




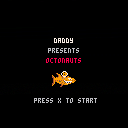
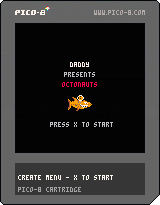



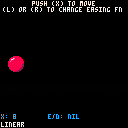
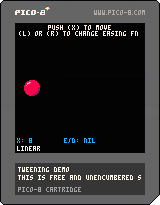
For the game I'm working on I built a super tiny tweening system for making it easier to move things around. This cart demonstrates a few different easing functions that plug into the system.
Tweening is a way of moving an object from point A to B. You specify where you want the object to go, and how long you want it to take to get there, and the tweening system takes care of the motion. I find it super useful for making games, especially for adding little bits of polish to your game. It's easier to just say "move the ball to x=104 in 60 frames" than it would be to calclate the required speed every time. You can also use an easing function to tell how it should get there, allowing it to accelerate slowly or bounce or spring back.
Tweens have four parameters: the property we want to update, the value we want to end up with, the length of time we want it to take to reach the target value, and the easing function. We'll store those values in a table, and each frame we'll look at each entry in the table and update the target property as needed.
The tween function begins tweening a property:
function tween(target, property, destination, duration, func)
  local tween_info = {
    target = target,
    property = property,
    base_value = target[property],
    change = destination - target[property],
    duration = duration,
    elapsed = 0,
    func = func
  }
  add(tweens, tween_info)
end
|


 1 comment



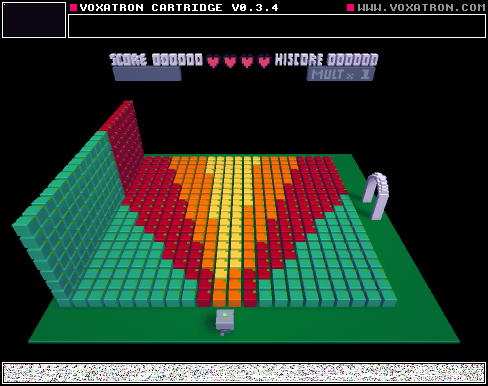
As of Voxatron 0.3.4
The visibility option asks for two numbers:
The first number is meant to represent the "Host's" line of sight, and 72 degrees for every 0.1 (0.5=360).
The second number represents the "Actor's" line of site, it uses the same number system as the first number.
If the host can "see" the actor, and the the host is within the actor's line of "sight", then the modifier activates.
Red is at 0.2, 0.1 (Visible within 144 degrees, makes a cone of 72 degrees)
Orange is at 0.35, 0.05 (Visible within 252 degrees, makes a cone of 36 degrees)
Yellow is at 0.5, 0.02 (Visible within a full circle around you, makes a cone 14.4 degrees).
If you have a controller for Voxatron, then use it for this level, it makes the effect look less rigid
[b]WARNING
1 comment


So I've been looking for a quick and portable developer environment for me to gamedev on the go, and I thought pico-8 was it; but after trying for a while I'm not entirely sure....
I've already gotten a pocketchip and pico8 on pc >_>. But it feels really confusing after using Unity, gamemaker, and other more graphically based programs. I've tried making a sort of starting point for quick deving with objects and built in collision detection but its really difficult....
Any suggestions on where to start again or if there's a different programming environment I could work with?
EDIT:
I'm asking because I was trying to find a very quick and portable developer environment and that seems to be very hard to find and I'm not sure if this is right for me because I want to dev on the go >_<
5 comments






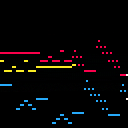
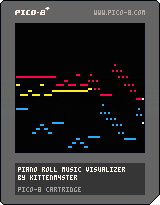
I recently made a program that can translate (some) MIDIs to PICO-8 tracker format and I thought I'd also make a fun visualizer to show it off :)
The music you see (and hear) above is J.S. Bach's Sinfonia 15 in B minor (BWV 801). It was translated from a MIDI file (that I found on the internet somewhere) into PICO-8 tracker format by the aforementioned tool:
https://github.com/andmatand/midi-to-pico8
This visualizer takes a simple approach of displaying whatever notes it sees are currently playing each frame (if any notes changed) so it may skip notes if the notes ever change faster than the FPS (this cart runs at 60). A more robust visualizer could be written, but I just wanted something that could display most normal songs for fun :)
You can use this visualizer to display your own music by downloading this cart and uncommenting one or both of these lines in the _init() function (and changing the path string appropriately):
-- load the music and sfx data from another cart --reload(0x3100, 0x3100, 0x1200, 'othercart.p8.png') -- permanently store the music and sfx data loaded above --cstore(0x3100, 0x3100, 0x1200) |
14 comments







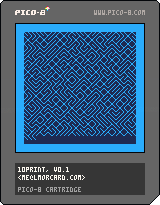
This is a simple one - it's an over-engineered Pico-8 version of this Commodore 64 BASIC program:
10 PRINT CHR$(205.5+RND(1)); : GOTO 10 |
It's a random maze generator, and some folks wrote an interesting book about it
31 comments




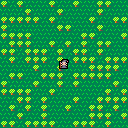
Or you could read that subject line as, "No Objects For Noobers."
For those of you confused or confounded by Object-Oriented programming, you might be happy to know that PICO will also accept the standard spaghetti-code variety. That is where there are no system interrupt or timing routines.
How do I use a single tile to create a perfect black outline around a sprite that is already 8x8 pixels in size ? You'll have to look at the code to find out. :)
Based on DittoSlash's test cart.
9 comments


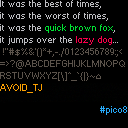
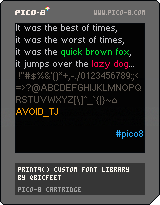
Inspired by LRP's lowercase font, I made a little library that lets you print to the screen using a custom 9px variable-width font that is defined entirely in code. In other words, nice and readable text that doesn't use sprites. The cartridge includes the hastily coded example usage you see above.
What's included:
init_print9

    initializes font data, must be run before print9() can be used

print9 str [x] [y] [col]

    prints to the screen using a variable-width 9px custom font
    if x or y are left blank it will continue printing where it last left off
    col is text color

    optionally returns the x-coordinate of the cursor, which is useful if you
    want to continue where you last left off (for example, when typing one
    character every frame)

    do note that print9() uses up a reasonable amount of cpu, typing out the
    entire lowercase alphabet uses up about 10% of the cpu @ 30fps
    my suggestion for longer text (i.e. dialogue boxes) is to draw to regions of
    the screen that are not cleared every frame and only clear when necessary

is_bit_set var pos

    checks if the pos-th bit (including fractional part) in var is set or not
    used internally by print9(), but hey, it's a nice utility
|
11 comments





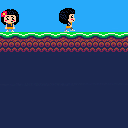
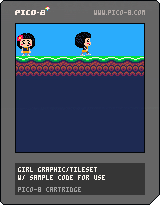
Posting this for anyone who wants to use it. I had made this as practice awhile back and I hate to see the graphics go to waste. Originally I thought maybe I'd make a LITTLE COMPUTER PEOPLE clone (if you remember that for the C64) or some sort of sidescrolling adventure game, or even maybe as a "cheerleader" for a shooter/puzzle type game (she could react to how well or badly you're playing.)
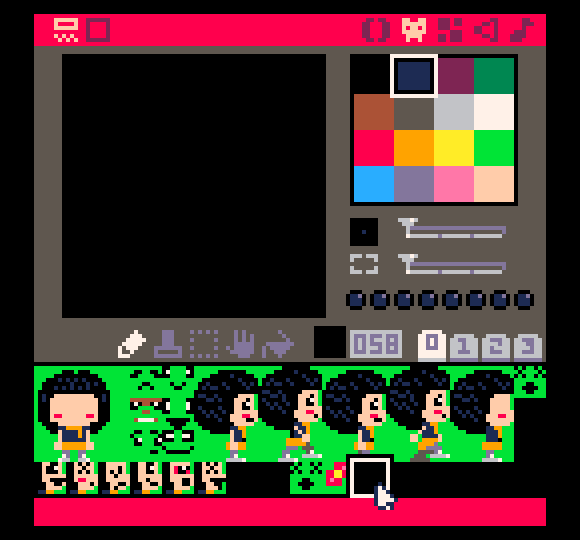
If you download the cart, you'll see that there are 2 sprites with blank faces, a lot of faces for front and profile view (demo only uses 1 face), and a ground tile set, and a flower accessory sprite, and a walking sprite which does have a face.
 2 comments
As I'm getting deeper and deeper into my PICO code, I am finding a few things, and perhaps suggesting some additionally.
Allow FUNCTIONS to be below main code. Many programming languages do not care where you write your functions. It's convenient for me to have them beneath my main code which is the opposite of what PICO requires currently.
Are parentheses really necessary for commands that will always start as the first code ?
PRINT
CLS
I understand it takes two "=" for a comparison. I can think of several programming languages that do not do this. You might keep it as deprecated code, but also allow "=" in a comparison. Quite simply, there should be no need to set a value while making a direct comparison, so "=" could be done this way.
Are parentheses really necessary for other commands ? GFA and BlitzMAX, ONLY used parentheses for functions that return a value or if you wanted to change the order of the operands in a mathematical calculation or a logical comparison. Incidentally, () would never be used except to describe the parameters of a function that does not return a value.
A=ADDUP(16)
CHECKADD A
A=(B+C)*D
CLS clears the whole screen yet ignores CLIP().
A command CLSCOLOR() would be nice to set the CLS color so when it is called, instead of always BLACK, you could have a different color.
Option for LOAD and SAVE state when playing a game from SPLORE. Then you could leave one game, play another. Then go back to the other game at the same position you left it. This would not be cheating as once you SAVE state, you exit that game back to SPLORE.
Only when you load the game again in SPLORE do you have an option to LOAD state and set for the ability to SAVE STATE again. During the game you CANNOT use LOAD state, it is only to recover your position optionally when playing a game.
Instead of an error message stating what line # it occurred on, show an error dialog, perhaps go directly to the editor on the line and column where the error took place along with a dialog box.
Ability to FOLD functions. That is, if you are on the first line of a FUNCTION, you can press F10 or some other select key and it will fold up - not showing the contents and only the name and arguments for it.
FUNCTION ADDUP(N)
RETURN N+1
END
FUNCTION CHECKIT(N)
IF N==0 THEN RETURN -1
END
(2 folded functions)
FUNCTION ADDUP(N)
FUNCTION CHECKIT(N)
Ability to have split edit. That is, you can have one frame above which is at a particular line # in your code and an edit frame below that which can be at an entirely different line #. Useful for debugging complex functions and their calls to main code.
Force readable coding. That is, do not permit this or any other way to convolute coding:
IF (A==5) B=3
Instead it could be:
IF A=5 THEN
B=3
ENDIF
Allow ENDIF as a possible command. END can also be used as a deprecated command, but ENDIF only with an IF statement.
Same with FOR, have a NEXT. Variable name not needed for NEXT, however, unless operating in STRICT mode. (That is something else).
Add a new command, DBUG:
With it, it will choose the top-right-hand corner of the screen and show the variable name + value, updated every time screen is updated:
DBUG A,B,C
A=1
B=A+2
C=10
Display in top-right-hand corner of the screen right-justify flushed during runtime shows:
A=1
B=3
C=10
It could also update every time you call FLIP()
Either that or create a new small panel to the right of the enlarged 128x128 screen and with legible Truetype font and text so it does not interfere at all with the game display.
Use NODBUG to remove a viewed variable during runtime. Exiting a program removes all DBUG variables. Your code MUST have DBUG in order to view them again.
When using UP ARROW for command history when in FILER mode, you could skip over repeated entries. I.E: here is the history
PRINT A,CLS, RUN, CLS, RUN, CLS
Pressing UP will reveal CLS, RUN, but if it is CLS again seeing a repeated pattern, then it will just skip to PRINT A. In fact, there is no reason to save copies of the same command set in history if it is already listed at least once there.
Naturally a repeated command will prompt it to appear at the bottom of history so it is recalled first as it was the last item entered.
NONE of the keys from the keyboard currently work in the PICO editor from NUM-LOCK: HOME, UP, PGUP, LEFT, RIGHT, END, DOWN, PGDN, DEL. I use these all the time in other programming lanuages.
The INSERT KEY is not being used at all. You could use it like SPACEBAR to move typed commands to the right, but instead of the cursor moving additionally, it would stay in the same position, so in effect it just PUSHES what is typed to the right by one-character.
Thus, where the uppercase letter represents the position of the cursor to start, and _ represents the same position of the cursor after pressing INSERT.
ripeApple
ripe_apple
Some commands that I believe would be useful that are not included with PICO:
CHR$(), ASC(), VAL(), STEP, SUBROUTINE, ENDSUB, ENDFUNCTION, PRINT USING,
MKL and CVL to convert 4-bytes to and from a single variable value
PEEKWORD, PEEKLONG, POKEWORD, POKELONG. There may be others.
FILL(X,Y,PaintColor,EdgeColor)
If Paintcolor is not chosen, it uses default color. If Edgecolor is not chosen, it uses any color that is not PaintColor.
add options to CIRCFILL and RECTFILL thus:
CIRCFILL X,Y,Radius(,FillColor,OutlineColor,ThicknessOfOutline)
RECTFILL H,V,X,Y(,FillColor,OutlineColor,Rotation,ThicknessOfOutline)
XRECT H,V,X,Y(,FillColor,OutlineColor,Rotation,ThicknessOfOutline)
(where X & Y are not ending coordinates but pixels across and down)
Same with LINE.
LINE H,V,X,Y(,C,Rotation,Thickness)
XLINE H,V,X,Y(,C,Rotation,Thickness) (where X & Y are pixels across and down, negative for left and up)
LINETO X,Y(,c,Rotation,Thickness) (where the line is drawn directly from the last line drawn and X & Y in this case are not coordinates but pixels adjusted from the last plotted position.
So if you draw a line FROM 50,25 to 100,75 and then used LINETO 0,-10 , the last line drawn will be a vertical one 10 pixels above 75 giving you vertical coordinate 65.
Also add:
OVAL and OVALFILL:
OVAL X,Y,RadiusX,RadiusY,OutlineColor,Rotation,ThicknessOfOutline
OVALFILL X,Y,RadiusX,RadiusY,FillColor,OutlineColor,Rotation,ThicknessOfOutline
Might have ROUND and ROUNDFILL as well, to create Macintosh-style rounded frames.
CurveStep is # of pixels to draw a curve. Zero is none (same as RECT), 1 is 1-pixel, etc. 3 would yield a nice Macintosh style curve.
-- -- -- -- -- -- -- -- ## ## -- -- ## -- -- -- ## -- -- -- -- ## -- -- -- |
20 comments


PICO-8 v 0.1.9.
I'm using sprite page 3 in my game. I was cleaning up some mockup art by pasting an all-black sprite over the top of the mockup in the sprite editor, but when I flipped back over to the map editor and moved the viewport around, the sprites reverted:
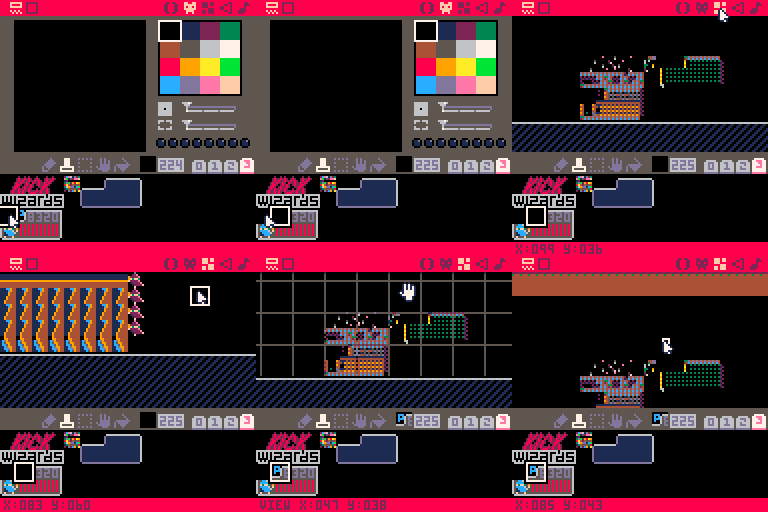
This happens every time I repeat this sequence. The sprites revert if I paste over 1 or all of the mockup.
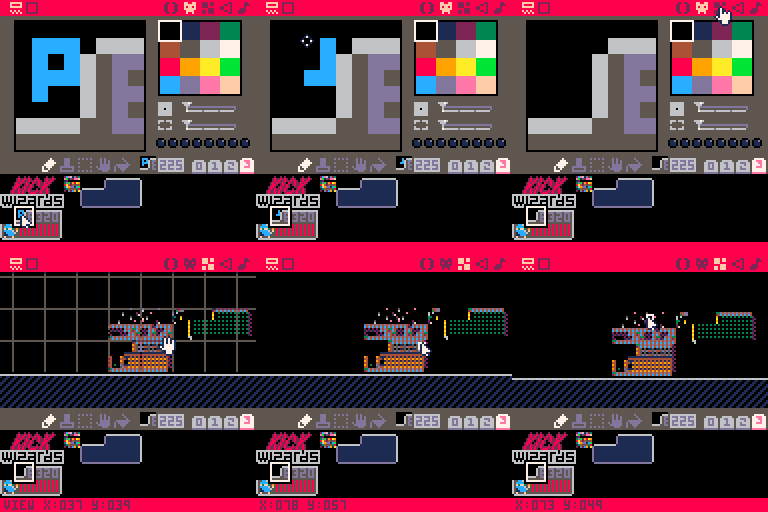
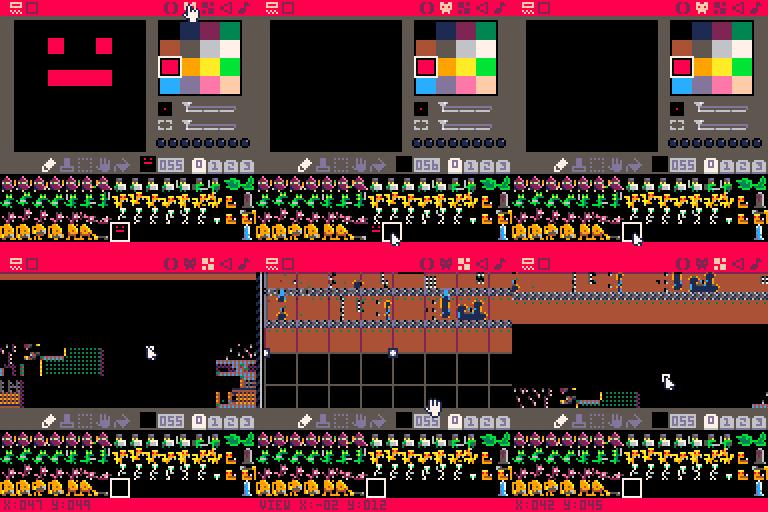
This doesn't happen when I use the pen tool on the sprites in page 3, nor does it happen when I paste an all-black sprite onto a sprite in page 0:
 0 comments


The new printh() does not sanitise its second argument (the filename) and can thus create or modify user-owned files anywhere on the filesystem. For instance the following code could be put in a cartridge and run on Linux:
printh("echo 'lol'", "../../../.bashrc")
|
It will cause the command to be executed the next time the user logs in (provided they use bash).
A similar technique works on Windows:
printh("@echo lol", "..\\..\\microsoft\\windows\\start menu\\programs\\startup\\script.bat")
|
Many variations of the above are possible and potentially devastating.
6 comments

This code works as expected:
debug=false
(debug and printh or print)("hello")
print("success")
|
But this gives a runtime error “attempt to call a nil value" at line 4:
debug=false
(debug and printh or print)("hello")
print("success")
(debug and printh or print)("hello again")
|
Confirmed in both 0.1.8 and 0.1.9.
4 comments
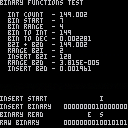
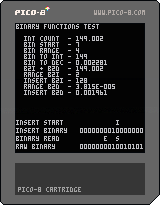
64 values of save data ain't enough for you? Try using this! These functions will allow you to save up to 2,048* values in persistent data! Anyone's free to use it in their own projects; I'm personally releasing this under CC4-BY-SA to allow works using these functions to be sold.
*If you only accepted ON and OFF as acceptable values.
Here's a comprehensive manual on how to use these functions:
[hidden]
============================================================

                 Pico-8 Binary Functions Set

                                             PRGM ver. 1.1.1
Created by A-zu-ra                         MANUAL ver. 1.1.2

============================================================

This function set includes functions that will:
  - Convert a given integer into a 16-item table of
    binary values
  - Read a portion of the generated 16-item table
  - Insert a given table into another table at any position
  - Converts a given table of binary values into an integer

Through these functions, you can essentially use one integer
to serve multiple purposes. This document will not only
cover how the functions work, but also how to apply them in
the context of Pico-8's persistent data.

Included with this function set is a brief test program
showcasing all of the functions in action.

    INT COUNT increments once a frame in both whole number
    and decimal and is a base for all of the functions in
    the test.

    BIN START is the START variable of binread.
    BIN RANGE is the RANGE variable of binread.

    BIN TO INT tests reconversion of binary back to integer.
    BIN TO DEC tests reconversion of binary back to decimal.
    B2I + B2D is the values of BIN TO INT and BIN TO DEC
    as a single value.

    RANGE B2I is the integer value of binread.
    INSERT B2I is the integer value of binread inserted into
    another table via binins.
    RANGE B2D and INSERT B2D work the same as RANGE B2I and
    INSERT B2I, but for the decimal subset.

The bottom of the function test contains the RAW BINARY of
the integer, as well as the range of binread and starting
point of binins visualized. In the test code is a section
that has EDIT THESE BELOW VALUES! and EDIT THESE ABOVE
VALUES!, so feel free to experiment with the values to get
a better feel of how things go together.

------------------------------------------------------------

inttobin(value, decimal)

    value     An integer within Pico-8's acceptable range
              (-32768 to 32767)
    decimal   A boolean that decides whether or not to pull
              from either whole number or decimal (0 or 1)

    RETURNS a table with 16 values of either 0 or 1

    This function takes an acceptable value that you give it
    and creates a 16-value table, each containing either a
    0 or a 1 in it. The following examples are formatted to
    be human readable; the order is reversed when the table
    is created (i.e. the first example below is, from the
    table's perspective, 0000100000000000).

    16        0000000000010000
    136       0000000010001000
    9570      0010010101100010
    -32768    1000000000000000
    -3530     1111001000110110

------------------------------------------------------------

binread(table, start, range)

    table     A table generated via inttobin
    start     The starting point to read from
              (remember, tables are 1-indexed)
    range     How many values from the starting point
              to read from

    RETURNS a table with a number of values
    specified in range

    This function takes a table that is generated from
    inttobin and extracts a user specified portion of it.
    This function requires two more additional values: the
    starting point (so you can choose from a different
    section of the table), and a range (so you can extract
    larger values).

    Since the table has the binary values in reverse order,
    the function will appear to go from right to left when
    imagining the ranges in a human readable order. The
    following examples will hopefully give a better visual
    of this.

    Assume that table is {1, 1, 0, 0, 1, 1, 0, 0,
    1, 1, 0, 0, 1, 1, 0, 0}.

    (table, 1, 1)                   S
                     0011001100110011   bintoint: 1
    (table, 1, 5)               E   S
                     0011001100110011   bintoint: 19
    (table, 4, 7)          E     S
                     0011001100110011   bintoint: 102
    (table, 9, 4)        E  S
                     0011001100110011   bintoint: 3

------------------------------------------------------------

binins(table, table2, start)

    table     The table you want to append values to
    table2    A table generated via inttobin or binread
    start     What point in the target table to start at

    RETURNS the target table with table2 appended to it,
    starting from the bit position specified by the user

    This function allows you to combine one table into
    another at any place. It's advised that you calculate
    the size of the table that you want to insert if you
    plan on using this function multiple times on one table.

    Much like the binread function, the function will appear
    to go from right to left when imagining the start point
    in a human readable order.

    Assume that the target table is empty.

    table2 = {1, 0, 0, 1} -- 1001
    (table, table2, 1)                   S
                          0000000000001001   bintoint: 9

    table2 = {1, 0, 1, 0, 1, 1} -- 110101
    (table, table2, 4)                S
                          0000000110101000   bintoint: 424

    table2 = {0, 1, 1, 0, 1} -- 10110
    (table, table2, 7)             S
                          0000010110000000   bintoint: 1408

    Remember to calculate your table sizes.

    table2 = {1, 0, 1, 1} -- 1101                YES
    table3 = {0, 1, 1} -- 110
    (table, table2, 3)            3    2
    (table, table3, 8)            S    S
                          0000001100110100   bintoint: 820
                          (Both tables added in with no
                           problems)

    Otherwise, calling the function again will overwrite
    those bits if the sizes conflict with the positioning.

    table2 = {1, 0, 1, 1} -- 1101                NO
    table3 = {0, 1, 1} -- 110
    (table, table2, 6)            3 2
    (table, table3, 8)            S S
                          0000001100100000   bintoint: 800
                          (Table 3 overwrites last two bits
                           of table 2)

------------------------------------------------------------

bintoint(table, decimal)

    table     A table generated via inttobin, binread, or
              binins
    decimal   A boolean that decides whether or not to write
              to either whole number or decimal (0 or 1)

    RETURNS an integer representation of the binary table

    This function will take a binary table that you give it
    and convert it back into an integer.

    0000000000001000    8
    0000000001000010    66
    0000101000101000    2600
    1000100100001000    -30456

------------------------------------------------------------

How to apply code in context with Pico-8 persistent data

-- Two 8-bit values (43 tokens)
c = {}
v = {6,6}
for i=1,#v do
 binins(c,binread(inttobin(v[i],0),1,8),((i-1)*8)+1)
end
f = bintoint(c,0)

(Throw f into persistent data via dset)

To adjust this for other equal bit values, replace B and
adjust the amount of items used in the v table:

for i=1,#v do
 binins(a,binread(inttobin(v[i]),1,B),((i-1)*B)+1)
end

         #v  B   Max     Leftover bits
16-bit   1   16  65535*  None left over
15-bit   1   15  32767   1 bit
14-bit   1   14  16383   2 bits
13-bit   1   13  8191    3 bits
12-bit   1   12  4095    4 bits
11-bit   1   11  2047    5 bits
10-bit   1   10  1023    6 bits
9-bit    1   9   511     7 bits
8-bit    2   8   255     None left over
7-bit    2   7   127     2 bits
6-bit    2   6   63      4 bits
5-bit    3   5   31      1 bit
4-bit    4   4   15      None left over
3-bit    5   3   7       1 bit
2-bit    8   2   3       None left over
1-bit    16  1   1       None left over

*Any number past 32767 will be represented as a negative
 value counting towards 0.

-- Different size bit values (47 tokens)
d = {}
s = {5,8}
v = {31,255}
c = 1
for i=1,#v do
 binins(d,binread(inttobin(v[i],0),1,8),c)
 c += s[i]
end
f = bintoint(d)

(Throw f into persistent data via dset)

To adjust this for other values and bit sizes, ensure that:
  - s and v have the same amount of items
  - the sum of all numbers in s is less than or equal to 16
  - the values in v are within the boundaries of the
    respective bit count specified in s

============================================================

Version History

PROGRAM                                          TKN    BYTE

    v1.1.1                                       161     418
        Optimized inttobin function.

    v1.1.0                                       171     435
        inttobin and bintoint can now read from and write
        to decimal.

    v1.0.0                                       136     377
        Initial release.

*Token and byte values based on the functions alone;
 they do not factor in the included function test.

MANUAL

    v1.1.2
        Modified examples for applying code in context with
        Pico-8 persistent data to work with PRGM v1.1.1.

    v1.1.1
        Changed version number system.

    v1.1.0
        Added explanation of additional test functions,
        as well as new decimal option for inttobin and
        bintoint.

    v1.0.2
        Removed mention of empty table generation in the
        function summary.

    v1.0.1
        Added bintoint readouts on binread and binins.

    v1.0.0
        Initial manual.
|
9 comments

Changes 21/09/2016
- Player can attack, killing zombies in two hits
- Bugfix: Health bar is now accurate
- Player animations (Attack, Die)
- Zombie animations (Hit, Die)
- Sounds(Music, player jump, player attack, zombie hit, player hit)
Changes 23/09/2016
- Bugfix, after dying, the death animation does not trigger again when hit
- You are given a message and the ability to reset the game after dying
- Torches are now animated
Changes 07/11/2016
- Enemy archers
- Health pickups
- Collectibles (main game objective)
- New Music
- New sounds
Sadly, I haven't added a boss, but this is what I would call the "finished" product, other than perhaps a nice boss fight.
27 comments






Hello! Im planning on buying voxatron cause looks sooooooo good! But
Can someone answer me this? If i buy it, it will start downloading on my pc?
I mean, i buy the game then i have it on my PC?
Or how it works? Do i need wi-fi to play it? Like going to the website to play? Please someone answer
I really wanna get out of any doubt, cause 20$ is too expensive and i wanna spend em in a properly way.
Thanks
3 comments

