


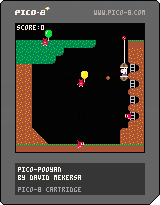
Hello! (French below)
A cartridge made for the French Pico-8 course by Gamecodeur.
https://www.gamecodeur.fr/liste-ateliers/atelier-pico8/
The course include Pico-8 discovery, programming, Design Pattern, and more.
En français :
La cartouche du jeu réalisé dans le cadre de l'atelier "Coder sur Pico-8" de la formation Gamecodeur.
https://www.gamecodeur.fr/liste-ateliers/atelier-pico8/
L'atelier inclus 2h25 de vidéos et 30 pages de support de cours (support accessible gratuitement):
- Qu’est-ce que la Pico-8 et pourquoi c’est cool (et formateur) de coder avec elle !
- Manipuler la Pico-8 pour saisir du code, créer des sprites, des maps et des sons
- Créer un Design Pattern et en faire un squelette de projet réutilisable
- Créer votre 1er jeu en Pico-8, en apprenant toutes les bases de l’API de la Pico-8
- Enregistrer et partager vos productions
- Plein d’astuces sur la Pico-8 et la programmation de jeux vidéo !
 1 comment

Okay. I have created randomly generated flashes. However, how can I make the flashes themselves into a randomly generated event? (I am trying to achieve a thunderstorm effect that roles through at random points in the gameplay.)
flash = false timer = 0 function _draw() cls() if flash then rectfill (0,0,127,127,7) end function _update() timer -= 1 if timer <= 0 then timer = 120 end if flr(rnd(100)) <= 10 then flash = true else flash = false end end end |
3 comments
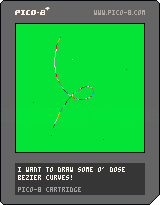
Hey everyone! This is my first time publishing a PICO-8 cart, I'm excited to get involved!
To get myself used to the PICO-8 a bit I thought I'd make a cart that simulates Bezier Curves! To put it simply, Bezier Curves are smooth curves, the plotting of which is influenced by a collection of control points. To put it longform... https://en.wikipedia.org/wiki/B%C3%A9zier_curve
Controls:
- Use the arrow buttons to move the currently selected control point. (the selected one is highlighted white, while un-selected ones are grey). You will see the curve move as the points of influence move. (Note that it's not really a proper Bezier curve unless all the control points stay still while it is being drawn, I just found it fun to be able to move control points while the curve was being drawn)
- Press Z to select the next control point in the list. You can then move different points around the map to see how each one influences the curve.
- Hold X to activate options. While holding X:
-> tap up to add a new control point. This new control point will appear at a random point on the screen, and will be the new end point for the curve. It will become the selected control point. See how the curve changes based on each control point!
-> tap down to remove the currently selected control point. The starting control point will become the selected control point.
-> tap left to reduce the increment value. This means that from moving from the first point to the last point there will be more increments, resulting in a smoother curve. The way I programmed it I only draw one increment each frame, so this will make the drawing slower. If you keep reducing it the curve will stop, and if you go past there the curve will start moving backwards.
-> Tap right to increase the increment value. This means that there will be less increments when drawing from the first point to the last point, so the curve will be less smooth.
This cart is intended to demo what Bezier curves look like and how you can manipulate them, although I've tried to write it so it will be as easy as possible for anyone to take the bezier curve code out of it for their own purposes! If you want to use Bezier curves in your own code, grab the CALXY(CPS,T) function, the DFOR(I,C,CPS,CPNO,T) and the BINOMIAL(N,K) functions. You should make a variable that calculates how far along the curve you want to find the point for (which my example code calls T). Calculate T however you want, then call CALXY(CPS,T) passing in a 2DArray of coordinates for CPS (ControlPointS) and your T value for T. This function will return the X and Y values at that point. You could use this code to make a game object move along the curve, for example.
Let me know what you think, and if I'm missing any obvious Lua tricks let me know! I'm pretty new to the language.
Updated to display controls at the beginning, and stop big white lines being drawn while moving control points.
3 comments


Hello all :),
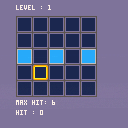
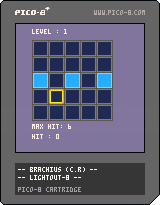
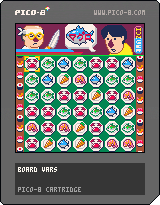
i love pico-8, and i make lightout, a old electronic game published by Tiger(1997).
It's my second games created with pico-8.
for resolve puzzle you must switch off all lights.
up down lef right for move.
c for light on or off
x for restart level.
all originals levels is here (50 levels)
good luck and thanks you for playing.
0 comments

Hello,
I'm a noob at programming and need some help please.
I'm try to write a for next loop that randomly fills an 2D array (my game grid), but I also want it to check that if that cell already has been used, then knock the counter back -1 and tries again. So in this way, at the end of the loop there should be a set number of cells filled.
My code works great except that when it detaches a duplicate cell, it doesn't roll the counter back.
So say at loop count 50, there's a duplicate cell, it doesn't alter the cell (which is correct), but it doesn't roll the loop counter back, it just continues.
Here's my code. I was hoping that the i-=1 would do the trick, but it doesn't.
function make_grid()
for i=1,level*100+1 do
y=flr(rnd(gridheight-6))
x=flr(rnd(gridwidth-6))
--is the space empty? then add
--a bomb. if not rollback counter
if grid[1][y+3][x+1]==0 then
grid[1][y+3][x+1]=2
else
i-=1
end
end
3 comments
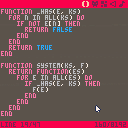
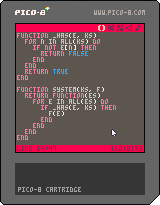
This is a tiny (47 token!) Entity Component System library.
Entity Component Systems are design patterns where entities are generic collections of components and logic is written for specific component types. It's popular for game design as we often have many 'things' that don't always fall within clear cut types.
There's different approaches to ECS, here we'll consider a table to be an entity, and the key/value pairs to be component names and values.
This library is basically a single function, system, which creates a function that selects every entity with the specified components and calls the user provided function on each one.
13 comments


Hi, I have a function that takes a string in a specific format and then creates a table used elsewhere in my game from the string.
Currently the function parses the string correctly and creates the table but after I assign a variable to the newly created table it is then lost. Is this a thing where I'm assigning a reference and then the original is cleared by garbage collection? How could I get around this?
for i=1,#levelonepaths do
	--stringtopath is the parseing function levelonepaths is a table containing the strings
	local path = stringtopath(levelonepaths[i])
	--Printing the local variables 1st entries x co ordinate gives the correct result
	print(path[1].x)
	--I then assign where the string was to the new table currently stored in the local var path
	levelonepaths[i] = {}
	levelonepaths[i] = path
end
--this print gives nil
print(levelonepaths[1].x)
--this print gives nil
print(levelonepaths[1].y)
|
2 comments
I am a designer and artist, not a programmer. This would be a casual gig and a symbiotic relationship. The concept I have in mind is a relaxed sandbox game about a honey bee. Simple enough. Let me know if you are up to the fun.
6 comments


I made this is programming homework. adjust the number of points with < and >
also i couldnt get it to make a thumbnail i pressed f7 10,000 times
1 comment


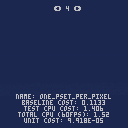
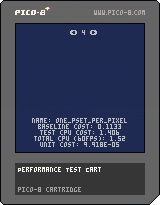
Ok, it isn't pretty but sometimes you just want to know what the CPU cost of something is. I've started this cart just to see what things cost. This runs at 60fps, so if you're using a 30fps cart, you can divide the CPU cost by 2.
Its structured to be really easy to add more tests to, if you're curious. Let me know if you have any questions! This lives on github at:
https://github.com/ssteinbach/pico8carts/blob/master/performance_test_gallery.p8
PRs welcome!
0 comments
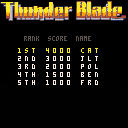
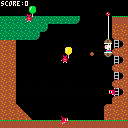
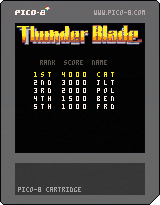
Back 30 years ago, After Burner and Thunderblade ruled the arcades.
As a kid, I only had an Amiga and near zero coding skills to produce very (very) weak clones.
Now a seasoned programmer with the mighty power of PICO-8, I can beat a Sega X board!
Well, err...:

Credits
• Chris Butler (player + tank sprites lifted from the C64 1989 version)
• gamax92 for midi to pico-8 program
• dw817 (david w) for image decompression code (http://writerscafe.org/dw817)
• pico-8 community
What's Missing
• gameplay tweaking...
• levels 2,3,4,5
• gazillions of buildings on screen!
Tech Details
Map:
Drawn using sprite sheet (2), you can tweak the level using colors:
4: tank
6,7,13: building
8: enemy helicopter
9: Battleship boss
10: swtich to chase mode
11: switch to top-down mode
15: end_game (use carrefully!)
Title screen:
Title image is loaded from a stringified image, decompression done 'asynchronously' with yield.
Main screen:
Buildings are mostly drawn with many rectfill using a big checkerboard pattern to simulate windows/floors.
Everything is z-sorted (w actually ;) before being drawn. This 'zbuffer' is in charge of drawing every asset.
Game screen manager:
A light version of what I've extensively used during my XNA period. Allows nice decoupling between game loop and other loops (title, game over).
Coroutines:
Used only for rare events (like player dying) to easily control animation and state changes.
Lessons Learned
• PICO-8 is a fantastic platform. Forces you to keep things simple (say that to my dozen or so failed Unity attempts...)
• token count is everything
• Coroutines are unfortunately too slow to be used in the core game loop
• Throw OOP techniques out. The nice class:method() construct eats up too many tokens - had to rewrite half of the code to stays within the limits :[
• bnot-cheating the platform is way too easy (but resisted against!)
• Did I say token count is everything?
9 comments


I am attempting to make the screen flash and shake. However, I would like it to be randomly generated. I vaguely researched the use of srand/rnd, but I ultimately do not know how to implement the proper code into what I currently have.
Warning: I have no idea what I'm doing.
player = {}
player.x = 60
player.y = 60
player.sprite = 0
player.speed = 1
player.moving = false
player.timer = 1
music(0)
cam_x = 0
cam_y = 0
fliph = false
flipv = false
shake = 0

function _rand

function _draw()
		cls()
		camera (cam_x,cam_y)
		cam_x = player.x-60
		cam_y = player.y-60
		map(0,0,0,0,16*8,16*2,0)
		--map(0,0,0,0,16,8)
		--map(0,0,0,64,16,8)
		spr (player.sprite, player.x, player.y,1,1,player.fliph,player.flipv)
end

function movex()

		player.moving = true
		player.sprite += 1
		if player.sprite > 3 then
					player.sprite = 2
		end
end

function movey()
		player.moving = true
		player.sprite += 1
		if player.sprite > 5 then
					player.sprite = 4
		end
end

function _update()
		player.moving = false

		if btn(0) then
				player.x -= player.speed
				movex()
				player.fliph = true
		elseif btn(1) then
				player.x += player.speed
				movex()
				player.fliph = false
		elseif btn(2) then
				player.y -= player.speed
				movey()
				player.flipv = true
		elseif btn(3) then
				player.y += player.speed
				movey()
				player.flipv = false
		end
			--	if not player.moving then
				--player.sprite = 0
	--	end
				if not player.moving then
				player.timer = player.timer+1
		end
				if player.timer >=30 then
				player.sprite = 1
		end
				if player.timer >=60 then
				player.sprite = 0
				player.timer = 0
		end
				if player.moving then
				player.timer = 0
		end
end
|
8 comments
Hey, I'm a relative beginner, and I've been trying to create a general-purpose shape collider for a little project I'm making. I've run into a bit of a problem when trying to make a function for detecting collision between circles and rectangles. The problem is, as far as I can tell, that Pico-8 doesn't have enough floating point precision to accurately calculate the distance between a point and a line (using a formula I copped off of Wikipedia). Here's what I've got:
-- I'm aware these function names are garbage, I'm gonna change them up later.
local function dOfLine(a, b)
  -- takes two points and returns the distance between
  return sqrt((b.y - a.y)^2 + (b.x - a.x)^2)
end

local function dToLine(p, a, b)
    -- takes a point and the two endpoints of a line and returns the length
    -- of the perpendicular between the point and the line.
    num = abs(((b.y - a.y) * p.x - (b.x - a.x) * p.y + b.x * a.y - b.y * a.y))
    return num / dOfLine(a, b)
end
|
2 comments


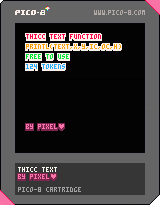
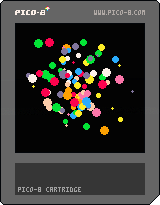
Just a thing to test out making particles with some sort of physics-y things going on.
Press O (or whatever button glyph you use for the Z key) to make bubbles. Change p_num in _init() to change the number of particles/bubbles created per press.
0 comments

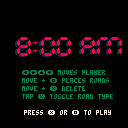
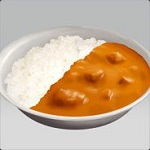
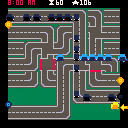
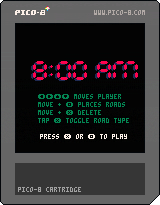
8:00 AM by Sushicats
The objective is to make sure that the cars reach their destination and avoiding traffic jams.
Controls:
You move the cursor with arrows.
While Z is pressed and you move the cursor you place roads.
While X is pressed and you move the cursor you remove roads.
Tapping X on top of an existing road will cycle through some options, you can make straight roads one directional and you can add semaphores on top of intersections.
 1 comment


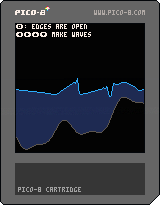
I started playing around with the shallow water equations and got to something that's maybe a little bit fun. Arrow keys make waves, Z switches boundaries between (approximately) open and reflecting. My implementation mostly follows https://graphics.ethz.ch/Downloads/Publications/Tutorials/2008/Mue08/coursenotes.pdf .
Current limitations/known bugs:
- Dissipates energy rapidly, although you'll probably only notice this if the boundaries are reflective.
- No handling of dry regions. Weird things may happen if depth goes to 0!
- Weird oscillations around both (nearly-)dry regions and shocks/big elevation changes. Not sure yet how much of this is attributable to bugs vs. limitations of the discretization I'm using.
- Liquid volume is not conserved. Not really a meaningful concept with open boundaries, but pretty noticeable with reflective boundaries.
- No wave breaking etc. Shallow water equations are a heightfield model and I don't think I'll get around to full liquids on PICO-8 any time soon. :)
I hope this cart is fun to play with! I'm hoping to fix a few of the items above, clean up the graphics a bit, and maybe find a way to build a little bit of a game around these dynamics.
2 comments

| I love seeing work-in-progress screenshots.
The great thing about keeping these screenshots is that after the game is finished, you can tell in retrospect which screenshots were significant and interesting. Pico-8 encourages screenshotting, with its built-in screenshot and gif capability. And the file size is minimal. ... So I figure a lot of folk probably have cool early screenshots of games that later become great games. So let's see 'em! |
1 comment