


Overview
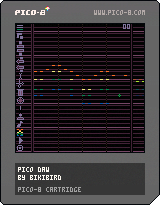
PICO DAW is a digital audio workstation for creating PICO-8 tunes. If you've ever been frustrated by the piano style layout keyboard layout of the music editor or just wished you could draw your music, PICO DAW is for you. It's a mouse-based alternative for tune creation.
THIS CART IS A WORK IN PROGRESS AND MINIMALLY TESTED. Consider it alpha. Save early and often! Please report any bugs you find.
Quick Start
- Open the PICO-8 console and enter
load #daw. - Save the cart under a new name.
- Optional: Add any desired custom instruments in SFX slots 0 through 7.
- Edit music patterns for length, looping, channels, and SFX assignments.
- Edit SFX for length, speed, and filters.
- Run the cart.
- Hold down the left mouse button to draw your tune.
- Select active track by scrolling the mouse wheel.
- Left and right arrows pan the music patterns.
- Edit notes by right clicking on them.
- There are many more keyboard shortcuts and tools, keep reading to get the most out of PICO DAW.
Preliminaries
Quite simply, PICO DAW is an alternative note editor and nothing more. Therefore, you must assign SFX to the music patterns and set the SFX speed and other top level SFX settings after PICO DAW is loaded, but before you run the cart. If you plan to use custom instruments, you should load them into SFX slots 0-7.
Navigation and Layout
Editing is done one music pattern at a time. The current pattern number is displayed in the upper right of the screen and the pattern itself occupies the major portion of the screen, with a few notes of the previous and next music patterns displaying at the left and right margins.
Change the active music pattern with the left and right arrows or by left clicking in the left and right margins. Press Home or End to jump to the beginning or end of the tune.
The horizontal staff lines represent pitch values. The highest pitch is at the top and the lowest pitch at the bottom. Each note is 3 pixels in width.
The crosshair cursor indicates you are in draw mode. The dot pattern cursor indicates you are in stamp mode.
Toggle the main menu on and off by right clicking in the left margin.
Some tools require selecting a grouping of notes. Hold down the shift key while dragging with the left mouse button to select a range of notes . A selection rectangle will appear over the notes. Release the mouse button to finalize the selection. Right click anywhere in the music pattern to cancel a selection.
Saving
PICO DAW automatically saves your work every 5 minutes. You can force a save anytime by pressing Ctrl-S. Be sure to press Ctrl-S before exiting PICO DAW.
If you forget to press Ctrl-S before exiting, salvage things by entering resume, pressing Ctrl-S, and finally exiting the program.
Editing
Draw Tool
To place notes, click with the left mouse button anywhere in the music pattern.
By default note are placed according to the current scale. To place a non-scale note, hold down the CTRL key while clicking to color in between the lines.
Drag with the left mouse button held down to create a grouping of notes with attack settings applied to the first note, release settings applied to the last note, and sustain setting to any notes in the middle. (See track indicator tool for setting note defaults.)
Scroll the mouse wheel to change which channel is being edited. (See also channel indicator tool.)
Hold down the delete key while clicking on individual notes to erase them. (See also the delete tool below.)
Ctrl-Z and Ctrl-Y undo and redo editing actions. The size of the undo buffer is only limited by the size of the PICO-8 memory. please be aware that cut and insert actions are especially memory intensive operations and they tend to decrease the number of actions that can be held in the buffer.
Note Options Menu

To view or change settings for an individual note, right click on a note. Your cursor color must match the note color. Scroll the mouse wheel to change the current channel if needed.
To batch edit a range of notes, select them and then right click on a note in the range. Edits only apply to notes that are in the same channel as the cursor. Notes from other channels will be ignored.
Hover over the waveform icon and use the mouse wheel to change the note's instrument. The standard instruments are represented with the same waveform icons found from the SFX editor. Custom instruments are represented by the numbers 0 through 7.
The next icon is the effect icon. Use the mouse wheel to change the effect.
The third icon is the volume icon. Use the mouse wheel to set the volume. You cannot set a note's volume to zero; delete the note instead.
Click on the speaker icon to audition the note or range of notes.
Close the note menu by right clicking anywhere in the pattern.
Additional Editing tools
Right click in the left margin to display the main menu.

Scroll the mouse wheel in the current pattern area to change the cursor's channel. The channel indicator shows which channel is under edit.
To switch from stamp mode back to draw mode, click the channel indicator.
The channel indicator also sets the default attack, sustain, and release used for note drawing. Select a range of notes and then click the channel indicator to assign attack, sustain, and release to a channel based on the selected notes. The first note in the selection is used for the attack, the last for the release, and the second note for the sustain.

Select a range of notes and click the copy icon to copy a pattern of notes for stamping. You may also press Ctrl-C to copy. The cursor will change to the repetition/transposition cursor.


Click one of the stamp icons to stamp the previously copied notes. The stamps are: repetition/transposition, inversion, retrograde, and retrograde inversion.
The cursor changes to a pattern of dots representing the notes. Click to place the notes in the music pattern. If you click near the left or right margin any notes that do not fit the current music pattern will spill into the previous or next pattern
Note intervals automatically adjust to the scale you are currently using. Hold down the Ctrl key while stamping to ignore the current scale and stamp chromatically.

Select a range of notes and click the insert icon to insert blank space at the start of the insertion point. The existing notes of the tuen will be pushed right.
Generally, the range selected should go all the way from the top of the screen to the bottom, but if a narrower band is select, only the notes within the horizontal band will be pushed right. This can be useful if you want to isolate the notes pushed to specific channels and exclude others.
The insert key may also be used for inserting.

Select a range of notes and click the cut icon to copy a range of notes, delete those notes from the screen, and shift notes left to close up the gap.
Generally, the range selected should go all the way from the top of the screen to the bottom, but if a narrower band is select, only the notes within the horizontal band will be pulled left. This can be useful if you want to isolate the notes pulled to specific channels and exclude others.
You may also use Ctrl-X to cut instead of clicking the icon.

Select a range of notes and click the delete icon to delete a range of notes. You may also press delete on the keyboard.
View Settings

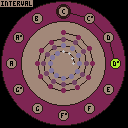
By default PICO DAW shows staff lines for the C Major scale. Clicking on the scale dial icon to select another scale. The scale selector tool displays. Ur the up and down arrows or the mouse wheel to set the scale family. Drag the outer ringer with the left mouse button to set the tonic pitch class. Drag the inner ring to set the mode. Click save to return to the editor.

Hover over the chord icon and scroll the mouse wheel to change the chord number. The staff lines for the root of the chord is highlighted in a lighter color. (When the chord number is set to 1, the root of the chord and the tonic are the same, so the chord icon may also be used to highlight the tonic.)
Press the 3, 5, and/or 7 keys to toggle on display of the e 3rd, 5th, and/or 7th of the chord. Press again to toggle them off.

Click the measure icon (metronome) to toggle measure markers on and off. By default there are 4 measures of eight notes per music pattern.
To change the measure width, select a range of notes the width of the new measure and click the metronome icon.
It's usually best to do this on the first music pattern of the tune and select the first note of the pattern through the desired width.

Click the subdivision icon (note) to display the subdivisions of the measure. By default the subdivisions are two notes wide.
To change the subdivision width, select a range of notes the width of the new subdivision and click the subdivision icon.
It's usually best to do this on the first music pattern of the tune and select the first note through the desired width.

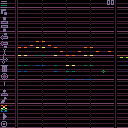
 Toggle view.
Click the view icon to toggle between channel view and spectrum view. The channel view displays the color of each note according to which channel it is in. The spectrum view displays notes according to how closely they are related harmonically as defined by the circle of 5ths. The closer that two notes are in color, the more consonant they are. The more the colors clash, the more dissonant the notes are.
Playing and Recording

To listen to your composition, press the play icon or press the spacebar. To stop playback, click the stop icon or press the spacebar.

To record to your composition, press the record icon. To stop recording, click on the stop icon or press the spacebar.
The recording saves to your desktop. If your music pattern loops, the recorder will record two loops before stopping if not stopped earlier by you.
 1 comment

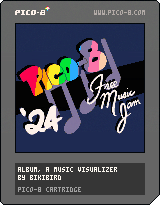
Album is a collection of music visualizers for the PICO-8 Free Music Jam. Just add your music, cover art, and a little bit of meta-data to make your own album.
Controls
Press ⬆️ to dismiss the credit for the tune.
Press ⬇️ to see the credit.
Press ⬅️ to listen to the previous tune.
Press ➡️ to listen to the next tune.
Press ❎ or 🅾️ to replay a tune.
Suggested workflow
- From the PICO-8 console
load #album. - Save the album under a new name to make it yours.
- Create your music in the cart or manually copy the SFXes and music pattern from another cart.
- Replace the cover art and label.
import my_image.pngfor album cover.
import -l my_image.pngfor cart label. - Select the code editor and navigate to tab 2:
tunes.
Fill out the data in the tunes table, adding one entry per tune. - If you are using custom instruments, navigate to tab 3 to add transposition data
- Save the cart.
- Run the cart to see and hear your music!
Customization
Cover Art
Be default, your sprite sheet is your cover art. The cart uses map(0,0) to draw the cover art. This area of the map is occupied by the entire sprite sheet. By editing the map you can assemble a different cover based on elements of the sprite sheet if you prefer.
Properties
At a bare minimum, each entry in the tunes table must have the following properties defined: pattern, title, credit and visualizer:
{
        pattern=0,  --music pattern number to play
        title="title of tune", -- tune title
        credit="me",
        visualizer=cover,
}, |
The choices for visualizer are bubble, cover, harp, piano_roll, ripples, and stars. (If you are good at coding, you can add some new ones!)
Additional properties may be used to customize the look:
{
        pattern=0,  --music pattern number to play
        title="title of tune",
        credit="me",
        visualizer=piano_roll,
        text=12,
        outline={13,13},
        background=-1, -- for map(0,0) or color 0 through 15
        palette={[0]=0,130,141,13,12,140,1,131,3,139,11,138,135,10,9,137},
        foreground={10,10,10,10},
}, |
Set text to a color number, 0 through 15, to set the color of title and credit text. Defaults to 7. Supported by all visualizers.
set outline to a table of two colors, for example outline={6,6} to set the left and right outlines of the text. Defaults to {1,1}. Supported by all visualizers. outline also sets the shadow colors in the bubble, ripples, piano_roll visualizers. To omit the outline, set outline to {-1,-1}.
Set background to -1 to use the cover art in the background or to a color number to select a solid color. background defaults to black. Supported by all visualizers
Set palette to specify a custom palette for all draw operations. Defaults to PICO-8 standard palette. Supported by all visualizers. Harp visualizer expects colors 4 through 15 to form a color gradient. For example: palette={[0]=0,130,141,13,12,140,1,131,3,139,11,138,135,10,9,137} causes consonant note pairs to appear close in color, with more dissonant notes creating more visual contrast.
Set foreground to a table of 4 colors representing the 4 audio channels. For example: foreground={8,8,8,8} displays each channel in red. Defaults to light blue for ripples and red for piano_roll. Supported by piano_roll and ripples visualizers only.
You can change where the notes appear on the screen using two properties, offset and spacing. The visualizer code converts the pitches to numeric values between 0 and 64. Each successive value is one half-step (semitone) apart. C0 maps to zero and D#5 maps to 64. offset is the number of half-steps to add to the pitch value for display purposes. (It does not affect how the pitch is played.) Use a negative value to shift left and a positive value to shift right. In the case of stars and ripples every multiple of 8 shifts the display up or down by full rows.
spacing is the factor by which to multiply the pitch value for display purposes. Values greater than 1 will spread the pitch display apart. Values less than 1 will compress them. piano_roll and harp defaults to a spacing of 2. stars and ripples default to 16. Using a value of 8 for stars, will cause the night sky to appear in the top half of the screen only. Using a value of 8 for ripples will cause the puddles to appear in the bottom half of the screen.
Clever use of spacing and offset allows for optimal placement of the notes on top of your cover art.
Custom Instruments
If you are using custom instruments that transpose the pitch being played, the pitch display will be incorrect by default. You may correct this by clicking on tab three in the code editor to edit the instruments table. Enter the number of half-steps (negative or positive) to transpose the display pitch value for each custom instrument you are using.
Record Function
A record function is included for your convenience. To record a tune, enter record(pattern, repeats, fadeout) in the PICO-8 console, where pattern is the starting pattern number of your tune, repeats is the number of times to repeat a looping tune, and fadeout is the number of milliseconds to fade out a loop after is done repeating. repeats defaults to 2 and fadeout defaults to 5000. The wave file should appear on your desktop after recording is complete.
Credits
Visualizers by @bikibird
Label Art by @paraK00PA
Record function based on code by @packbat
To credit this cart when used in your own work add this statement wherever you list the credits for your project:
Visualizers provided courtesy of the PICO-8 Free Music Jam.

Help Santa pass his audition with the Norse Ursine Merriment Band.
Hints:
Credits:
Created for the PICO-8 Holiday Bundle 2023
Label Art by @paraK00PA
Jingle Bells by James Lord Pierpont
We Wish You a Merry Christmas popularized by Arthur Warrell
Everything else by @bikibird
ZOMG! I just realized it's October already! The PICO-8 advent calendar is just around the corner. Or, maybe not... We're still looking for tons more people to contribute a winter holiday themed PICO-8 project to the calendar. It doesn't have to be an epic masterpiece. Small games and demos are welcome. You can even reskin a game you previously released.
If you're interested, make sure you've joined the PICO-8 Discord server and then see https://discord.com/channels/215267007245975552/220602714982318081/1146905525158682665 for info on how to contribute, cuz we sure need you.
I've released the first eight lessons of my new music theory tutorial, available here: https://bikibird.itch.io/music-theory. It's designed for people who want to make their own music for PICO-8 games, but feel they don't have the skill or talent to do so.
The tutorial provides an introduction to the basics of pitch, melody, harmony, rhythm and composition within the context of PICO-8. It explores music in a decidedly mathy way through a series of interactive demos that use spatial relations to connect sound to vision.
Only the parts of music theory that are relevant to PICO-8 are covered. No prior knowledge of music is assumed. There's no reading sheet music or needing to play an instrument.
More lessons will be coming in October.
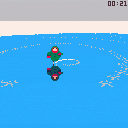
You were so excited to try your brand new skates on Christmas day that you skated out to the middle of lake without checking the ice conditions. Now you are on thin ice and just want to get back to your friend on the shore.
Game Play
Control your skates with the left and right buttons. Alternate left and right to speed up. Hold to turn. You haven't exactly learned to stop yet, but if you start turning circles, you will eventually slow down. You can walk on the snow, but it is very slow.
Credits:
Music composed by Vince Guaraldi
Christmas Time Is Here arranged by @Gruber
3d effects: @Mot's Instant 3d Plus Library
Special thanks to @thattomhall for advice on the ending
Everything else by @bikibird
Created for the 2022 Advent Calendar

This is the year you find out if Santa is really real. You and your siblings are staying up late to finally get proof. The light are out, but you're not scared!
Game Play
Requires mouse. Hold down left mouse button to turn on flashlight. Drag mouse across screen to catch Santa in the act. Press ❎ to snap a picture.
Credits
Up on the Housetop composed by Benjamin Hanby
Midilib flute by @ericb https://www.lexaloffle.com/bbs/?tid=49487
Flashlight effect informed by @Krystman https://www.lexaloffle.com/bbs/?tid=46286
Fizzle fader borrowed from @DrPete https://www.lexaloffle.com/bbs/?tid=29862
Everything else by @bikibird
Created for the 2022 Advent Calendar
WARNING: SPOILERS IN COMMENTS. SCROLL AT YOUR OWN RISK.
*
WARNING: SPOILERS IN COMMENTS. SERIOUSLY, GO BACK.
*
WARNING: SPOILERS IN COMMENTS. WELL, YOU CAN'T SAY I DIDN'T WARN YOU.
WARNING: SPOILERS IN COMMENTS. HERE THEY COME.
*
Add speech synthesis to your games with Speako8, a speech synthesis library for PICO-8 in under a thousand tokens! It's loosely based on a Klatt synthesizer and will remind some folks of Software Automatic Mouth (S.A.M.)
To add Speako8 to your games, copy and paste the library below:
Speako8's voice must be configured prior to first use:
function _init() spk8_pitch,spk8_rate,spk8_volume,spk8_quality,spk8_intonation,spk8_if0,spk8_shift,spk8_bandwidth,spk8_whisper= 140,1,1,.5,10,10,1,1,1 end |
Warning: This application may generate loud and harsh sounds. Protect your hearing! Do not test with headphones on and turn down the volume.
| Variable | Range | Explanation |
|---|---|---|
| spk8_pitch | 60-230 | Fundamental pitch of voice (F0) in hertz |
| spk8_rate | .1-2 | Standard rate of speech divisor— below 1 is slower; above 1 is faster. |
| spk8_volume | .1-2 | Standard volume factor— below 1 is quieter; above 1 is louder. |
| spk8_quality | .1-2 | Glottis open period— below .5 is creakier voice; .5 is modal voice; 1 is breathy voice; above 1 is weaker voice. |
| spk8_intonation | 0-20 | Degree of pitch prosody in hertz— set to zero for robotic monotone. |
| spk8_if0 | 0-20 | Degree to which the inherent pitch (F0) of vowels varies (in hertz)— set to zero for robotic monotone. |
| spk8_shift | .8-1.2 | Factor by which to shift formant frequencies (F1, F2, F3)— above raises formant frequencies; below one lowers |
| spk8_bandwidth | .5-5 | Factor by which to alter bandwidth of formant frequencies (F1, F2, F3)— below 1 narrows the bandwidth of the formants; above 1 widens. When formants are shifted upward, it is recommended to widen bandwidths as well. |
| spk8_whisper | 1 or 2 | Speaking mode— Normal voice is 1; whispering is 2. |
To enable speech synthesis, you must call speako8 in the _update function. Then call say with a speech string:
function _update()

  speako8()  -- must appear once unconditionally in _update.

  if btnp(5) then --❎ button
    -- use speaking if you want to check if anything is currently being said.
    -- if not speaking() then
    say("_/hh/-1.57/eh/-1.07/l/-1.33/3/ow/-1.03/-3/w/1.27/-3/er/1.65/-3/l/-1.64/-3/_/d")
    -- end
  elseif btnp(4) then -- 🅾️ button
    mute()  --flushes the sound queue and immediately stops whatever is currently being said.
  end
end |
Speech strings represent text phonetically and include prosody markup. The easiest way to create and test them is with the Declare web app. You can also try out different voice options with it.
If you are interested in learning more about speech synthesis, try googling these key words: Klatt synthesizer, formant, acoustic phonetics. It's a fascinating topic. An unminimized version of the library is included in the demo cart.
Special thanks to the gang on the Discord server for lending me their ears and keeping me motivated, especially @packbat, who did it for science. Thanks also to @IMLXH for finding the Klatt prosody rules.
Defy Audio Player
The Defy Audio Player plays Defy formatted audio files via PICO-8's PCM channel. It's a PCM boombox! You can also use it to create binary strings of audio data for playback in your own cartridges.
Convert almost any audio file format to .defy here: https://bikibird.itch.io/defy.
This cart is intended to run in PICO-8, not play on the BBS, which is limited to a maximum files size of 250K. Instead, open PICO-8 and enter load #defy. Then enter run.
Controls
- Drag and drop your .defy file onto PICO-8 to play it. You do not have to wait for a file to finish before loading another.
- Press 🅾️ (z key) to pause playback. Press it again to resume.
- Press ⬅️ or ➡️ to switch visualizers.
- Press ⬆️ to eject and stop playback.
- Press ⬇️ to display title and format.
- Press ❎ to record binary string. If you press record prior to playing the file, Defy will start recording it as soon as the file is dropped. The binary string is copied to your computer's clipboard.
Audio String Player
The library below plays Defy formatted audio strings. For support for @luchak's QPA formatted audio strings see https://www.lexaloffle.com/bbs/?tid=53933 and https://github.com/luchak/qpa-format/.
Warning: Be careful testing new audio strings. Playback with a mismatched playback mode sounds terrible. Do not test with headphones. Protect your hearing.
When record is pressed, the first 32,000 bytes of audio data are copied to the clipboard as a binary string during playback. Use the code below in your own carts to play the binary string. Be aware that only a few seconds of audio will fit in a cart. If the captured string contains too much data, you may truncate it. One second of audio equates to approximately 5500, 2250, 1840, 1125, and 690 characters for 8, 4, 2.6, 2, and 1 bit formats respectively.
- Paste the library below into a new cart.
- To save tokens, delete defy_play functions for any unused bit formats
do  --defy audio string library by bikibird
    local buffer=0x8000  -- required all formats
    local clips={}  -- required all formats
    local cued  -- required all formats

    -- locals required for 4, 2.6, 2, and 1 bit formats below

    local step, new_sample, ad_index,c,direction
    local index_table = {[0]=-1,-1,-1,-1,2,4,6,8,-1,-1,-1,-1,2,4,6,8}
    local step_table ={7, 8, 9, 10, 11, 12, 13, 14, 16, 17, 19, 21, 23, 25, 28, 31, 34, 37, 41, 45, 50, 55, 60, 66, 73, 80, 88, 97, 107, 118,130, 143, 157, 173, 190, 209, 230, 253, 279, 307, 337, 371, 408, 449, 494, 544, 598, 658, 724, 796, 876, 963, 1060, 1166, 1282, 1411, 1552, 1707, 1878, 2066, 2272, 2499, 2749, 3024, 3327, 3660, 4026, 4428, 4871, 5358, 5894, 6484, 7132, 7845, 8630, 9493, 10442, 11487, 12635, 13899, 15289, 16818, 18500, 20350, 22385, 24623, 27086, 29794, 32767}
    local adpcm=function(sample,bits) --adapted from http://www.cs.columbia.edu/~hgs/audio/dvi/IMA_ADPCM.pdf
        if bits >1 then
            local delta=0
            local temp_step =step
            local sign = sample &(1<<(bits-1)) --hi bit of sample convert to 4 bit
            local magnitude =(sample & (sign-1))<<(4-bits)  -- convert sample to 4 bit
            sign <<=(4-bits) -- convert sign to 4 bit 8==negative 0== positive
            local mask = 4
            for i=1,3 do
                if (magnitude & mask >0) then
                    delta+=temp_step
                end
                mask >>>= 1
                temp_step >>>= 1
            end
            if sign> 0 then  -- negative magnitude
                if new_sample < -32768+delta then
                    new_sample = -32768
                else
                    new_sample-=delta
                end
            else  -- positive magnitude
                if new_sample >32767-delta then
                    new_sample =32767
                else
                    new_sample +=delta
                end
            end
            ad_index += index_table[sign+magnitude]
        else --1-bit
            if sample==1 then  -- negative
                if new_sample < -32768+step then
                    new_sample = -32768
                else
                    new_sample-=step
                end
            else  -- positive
                if new_sample >32767-step then
                    new_sample =32767
                else
                    new_sample +=step
                end
            end
            if sample==direction then --if direction same, try larger step. if changed, try smaller step
                ad_index+=1
            else
                ad_index-=1
                direction =sample
            end
        end
        if ad_index < 1 then
            ad_index = 1
        elseif (ad_index > #step_table) then
            ad_index = #step_table
        end
        step = step_table[ad_index]
        return new_sample\256+128
    end
    defy_load=function(clip) -- required all formats
        add(clips,{clip=clip,start=1,endpoint=#clip, index=1, loop=false, done=false})
    end
    local cued=false -- required all formats
    defy_cue=function(clip_number,start,endpoint,looping)  --required all formats
        clips[clip_number].start=start or clips[clip_number].start
        clips[clip_number].index=clips[clip_number].start
        clips[clip_number].endpoint=endpoint or #clips[clip_number].clip
        clips[clip_number].loop=looping or false
        clips[clip_number].done=false
        step, new_sample, ad_index,delta,direction=7,0,0,0,0
        cued=clip_number
    end
    defy_play=
    {
        [8]=function()  -- 8 bit format
            if cued and not clips[cued].done then
                while stat(108)<1536 do
                    for i=0,511 do
                        poke (buffer+i,ord(clips[cued].clip,clips[cued].index))
                        clips[cued].index+=1
                        if (clips[cued].index>clips[cued].endpoint) then
                            if (clips[cued].loop) then
                                clips[cued].index=clips[cued].start
                            else
                                serial(0x808,buffer,i+1)
                                clips[cued].done=true
                                return
                            end
                        end
                    end
                    serial(0x808,buffer,512)
                end
            end
        end,
        [4]=function() -- 4 bit format
            if cued and not clips[cued].done then
                while stat(108)<1536 do
                    for i=0,255 do
                        c=ord(clips[cued].clip,clips[cued].index)
                        poke (buffer+i*2,adpcm((c&0xf0)>>>4,4),adpcm(c&0x0f,4))
                        clips[cued].index+=1
                        if (clips[cued].index>clips[cued].endpoint) then
                            if (clips[cued].loop) then
                                clips[cued].index=clips[cued].start
                            else
                                serial(0x808,buffer,i+1)
                                clips[cued].done=true
                                return
                            end
                        end
                    end
                    serial(0x808,buffer,512)
                end
            end
        end,
        [3]=function() -- 3 bit format
            if cued and not clips[cued].done then
                while stat(108)<1536 do
                    for i=0,170 do
                        c=ord(clips[cued].clip,clips[cued].index)
                        poke(buffer+i*3, adpcm((c>>>5)&0x07,3), adpcm((c>>>2)&0x07,3), adpcm(c&0x03,2,true))
                        clips[cued].index+=1
                        if (clips[cued].index>clips[cued].endpoint) then
                            if (clips[cued].loop) then
                                clips[cued].index=clips[cued].start
                            else
                                serial(0x808,buffer,i+1)
                                clips[cued].done=true
                                return
                            end
                        end
                    end
                    serial(0x808,buffer,510)
                end
            end
        end,
        [2]=function() -- 2 bit format
            if cued and not clips[cued].done then
                while stat(108)<1536 do
                    for i=0,128 do
                        c=ord(clips[cued].clip,clips[cued].index)
                        poke(buffer+i*4, adpcm((c>>>6)&0x03,2), adpcm((c>>>4)&0x03,2), adpcm((c>>>2)&0x03,2), adpcm(c&0x03,2))
                        clips[cued].index+=1
                        if (clips[cued].index>clips[cued].endpoint) then
                            if (clips[cued].loop) then
                                clips[cued].index=clips[cued].start
                            else
                                serial(0x808,buffer,i+1)
                                clips[cued].done=true
                                return
                            end
                        end
                    end
                    serial(0x808,buffer,512)
                end
            end
        end,
        [1]=function() -- 1 bit format
            if cued and not clips[cued].done then
                while stat(108)<1536 do
                    for i=0,64 do
                        c=ord(clips[cued].clip,clips[cued].index)
                        poke(buffer+i*8, adpcm((c>>>7)&1,1), adpcm((c>>>6)&1,1), adpcm((c>>>5)&1,1), adpcm((c>>>4)&1,1), adpcm((c>>>3)&1,1), adpcm((c>>>2)&1,1), adpcm((c>>>1)&1,1),adpcm(c&1,1))
                        clips[cued].index+=1
                        if (clips[cued].index>clips[cued].endpoint) then
                            if (clips[cued].loop) then
                                clips[cued].index=clips[cued].start
                            else
                                serial(0x808,buffer,i+1)
                                clips[cued].done=true
                                return
                            end
                        end
                    end
                    serial(0x808,buffer,512)
                end
            end
        end
    }
    function eject()  -- required all formats
        clips[cued].done=true
    end
end |
- Record some audio in the Defy Player. Once the binary string is created, playback will pause while the binary string is copied to the clipboard and then resume
- In
_init()add one or more load statements to add your audio clips to the clip table. Turn on puny font by pressing ctrl-p before pasting your string. Failing to do so will corrupt the string and distort the audio.
function _init() defy_load"my audio string" --Turn on puny font (ctrl-p) before pasting!!! end |
- The
cuefunction must be called before your audio string may be played. Cue your clip in the_updatefunction. Use whatever logic you would use when usingsfx(). Cue may also be called with additional parameters:defy_cue(clip_number,start,endpoint,looping).startandendpointare indexes into the string.loopingis a boolean. - Add a playback mode in
_update,defy_play[format](). Where format is 8, 4, 3, 2, or 1, corresponding to 8-bit, 4-bit, 2.6-bit, 2-bit, or 1-bit.
function _update()
    if (btnp(4)) then
      defy_cue(1)  -- cues clip 1 for play from beginning to end, no looping.
    end
    defy_play[4]() -- play back of 4-bit audio string.   called unconditionally in _update.
end |
- Use
defy_eject(clip_number)to end a clip early or stop a looping clip.
Acknowledgements
Thank you, @luchak and @packbat, for all your sound advice. Thank you, @luchak for the antialiasing filter. Thank you, @Gabe_8_bit for feedback and your fancy oscilloscope code. It formed the basis of the simpler oscilloscope that was ultimately included. Thank you, @LazarevGaming, et al, for testing and feedback.
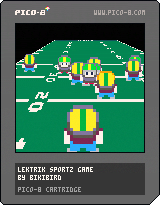
Lektrik Sportz Game
A Captain Neat-o Adventure
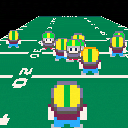
Let's get one thing straight. This is not Electric Football™. Doctor Lamento destroyed the football years ago because, you know, he's evil. But, I get ahead of myself. This is the story of Captain Neat-o who is far from home and falls into the clutches of Doctor Lamento.
The evil Doctor forces our hero to face off against his most formidable opponent, Neat-o himself, in a spectacle the Doctor calls Lektrik Sportz Game (because he can't spell and, you know, he's evil.)
Game Play
Run from one end of the field to the other while avoiding your opponents. You should make it home in under 5 minutes. Don't fall off.
Your teammates can help block the opponents and you can set their overall direction and confrontation style in the strategy session.
If you are using a keyboard to play, use the X key to advance to the next screen/teammate and the Z key to switch modes in the strategy session. Arrow keys select options, set direction, and move teammates.
The visiting team's strategy is randomly generated, but set for a single day. Learn their strategy over multiple plays and eventually defeat them in a single down! Then, come back tomorrow and play a new challenge.
Poetry Corner (Spoilers)
Credits
All assets used in the making of this game are courtesy of Toy Box Jam 3. I borrowed @Mot's Instant 3D Plus! library and hacked it a bit to get an additional camera angle. All other code, the poetry, and the idea for this adventure are my own.
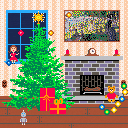
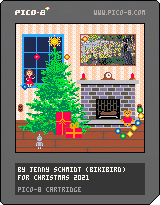
This is the story of a hard working Christmas elf. I was never told their name. I call them Blinky. They had one last task to complete late one Christmas Eve: String some lights, plug them in, and connect them to the finial atop the tree. Easy for a smart elf like Blinky. Too bad they never finished that electrician's course...
Game Play
Connect the loose bulbs by touching them with the exposed wire from the light string. Loose bulbs are always safe, but if the string is connected to power and you touch the string to itself, some of the bulbs will explode. Electricity is powerful, but dangerous. Be careful with it.
There are three possible endings and eleven achievements to earn.
Controls
Press the Z key to disconnect the light string to/from the power outlet.
Press the X key to disconnect the light string to/from the finial.
Arrow keys set the direction of travel. If you wander off screen you will hear warning notes. Come back before you wander too far.
I made a web-based tool for extracting and converting MIDI file data to be played in PICO-8. It's nicely interactive and includes a PICO-8 console built into the page so that you can audition the results before you copy the SFX data. Give Denote a try and let me know what you think.
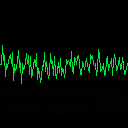
So, I've been working on a web based MIDI to PICO-8 converter for a while now. It was going pretty well, but today I introduced a bug, which totally corrupted the SFX data. The input was the traditional melody, Ghost Of John. The output was this:
Surprisingly, I like the way it sounds. I guess I composed some original music here, but it was completely accidental. I guess if you make enough mistakes, some of them are bound to turn out ok.
Now I just need to figure out what kind of game goes with this soundtrack. Any suggestions? Feel free to use this in your own projects if it fits.
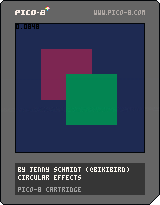
In my last game, I included an iris effect to transition between two scenes. I used the midpoint circle algorithm to calculate the edges of the iris. This algo avoids trig and square root functions and so is super fast. Even at 60 frames a second, there's no lag. I decided to make a more generalized version, implemented as a coroutine. I hope you find it useful for your projects.
To use:
-
Copy the iris function from the cartridge above into your own cartridge.
-
When it's time for a transition, assign the coroutine to a variable in your update function:
effect = cocreate(iris) - In the draw function, call the coroutine:
coresume(effect, 1, 128, 1, 15)
The parameters for the coroutine are starting radius, ending radius, step, and color. A positive step indicates by how much to open the iris on each frame. A negative step indicates a shrinking iris. See the code for examples.

Straight from the laboratory of Professor von Stroopwafel is a modest proposal to solve global climate change. Enjoy a lighthearted romp through a speculative future. It even has bells and whistles. Happy Earth Day, everyone.
Game Play
Catch falling scoops of ice cream and toppings to fulfill as many orders as possible before the timer runs out.
Controls
Press the X key to advance to the next screen.
Left and right keys move the cone.
Use the Z key at any time to see the ice cream order. Press Z again to dismiss it. The timer is always running so try not to look at the order too long or too often.
I'm working on an SFX that is supposed to sound like a bicycle bell, well actually an ice cream bell. Here's what I have so far:
Do you find it convincing? Do you have advice on making it better? If you have a better SFX of a bicycle or ice cream bell ding, please share.
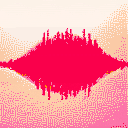
I made an image demake tool for PICO-8. Load any image and create a dithered image that uses PICO-8 standard colors and/or hidden colors and is reduced to a maximum width and height of 128 x128. Depict supports Ordered, Atkinson, Floyd-Steinberg, and Sierra2 dithering as well as some artistic dithers: Rivers, Streets, Rain, Wind. Drag and drop the final result into the PICO-8 sprite sheet. Free on itch: Depict
All feedback welcomed.
Mix and match standard and hidden colors, but do do not exceed 16.
.png)
Rivers dither adds horizontal ripples.
.png)
Streets dither creates maze-like artifacts.
.png)
Rain dither makes vertical steaks.
.png)
Wind dither produces slashes.
.png)
Atkinson Dither
.png)
Ordered Dither
.png)
No Dither
.png)
My first Pico-8 game. Entered in Toy Box Jam 2020.
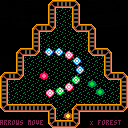
Tis the season to sing carols, drink nog, and decorate the night with Christmas sneks.
Press an arrow key to change the direction of the snek and connect bulbs to the live wire at the front of the snek to light them up. Build a long snek or a short snek. Ride the high speed rail to get around faster.
This is a mellow game with no set goals, but beware! If you touch the live wire to the snek you will create a short circuit!
When you are happy with your snek, press X to go to the forest and plant a tree decorated with your snek. Then go build another snek so you can plant another tree.
Merry Christmas and may 2021 bring you only good things.