Log In  
Follow
BenWiley4000

For games, I do programming and music/sfx. For money, I do web development (mainly JavaScript lately).

@BenWiley4000

[ :: Read More :: ]

If you port your PICO-8 game to any European languages other than English, you might want to include some character accents, which doesn't work by default since PICO-8 only supports ASCII characters (plus some special ones in the unused range between ASCII and ISO-8859-1).

My work here is based off of Zep's post from a couple weeks ago about Latin accent printing (by including special characters in front of plain ASCII characters to indicate accents). My code goes a step further by offering a way to save your strings with the real accent characters included, and then encode them so they can be printed properly. This way your text is a bit more readable in the source file.

I slightly modified Zep's original print function by changing the : control character to @ since I needed : in my printed text. The general rule, if you want to add new encoded characters to this system, is to pick a control character that won't be needed in the actual printed text.

FUNCTIONS:

  • print_with_accents is the modified version of Zep's Latin accent string printing function. It does not print strings with Latin accent characters. It prints strings that have been processed already by encode_accents.
  • encode_accents accepts a string and returns the "encoded" version made up of plain ASCII characters.
  • encode_table takes a table full of string values (can be nested in subtables) and converts all the strings using encode_accents. It does this in-place and doesn't return any value.

HANDLING ADDITIONAL ACCENT CHARACTERS:

A bunch of cases are included in encode_accents to cover all the standard French accents, but if you need to handle another case (like the ñ in Spanish) you can include it manually! For accents that haven't already been handled for any letters, you'll want to also include a new row in the dat table for print_with_accents

ACCOUNTING FOR SPECIAL PICO-8 CHARACTERS:

The printer generally assumes that printed characters will take up 4 pixels of horizontal space, but the special upper range PICO-8 characters (e.g. 🅾️, ❎) actually take up 8 pixels, so we have to account for this in print_with_accents. If you need to include any of those characters in your printed text, make sure to add that check in the code.

HOW TO USE FEWER TOKENS:

If you're worried about the number of tokens you would need to include encode_accents and encode_table, you can use those functions in combination with a table serializer like pico8-table-string to encode your table at build time in a separate Lua script.

function print_with_accents(str,x,y,col)
 local dat={
  ["#"] = {",",  0, 2},
  ["^"] = {"^",  0,-3},
  ["`"] = {"`", -1,-3},
  ["|"] = {",",  1,-6},
  ["@"] = {"\"", 0,-3}
 }
 local p = 1
 while p <= #str do
  local c=sub(str,p,p)
  if dat[c] then
   print(
    dat[c][1],
    x + dat[c][2],
    y + dat[c][3],
    col
   )
   p += 1
   c = sub(str,p,p)
  end
  print(c, x, y, col)
  x += 4 p += 1
  if (
   c == '🅾️' or
   c == '❎' or
   c == '♪'
  ) then
   x += 4
  end
 end
end

function encode_accents(str)
 local new_str = ""
 local i = 0
 while i <= #str do
  -- two byte compare string
  local c = sub(str,i,i+1)
  -- one byte default
  local e = sub(str,i,i)
  -- cedille ¸
  if c == "ç" then
   e="#c"
  -- aigu ˊ
  elseif c == "é" then
   e="|e"
  -- circonflexe ˆ
  elseif c == "â" then
   e="^a"
  elseif c == "ê" then
   e="^e"
  elseif c == "î" then
   e="^i"
  elseif c == "ô" then
   e="^o"
  elseif c == "û" then
   e="^u"
  -- grave ˋ
  elseif c == "à" then
   e="`a"
  elseif c == "è" then
   e="`e"
  elseif c == "ì" then
   e="`i"
  elseif c == "ò" then
   e="`o"
  elseif c == "ù" then
   e="`u"
  -- tréma ¨
  elseif c == "ë" then
   e="@e"
  elseif c == "ï" then
   e="@i"
  elseif c == "ü" then
   e='@u'
  end
  new_str=new_str..e
  if e ~= sub(str,i,i) then
    i = i + 1
  end
  i = i + 1
 end
 return new_str
end

function encode_table(table)
 for k,v in pairs(table) do
  if type(v) == "table" then
   encode_table(v)
  else
   table[k]=encode_accents(v)
  end
 end
end
P#64966 2019-06-03 03:49 ( Edited 2019-06-03 03:54)

[ :: Read More :: ]

I wrote this library to cut down on the number of tokens taken up by large tables with string data, e.g. for dialogue text/translations/etc. Most helpful if those tokens are using a lot of your tokens (i.e. more than 150), since the library itself takes up 139 tokens. But all your table declarations can be reduced to 5 tokens each!

Here's an example of what your code can look like.

Before:

my_table = {
  hello='world',
  nested={
    some='data\'s nested',
    inside_of='here'
  },
  'and',
  'indexed',
  'data',
  { as='well' }
}

After:

function table_from_string(str)
  local tab, is_key = {}, true
  local key,val,is_on_key
  local function reset()
    key,val,is_on_key = '','',true
  end
  reset()
  local i, len = 1, #str
  while i <= len do
    local char = sub(str, i, i)
    -- token separator
    if char == '\31' then
      if is_on_key then
        is_on_key = false
      else
        tab[tonum(key) or key] = val
        reset()
      end
    -- subtable start
    elseif char == '\29' then
      local j,c = i,''
      -- checking for subtable end character
      while (c ~= '\30') do
        j = j + 1
        c = sub(str, j, j)
      end
      tab[tonum(key) or key] = table_from_string(sub(str,i+1,j-1))
      reset()
      i = j
    else
      if is_on_key then
        key = key..char
      else
        val = val..char
      end
    end
    i = i + 1
  end
  return tab
end

my_table=
table_from_string(
 '1�and�2�indexed�3�data�4�as�well��hello�world�nested�inside_of�here�some�data\'s nested��'
)

Clearly it's more helpful if your data table is much larger than this. In my case, my data tables took up almost 200 tokens, and I saved about 50 using this technique. If I go to add more translations in the future, it will save even more.

https://github.com/benwiley4000/pico8-table-string

P#64776 2019-05-27 07:03 ( Edited 2019-05-27 07:05)

[ :: Read More :: ]

Here's a simple tool I made for converting PICO-8-style Lua syntax into standard Lua syntax which allows you to run code analysis tools created for Lua. It's a thin wrapper around a converter function I took from PICOLOVE.

https://github.com/benwiley4000/pico8-to-lua

P#64758 2019-05-26 06:41

[ :: Read More :: ]

Cart #51655 | 2018-04-16 | Code ▽ | Embed ▽ | No License
17

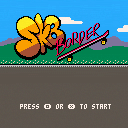
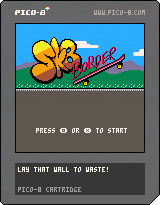
Sk8Border is a collaboration by Leif Halldór Ásgeirsson, Marc-André Toupin and Ben Wiley for the Anti-Fascist Game Jam.

Works in mobile browsers!

Hold Z or X to crouch, release to jump (Ollie). Do a tail or nose grind with Z or X. Rack up a nice combo to take down the wall!

More details and play instructions are at the game's official site. We recommend playing it on mobile there since we have specially tailored controls, and vibration support!

The game is "finished," but comments are always welcome.

P#51656 2018-04-15 21:09 ( Edited 2018-06-01 17:41)

[ :: Read More :: ]

Here's a repo with the code and more details on GitHub

PICO-8 has a GPIO interface supporting 128 pins, each of which can store a 128-bit unsigned integer (0-255). However Raspberry PI and CHIP only support consuming each GPIO pin as a single bit (0 or 255), and only have pins for a small subset of the 128 virtual slots. The Pocket CHIP only has 6 fully-exposed pins (indices 2-7).

This means that if you want to pass GPIO information that can be used easily with any platform that runs PICO-8, you only get six on-and-off slots, which doesn't sound that great. Until you consider that you can still use those 6 slots to encode an integer up to 6 bits (-32 to 31 signed, or 0 to 63 unsigned!). Even a 3-bit int (0-7 unsigned) can often be enough to encode meaningful state information for many games, which can be used to trigger vibrations, color lights, etc.

The trouble is, taking a decimal value and encoding it as binary with PICO-8's built-in GPIO functions, then reading it again later, is not simple. PICO-8 Messenger provides utility functions which abstract away the bit-shifting and let you just read and write numbers.

Usage

Copy the functions you need from pico8-messenger.lua into your .p8 file.

-- included definition for write_gpio
-- included definition for read_gpio

-- write the number -1 to bits 2 through 4
write_gpio(-1, 2, 3)

-- print out the number stored in bits 5 through 7
print(read_gpio(5, 3), 8, 8, 7)

You can download pico8-messenger.js and include it in your page with a script tag:

<script src="pico8-messenger.js"></script>
<script>
  pico8_gpio = pico8_gpio || Array(128);

  // get some number stored in bits 2 through 4
  var numFromPico8 = readFromGpio(pico8_gpio, 2, 3);

  // send the number 2 to pico-8 stored in bits 5 through 7
  writeToGpio(pico8_gpio, 2, 5, 3);
</script>

API

For all of these functions:

  • num is the decimal integer to be stored
  • pin_index or pinIndex is index in the GPIO array (0-127) where storage for this number should begin (in other words, the location of the largest, left-most bit)
  • bits is the number of bits required to store the maximum value for this number

Lua

These functions wrap PICO-8's peek and poke functions to read and write data in the GPIO slots.

function write_gpio(num, pin_index, bits)

function write_gpio_unsigned(num, pin_index, bits)

function read_gpio(pin_index, bits)

function read_gpio_unsigned(pin_index,bits)

JavaScript

All of these functions assume gpio is a 128-length array filled with numbers that are either 0 or 255. Although these are intended for handling PICO-8 data, they can be used anywhere it could be useful to encode numbers in a binary array.

function writeToGpio(gpio, num, pinIndex, bits)

function writeToGpioUnsigned(gpio, num, pinIndex, bits)

function readFromGpio(gpio, pinIndex, bits)

function readFromGpioUnsigned(gpio, pinIndex, bits)

How many bits do I need?

Check out this table on GitHub

P#51406 2018-04-08 06:15 ( Edited 2018-04-08 10:53)

[ :: Read More :: ]

The fact you can read and write PICO-8 GPIO values from the web wrapper is awesome - it means you can do things like emit vibrations according to game state, change the site theme to match different in-game levels, or maybe even develop a brand new input scheme.

However the API for reading these values is a bit basic... PICO-8 writes GPIO values to an array, and it's up to you, the developer to check those values periodically to see if they're different. What if you could just tell JavaScript to let you know whenever the GPIO pins get updated with new values?

Voilà:

var gpio = getP8Gpio();
var unsubscribe = gpio.subscribe(function(indices) {
  console.log(
    'New values at indices ' + indices.join(', ') + ': ' +
    indices.map(function(i) { return gpio[i]; }).join(', ')
  );
});
// unsubscribe later if you want...
unsubscribe();

This uses JavaScript setters under the hood to watch each index in the array, which means the watching part is shoved into a native background thread (== faster!). No need to write once-a-frame JS iterator loops or anything like that. Whenever PICO-8 writes to the GPIO array, you get notified immediately.

Of course you can also write back to the GPIO array:

gpio[3] = 255;
gpio[4] = 0;
New values at indices 3, 4: 255, 0

Your listener will be notified about your own changes as well; it's up to you if you want to do anything with that.

By default, listeners only get called if at least one value has changed in the last call stack. If you want to be notified about every update, new value or not, you can pass a second argument, verbose, which is a boolean:

gpio.subscribe(function(indices) {
  console.log(
    'The values ' +
    indices.map(function(i) { return gpio[i]; }).join(', ') +
    ' at indices ' + indices.join(', ') +
    ' probably didn\'t change, but I am logging them anyway..'
  );
}, true);

Here's the library code (~75 lines of JavaScript):

var getP8Gpio;

(function() {
  getP8Gpio = _getP8Gpio;
  var size = 8;

  // extends Array prototype
  function PicoGpioArray() {
    Array.call(this, size);
    this._data = Array(size);
    this._listeners = [];
    this._pending = {};
    this._pendingNew = {};
    this._pendingTimeout = null;
    this.dispatchPending = this.dispatchPending.bind(this);
    Object.seal(this);
  }

  PicoGpioArray.prototype = Object.create(Array.prototype);
  PicoGpioArray.prototype.constructor = PicoGpioArray;

  // listener callback is required. second argument (verbose) is a boolean
  // and assumed to be false if not provided.
  PicoGpioArray.prototype.subscribe = function subscribe(listener, verbose) {
    listener.verbose = Boolean(verbose);
    this._listeners.push(listener);
    return (function unsubscribe() {
      this._listeners.splice(this._listeners.indexOf(listener), 1);
    }).bind(this);
  };

  // alert listeners of all values changed during the last call stack
  PicoGpioArray.prototype.dispatchPending = function dispatchPending() {
    var pendingIndices = Object.keys(this._pending).map(Number);
    var pendingNewIndices = Object.keys(this._pendingNew).map(Number);
    for (var i = 0; i < size; i++) {
      delete this._pending[i];
      delete this._pendingNew[i];
    }
    if (!pendingIndices.length) {
      return;
    }
    for (var l = 0; l < this._listeners.length; l++) {
      var indices = this._listeners[l].verbose
        ? pendingIndices
        : pendingNewIndices;
      if (indices.length) {
        this._listeners[l](indices);
      }
    }
  };

  // intercept assignments to each GPIO pin to notify listeners
  for (var i = 0; i < size; i++) {
    (function(index) {
      Object.defineProperty(PicoGpioArray.prototype, index, {
        get: function() {
          return this._data[index];
        },
        set: function(value) {
          clearTimeout(this._pendingTimeout);
          this._pending[index] = true;
          if (this._data[index] !== value) {
            this._pendingNew[index] = true;
          }
          this._data[index] = value;
          this._pendingTimeout = setTimeout(this.dispatchPending);
        }
      });
    })(i);
  }

  function _getP8Gpio() {
    // initialize only once
    window.pico8_gpio = window.pico8_gpio || new PicoGpioArray();
    return window.pico8_gpio;
  }
})();

Old version (API changed):


Voilà:

var gpio = getP8Gpio();
var unsubscribe = gpio.subscribe(function(index) {
  console.log('New value at index ' + index ' + ': ' + gpio[index]);
});
// unsubscribe later if you want...
unsubscribe();

This uses JavaScript setters under the hood to watch each index in the array, which means the watching part is shoved into a native background thread (== faster!). No need to write once-a-frame JS iterator loops or anything like that. Whenever PICO-8 writes to the GPIO array, you get notified immediately.

Of course you can also write back to the GPIO array:

gpio[3] = 255;

Your listener will be notified about your own changes as well; it's up to you if you want to do anything with that.

By default, listeners only get called if a value has changed. If you want to be notified about every update, new value or not, you can pass a second argument, verbose, which is a boolean:

gpio.subscribe(function(index) {
  console.log(
    'The value ' + gpio[index] + ' at index ' + index +
    ' probably didn't change, but I am logging it anyway..'
  );
}, true);

Here's the library code (50 lines of JavaScript):

var getP8Gpio;

(function() {
  getP8Gpio = _getP8Gpio;
  var size = 8;

  // extends Array prototype
  function PicoGpioArray() {
    Array.call(this, size);
    this._data = Array(size);
    this._listeners = [];
    Object.seal(this);
  }

  PicoGpioArray.prototype = Object.create(Array.prototype);
  PicoGpioArray.prototype.constructor = PicoGpioArray;

  // listener callback is required. second argument (verbose) is a boolean
  // and assumed to be false if not provided.
  PicoGpioArray.prototype.subscribe = function subscribe(listener, verbose) {
    listener.verbose = Boolean(verbose);
    this._listeners.push(listener);
    return (function unsubscribe() {
      this._listeners.splice(this._listeners.indexOf(listener), 1);
    }).bind(this);
  };

  // intercept assignments to each GPIO pin to notify listeners
  for (var i = 0; i < size; i++) {
    (function(index) {
      Object.defineProperty(PicoGpioArray.prototype, index, {
        get: function() {
          return this._data[index];
        },
        set: function(value) {
          var isNew = this._data[index] !== value;
          this._data[index] = value;
          this._listeners.forEach(function(listener) {
            if (isNew || listener.verbose) {
              listener(index);
            }
          });
        }
      });
    })(i);
  }

  function _getP8Gpio() {
    // initialize only once
    window.pico8_gpio = window.pico8_gpio || new PicoGpioArray();
    return window.pico8_gpio;
  }
})();

P#51323 2018-04-05 01:10 ( Edited 2018-04-05 08:35)

[ :: Read More :: ]

I want my web export to support mobile. But if you're like me, you might find the API for controlling touch button inputs from a web page a bit esoteric, and not super easy to read/write. Why not write a tiny API wrapper that makes this much easier?

If you have a page that looks like this:

<!-- ... cart stuff -->
<button id="left"> < </button>
<button id="right"> > </button>
<button id="up"> /\ </button>
<button id="down"> \/ </button>
<button id="o"> O </button>
<button id="x"> X </button>
<! -- ... -->

Include this in your page...

(function() {
  var __btns = {};

  function update_btns(playerIndex) {
    pico8_buttons[playerIndex] =
      Object.keys(__btns[playerIndex]).reduce(function(val, btn) {
        return val | (__btns[playerIndex][btn] ? Math.pow(2, btn) : 0);
      }, 0);
  }

  function registerP8Btn(domElement, btnIndex, playerIndex) {
    playerIndex = playerIndex || 0;
    window.pico8_buttons = window.pico8_buttons || [];
    pico8_buttons[playerIndex] = pico8_buttons[playerIndex] || 0;
    __btns[playerIndex] = __btns[playerIndex] || {};
    domElement.addEventListener('touchstart', function() {
      __btns[playerIndex][btnIndex] = true;
      update_btns(playerIndex);
    });
    domElement.addEventListener('touchend', function() {
      __btns[playerIndex][btnIndex] = false;
      update_btns(playerIndex);
    });
  }

  window.registerP8Btn = registerP8Btn;
})();

Then later you can register buttons like this:

registerP8Btn(document.getElementById('left'), 0);
registerP8Btn(document.getElementById('right'), 1);
registerP8Btn(document.getElementById('up'), 2);
registerP8Btn(document.getElementById('down'), 3);
registerP8Btn(document.getElementById('o'), 4);
registerP8Btn(document.getElementById('x'), 5);

Are you trying to support multiple players? Then you can do:

registerP8Btn(document.getElementById('x-P1'), 5, 0 /* player 1 */);
registerP8Btn(document.getElementById('x-P2'), 5, 1 /* player 2 */);

That's it!

P#51309 2018-04-04 15:46 ( Edited 2018-04-05 00:05)

[ :: Read More :: ]

Cart #19773 | 2016-04-13 | Code ▽ | Embed ▽ | License: CC4-BY-NC-SA
12

Cart #19696 | 2016-04-10 | Code ▽ | Embed ▽ | License: CC4-BY-NC-SA
12

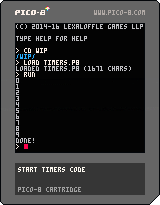
As Scathe noted over here, there's not a proper/easy-to-use Timers API built into PICO-8. Turns out it's not too hard to build one, though, so I took up the task.

The cartridge which you can play above just counts to 10. I've reproduced all the code here:

-- start timers code

local timers = {}
local last_time = nil

function init_timers ()
  last_time = time()
end

function add_timer (name,
    length, step_fn, end_fn,
    start_paused)
  local timer = {
    length=length,
    elapsed=0,
    active=not start_paused,
    step_fn=step_fn,
    end_fn=end_fn
  }
  timers[name] = timer
  return timer
end

function update_timers ()
  local t = time()
  local dt = t - last_time
  last_time = t
  for name,timer in pairs(timers) do
    if timer.active then
      timer.elapsed += dt
      local elapsed = timer.elapsed
      local length = timer.length
      if elapsed < length then
        if timer.step_fn then
          timer.step_fn(dt,elapsed,length,timer)
        end  
      else
        if timer.end_fn then
          timer.end_fn(dt,elapsed,length,timer)
        end
        timer.active = false
      end
    end
  end
end

function pause_timer (name)
  local timer = timers[name]
  if (timer) timer.active = false
end

function resume_timer (name)
  local timer = timers[name]
  if (timer) timer.active = true
end

function restart_timer (name, start_paused)
  local timer = timers[name]
  if (not timer) return
  timer.elapsed = 0
  timer.active = not start_paused
end

-- end timers code

-- start app code

function _update ()
  update_timers()
end

function _init ()
  init_timers()

  local last_int = 0
  print(last_int)
  sfx(last_int)
  add_timer(
    "timer1",
    10,
    function (dt,elapsed,length)
      local i = flr(elapsed)
      if i > last_int then
        print(i)
        sfx(i)
        last_int = i
      end
    end,
    function ()
      print("done!")
      sfx(10)
    end
  )
end

-- end app code

The actual "Timers API" is between "-- start timers code" and "-- end timers code." It might seem a bit verbose; take what you need and leave the rest.

This should be robust enough to meet any typical needs. The main weakness right now is that you can't have multiple step or end callbacks, and you can't add callbacks after the timer is initialized.

API specification:

local timers -- CRITICAL
-- this is a table that tracks your timers by name
local last_time -- CRITICAL
-- this is the last value of time() recorded.
function init_timers() -- CRITICAL
-- run this at the start of your _init() function to make sure
-- last_time is properly in-sync.
function add_timer (name, length, step_fn, end_fn, start_paused)  -- CRITICAL
-- use this function to track a new timer.
-- PARAMS:
-- * name:
--    You can use "timers[name]" to access your timer later on, if you need to.
--    type: string
--    required? Yes.
-- * length:
--    How many seconds your timer should last.
--    type: number
--    required? Yes.
-- * step_fn:
--    A callback that gets called each time update_timers() is run.
--    Receives (dt,elapsed,length,timer) as parameters.
--    type: function
--    required? No.
-- * end_fn:
--    A callback that gets called once after the timer has expired.
--    Receives (dt,elapsed,length,timer) as parameters.
--    type: function
--    required? No.
-- * start_paused:
--    If present and truthy, makes the timer initialize as inactive.
--    type: boolean
--    required? No.
function update_timers() -- CRITICAL
-- run this as part of your _update() function.
function pause_timer(name) -- OPTIONAL
-- synactic sugar equivalent to 'timers[name].active = false.'
-- leave out if you won't use this much or at all.
-- fails silently if timer doesn't exist.
function resume_timer(name) -- OPTIONAL
-- synactic sugar equivalent to 'timers[name].active = true.'
-- leave out if you won't use this much or at all.
-- fails silently if timer doesn't exist.
function restart_timer(name, start_paused) -- OPTIONAL
-- synactic sugar equivalent to 'timers[name].elapsed = 0;timers[name].active = not start_paused.'
-- leave out if you won't use this much or at all.
-- fails silently if timer doesn't exist.
-- PARAMS:
-- * name:
--    type: string
--    required? Yes.
-- * start_paused:
--    If present and truthy, sets the timer to inactive.
--    type: boolean
--    required? No.

P#19693 2016-04-10 18:18 ( Edited 2018-05-26 04:02)

[ :: Read More :: ]

I was discussing with a friend how to deal with complex music arrangements (all 4 channels) alongside sound effects. He alleged that the GameBoy used all its channels for music at times but would cancel one of its channels (perhaps the percussive one) to play sound effects, then resume when sound effects had elapsed.

Current PICO-8 configuration, as far as I understand, is to have music channel masks take precedence over sound effects. This is good in theory but can be bad if you want to do something like the above. A possible solution could be to allow music channel mask modification mid-playback - is this doable? It would require some way to save or lookup a currently playing track (not yet in the API as far as I know), and then we pass that track's value to a function that could reset the channel mask to fewer channels, before playing a sound effect. Then we would do it again with the previous channel mask and expect the muted track component to come back.

I'm not familiar with the tech powering sound playback for PICO-8 and I don't know if this is the sort of thing that could have a simple implementation, or if trying to be able to modify variables for already-playing songs is totally out of the question. I can begin to imagine why it would be complicated or non-performant, but I'm not sure, so I thought I'd ask.

Thanks!

P#19585 2016-04-04 09:57 ( Edited 2016-04-06 13:13)

[ :: Read More :: ]

I want to write a song that's in 4, but has swinging notes - so I'm just writing tracks that fill up 24 of the slots instead of all 32. But in order to make it work in sequence I need the track to stop playing after the 24th slot and move on to the next segment in the song immediately. Is there a way to tell PICO-8 to do that? Of course I could just use all 32 slots and changing the measure's starting place depending on where I am, but I'd rather be more organized.

P#19581 2016-04-04 09:03 ( Edited 2016-04-04 21:55)

[ :: Read More :: ]

UPDATE: Since I created this I've updated the script to apply all transforms with Python by default. The JavaScript method of shuffling elements is enabled only if 1) you lack the dependencies required by Python or 2) you specifically flag the program to use JavaScript. The advantage of doing it all with Python is that you don't have to wait until page content loads to see a responsive layout - it's already there. I've also created a comparison of the responsive and default web player layouts. And check out the README to see what Python packages you'll need to do the full HTML transform in Python.

~original post~

The default webplayer page format that gets exported from PICO-8 is great, but not quite excellent, since it only provides one display resolution. I decided to work with the structure and style a bit (using flexbox styles and media breakpoints) to make the canvas render at 290px, 580px, or 1160px wide based on what real estate is available. Also, the buttons collapse into multiple rows once the display gets small enough.

I came up with this.
(replace "[PATH_TO_YOUR_CARTRIDGE.js]" with your actual cartridge js file).

Try it out by resizing your browser window (if you open up the developer console you can use its border to make the window space even smaller). You won't get the highest resolution unless you're on a very high res display (e.g. 4k), since it checks for vertical space as well.

The thing is, this won't be easy to use if you've already made content or style changes to your page, or when the next iteration of the HTML export page is included in a future version of PICO-8.

So I wrote a Python script (click on "Raw" to download) that will, in one command, turn your existing webplayer page into a responsive one.

$ python transform.py cartridge.html

This will give you a "cartridge-responsive.html" file.

It works by inserting a new HTML style tag as a CSS override, and a bit of JavaScript that rearranges your page's elements immediately after the page loads. I was going to do that bit as part of the Python transform, but that would require people installing random Python libraries as dependencies. It doesn't really matter though, since the change happens as soon as the game is ready. The main disadvantage is that on a tiny display, the buttons will be overflowing the side of the screen until the game is finished loading.

The full source is all on GitHub.

Let me know what you think! If I did something wrong, feel free to discuss it here or submit a pull request.

P.S. If you like it feel free to give the project a star on GitHub. :)

P#19489 2016-03-30 09:14 ( Edited 2016-03-31 09:45)

[ :: Read More :: ]

So after completing the (very helpful) Squash/Pong tutorial in the first pico-8 zine, I decided to go about setting up a class-based object-oriented framework for implementing the same game - one where relevant data is contained within an object, and the object has callable methods that let the object act on its own data rather than other members reaching in and changing values. The _update() and _draw() functions in turn just call _update() and _draw() methods contained inside game objects.

Here's what I came up with: http://hastebin.com/agasogijet.lua
The code at the top is mine, and the section at the bottom contains the original code (more or less, I made a couple of changes).

It's good if you follow the tutorial from the zine (https://sectordub.itch.io/pico-8-fanzine-1), but if you don't, you should be able to paste the code into the pico-8 editor and run it. The health meter sprites won't show up, and you won't get any sound, but everything else will work.

DISCUSSION:

This turned out to be more complicated than I expected, entirely because I couldn't decide how I was going to implement classes. Even though this example only instantiates each class once (singletons), I wanted to have classes for future projects where I would want to be able to generalize across several instances.

The common way of implementing classes in Lua is similar to what I'm used to with JavaScript - prototype inheritance, where a method lookup on an object falls back to another object which represents the class. In this case our "objects" are actually "tables," but it's the same principle. I ended up writing this helper for creating a class in Lua:

-- this is possible in standard lua (try it here: [http://www.lua.org/cgi-bin/demo](http://www.lua.org/cgi-bin/demo))

-- class helper (include this once, use it for all your classes)
function class (init)
  local c = {}
  c.__index = c
  function c.init (...)
    local self = setmetatable({},c)
    init(self,...)
    return self
  end
  return c
end
-- end class helper

-- actual class definition
local someclass = class(function (self, name)
  self.name = name
end)

function someclass:setname (name)
  self.name = name
end
-- end class definition

local someclassinstance = someclass.init("monkey")
print(someclassinstance.name) -- "monkey"
someclassinstance:setname("banana")
print(someclassinstance.name) -- "banana"

However this requires the "setmetatable()" function which is part of the Lua standard library, which we don't have. As far as I know there isn't another way to pull off prototype-based classes, so I gave up on that. lua-users.org/wiki/ObjectOrientationTutorial

The other accepted method (also discussed in the link above) is closure-based classes, which is also something people do in JavaScript (if they're confused). No need to use a helper function - we can just declare our object and its methods inside a function and return the result - it ends up being a lot like classes in Java and other object-oriented languages. Each instantiated class has its own set of methods rather than a shared set, so the memory cost can be substantially higher for many instances.

-- this works in pico-8! try it.

-- class definition
function someclass (name)
  local self = {}

  self.name = name

  function self.setname (name)
    self.name = name
  end

  return self
end
-- end class definition

local someclassinstance = someclass("monkey")
print(someclassinstance.name) -- "monkey"
someclassinstance.setname("banana")
print(someclassinstance.name) -- "banana"

However, that's good enough, if a bit memory inefficient, and what we've got to work with right now. It's what I use throughout the Squash/Pong code I've shared.

P.S. I also want to acknowledge this discussion which suggests copying objects and mutating them to simulate classes. https://www.lexaloffle.com/bbs/?tid=2951

While some consider that a viable option (and it can get the job done), for me it slightly defeats the point of class-based programming.

P#19449 2016-03-28 07:20 ( Edited 2016-04-08 15:08)