


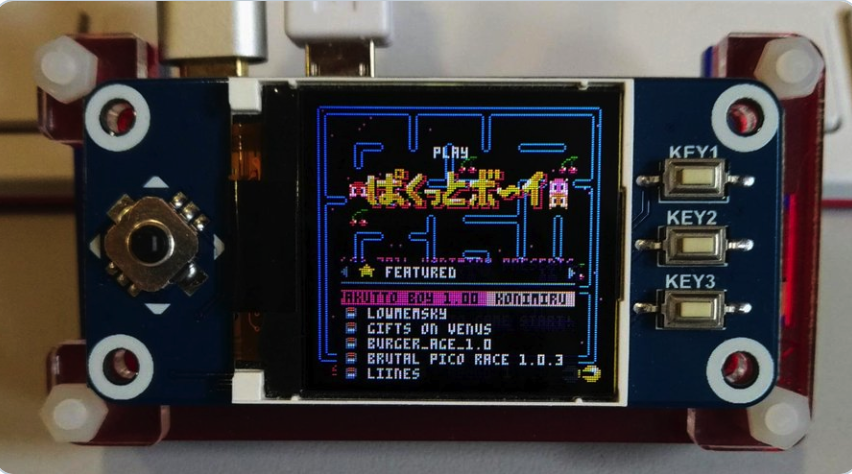
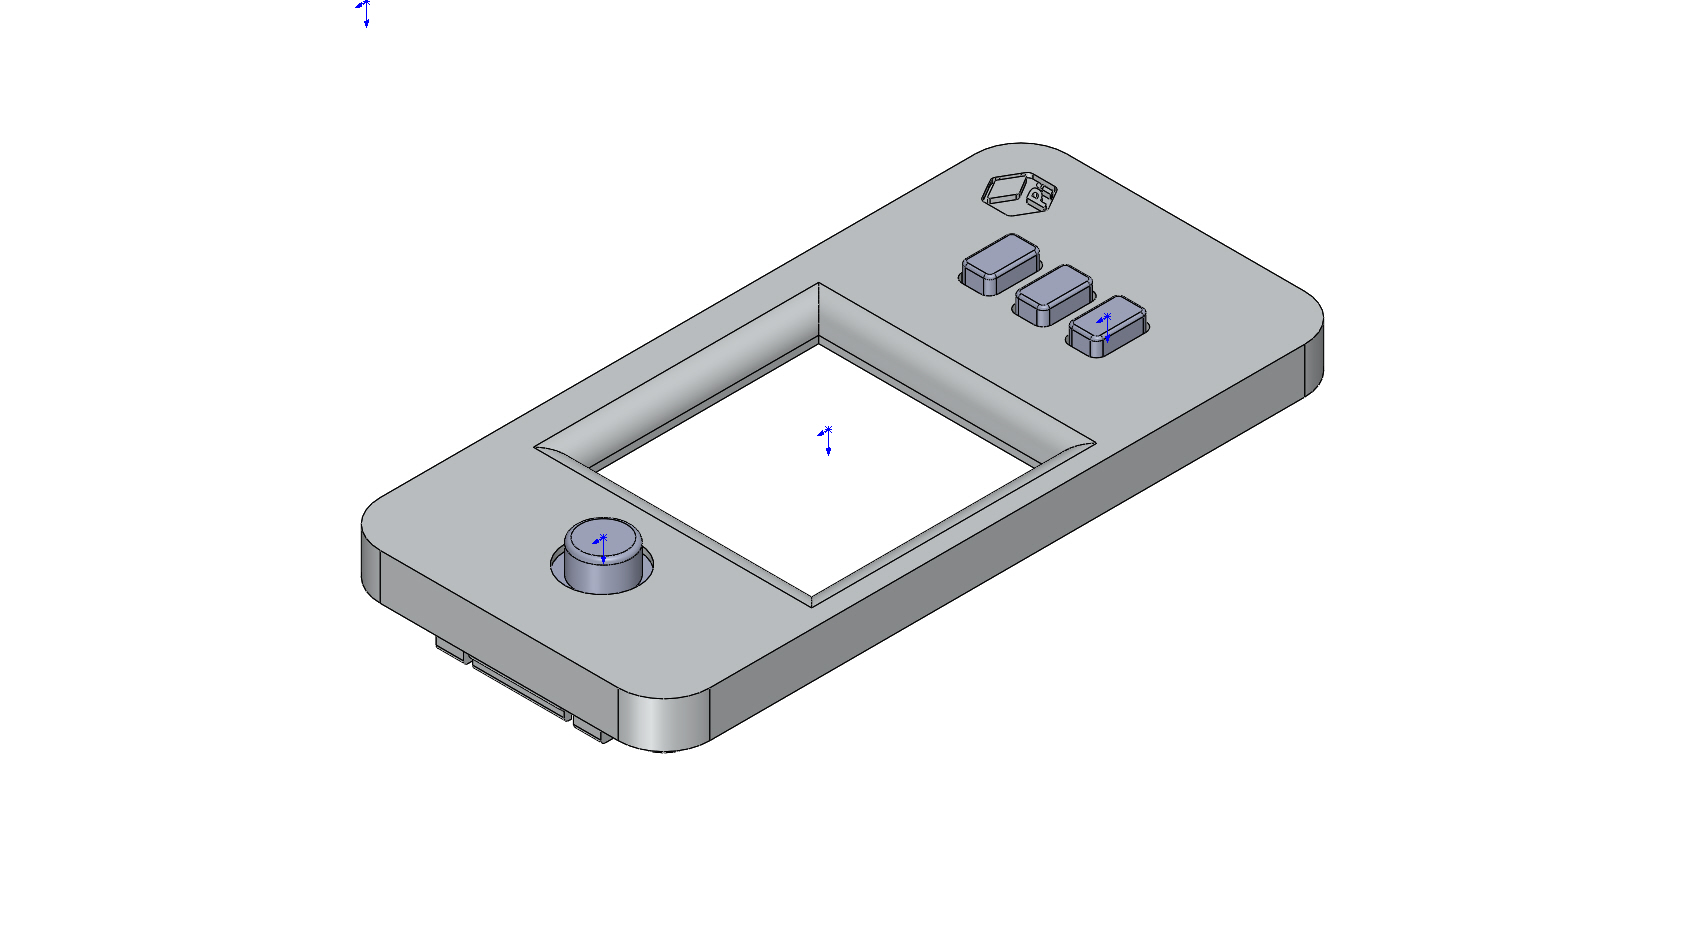
At 128 x 128 pixels, the Waveshare 1.44 inch display with controller is a perfect fit for Pico-8.
The screen Driver being installed, requires a Waveshare 1.44" 128x128 pixel colour LCD display, with joystick & 3 buttons which utilises an ST7735S controller.
Amazon UK link: https://www.amazon.co.uk/gp/product/B077YK8161
Amazon US link: https://www.amazon.com/waveshare-1-44inch-LCD-HAT-Interface/dp/B0781BNC9L/
Built, tested and confirmed working with both Raspbian Stretch lite and Buster lite-based images.
Begin by writing a fresh Raspbian Stretch or Buster Lite image to a 4GB or larger MicroSD card using your favoured image writing tool.
Caution:
Raspbian Buster appears to generate more heat after short periods on a Pi ZeroWH than Stretch does.
Whichever image you begin your build with, please monitor CPU temperature during use. I won't be held responsible for a baked Pi!
A Pi ZeroW can be set-up headless if a properly configured "wpa_supplicant.conf" and a blank file named "ssh" are copied to the root of the MicroSD card, after writing the image but before unplugging and inserting into the Pi.
ON FIRST BOOT
SSH into the Pi or plug-in a keyboard and monitor. Login with username "pi" and password "raspberry"
sudo raspi-config |
Expand the filesystem
Set boot to CLI with auto-login
enable SPI
disable VNC
disable serial
I recommend changing the default password from "raspberry" to something more secure while you're still in raspi-config.
You may also wish to change the hostname while you're in here. I named mine pico8, so I can ssh to pico8.local from other machines for maintenance.
Exit raspi-config and reboot with
sudo reboot |
Once rebooted, login as pi, then update and upgrade the OS and programs:
sudo apt-get update sudo apt-get upgrade |
Reboot once again and re-login if recommended by the upgrade process
Let's begin by getting Pico8 running on the Pi
sudo apt-get install libasound2-dev wiringpi wget https://t.co/jZy96cDeCC?amp=1 -O sndio-1.2.0.tar.gz tar -xf sndio-1.2.0.tar.gz cd sndio-1.2.0 ./configure make sudo make install cd ~ |
Use SFTP (or USB) to transfer your personal Pico download zip file into /home/pi folder
Unzip your Pico8 Raspberry Pi zip file into /home/pi.
This should create a /home/pi/pico-8 folder, which will contain all of the files required to run Pico8.
Now we’ll get the Waveshare 1.44" 128x128 pixel LCD display hat working on the Pi
cd ~ sudo apt-get install git cmake git clone https://github.com/tasanakorn/rpi-fbcp cd rpi-fbcp/ mkdir build cd build/ cmake .. make sudo install fbcp /usr/local/bin/fbcp cd ~ wget http://www.airspayce.com/mikem/bcm2835/bcm2835-1.59.tar.gz tar zxvf bcm2835-1.59.tar.gz cd bcm2835-1.59/ ./configure make sudo make check sudo make install |
Open and edit the modules file to enable the additional modules required to make the LCD function.
sudo nano /etc/modules |
Append the two lines below to the end of the file, save and exit.
spi-bcm2835 fbtft_device |
We need to create a new file for the fbtft configuration
sudo nano /etc/modprobe.d/fbtft.conf |
Add the following lines to the empty file and save it.
# /etc/modprobe.d/fbtft.conf options fbtft_device name=adafruit18_green gpios=reset:27,dc:25,cs:8,led:24 speed=40000000 bgr=1 fps=60 custom=1 height=128 width=128 rotate=180 |
Fortunately for us, Adafruit created a GPIO controller driver, so let's use this to make the Waveshare hat's controller and buttons work in pico-8.
cd ~ curl https://raw.githubusercontent.com/adafruit/Raspberry-Pi-Installer-Scripts/master/retrogame.sh >retrogame.sh sudo bash retrogame.sh |
On the option screen, Select “6 buttons + joystick”. We’ll edit the resulting config file a little later to fit the 3 button and joystick layout of our hat.
Once installed; at the reboot prompt, type “N” so as NOT to reboot your Pi.
Now we’ll edit the configuration file installed and used by Adafruit’s retrogamer driver, to configure the correct number of buttons for the Waveshare hat.
sudo nano /boot/retrogame.cfg |
Use CTRL-K to remove all lines from the file and paste the following lines into the now empty file before saving it and exiting nano.
LEFT 5 # Joypad left RIGHT 26 # Joypad right UP 6 # Joypad up DOWN 19 # Joypad down Z 20 # Button 3 X 16 # Button 2 ESC 21 # Button 1 |
Please ensure each entry is on a separate line as displayed above.
At this stage, we can set the correct display settings for the Waveshare 128x128 LCD within the file config.txt
sudo nano /boot/config.txt |
Add to the end of the file and beginning on a new/empty line, the following lines:
display_rotate=1 hdmi_group=2 hdmi_mode=87 hdmi_cvt=128 128 60 1 0 0 0 hdmi_force_hotplug=1 |
Save the file and exit nano.
Now let's put this all together and have Pico-8 run in "splore" mode at boot.
sudo nano /etc/rc.local |
This file should should be as below. (All we're adding to the file are three lines near the end, each beginning with sudo):
#!/bin/sh -e # # rc.local # # This script is executed at the end of each multiuser runlevel. # Make sure that the script will "exit 0" on success or any other # value on error. # # In order to enable or disable this script just change the execution # bits. # # By default this script does nothing. # Print the IP address _IP=$(hostname -I) || true if [ "$_IP" ]; then printf "My IP address is %s\n" "$_IP" fi sudo /usr/local/bin/fbcp & sudo /usr/local/bin/retrogame & sudo /home/pi/pico-8/pico8 -splore & exit 0 |
Save this file and exit nano.
Shutdown and power-off the pi with
sudo shutdown now |
Wait for the pi to shutdown, unplug the power-cable and connect the Waveshare LCD hat onto the GPIO connectors.
Be careful to connect the hat in the correct orientation, onto all 40 GPIO pins.
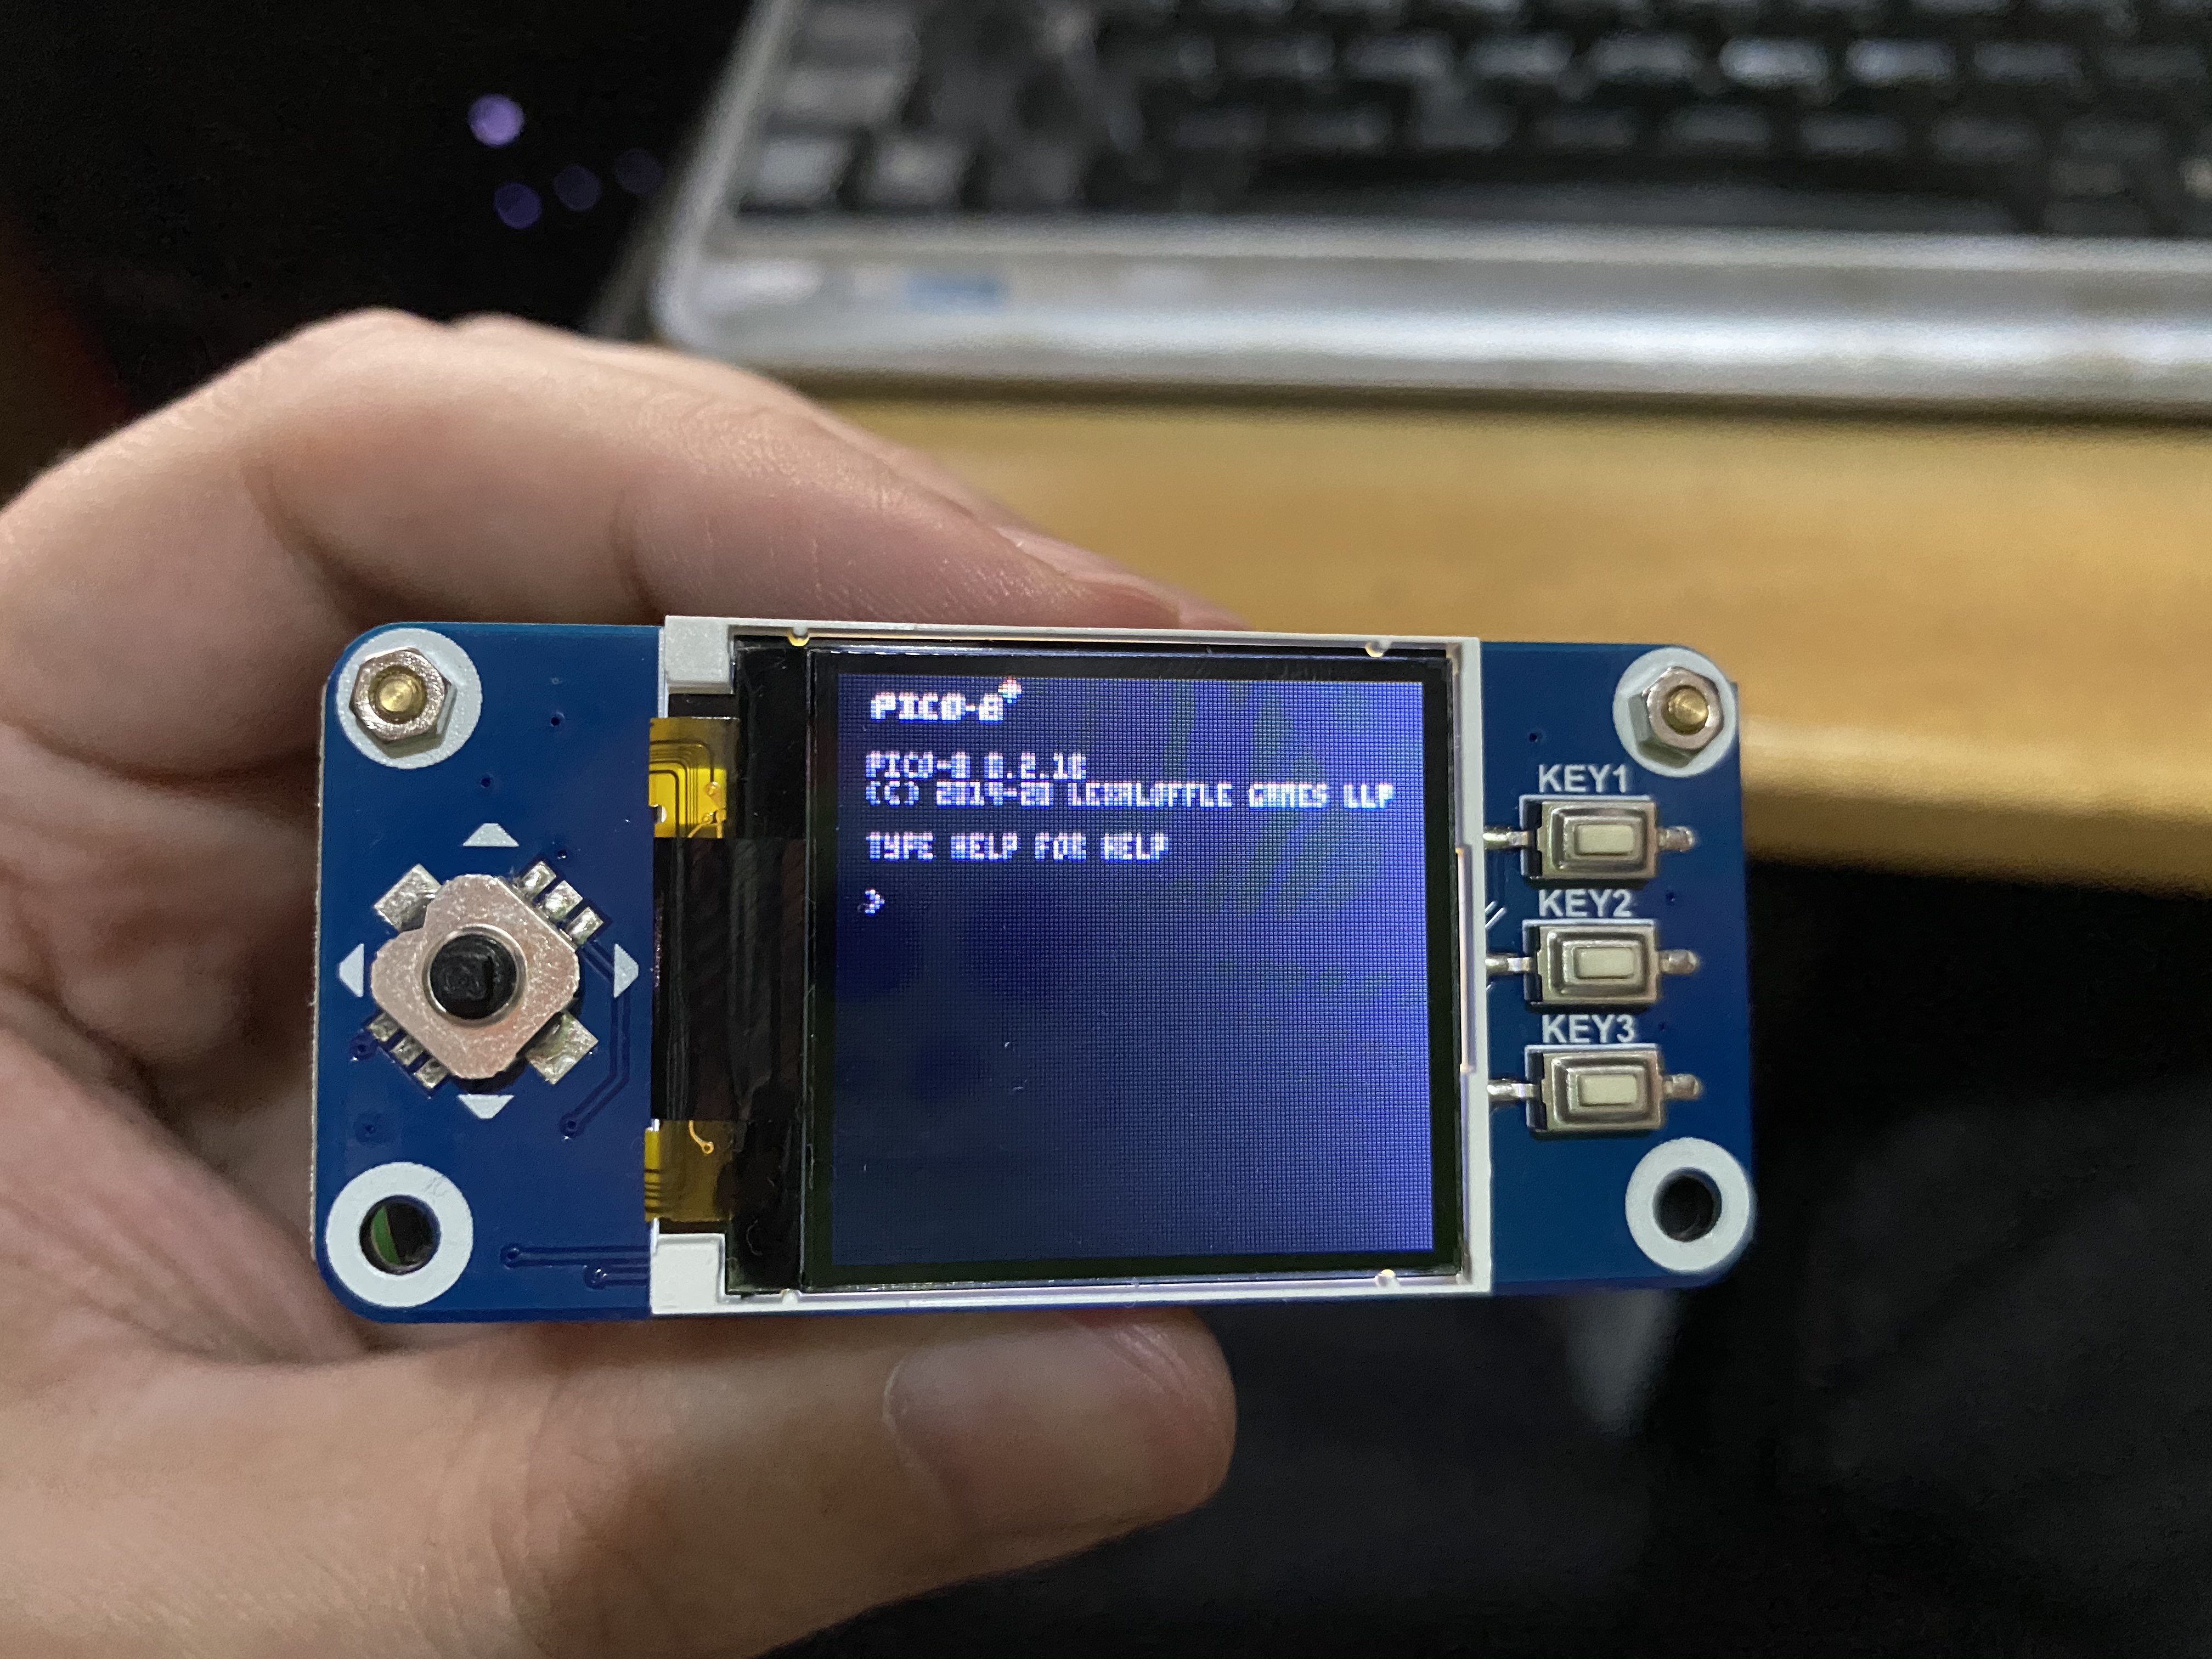
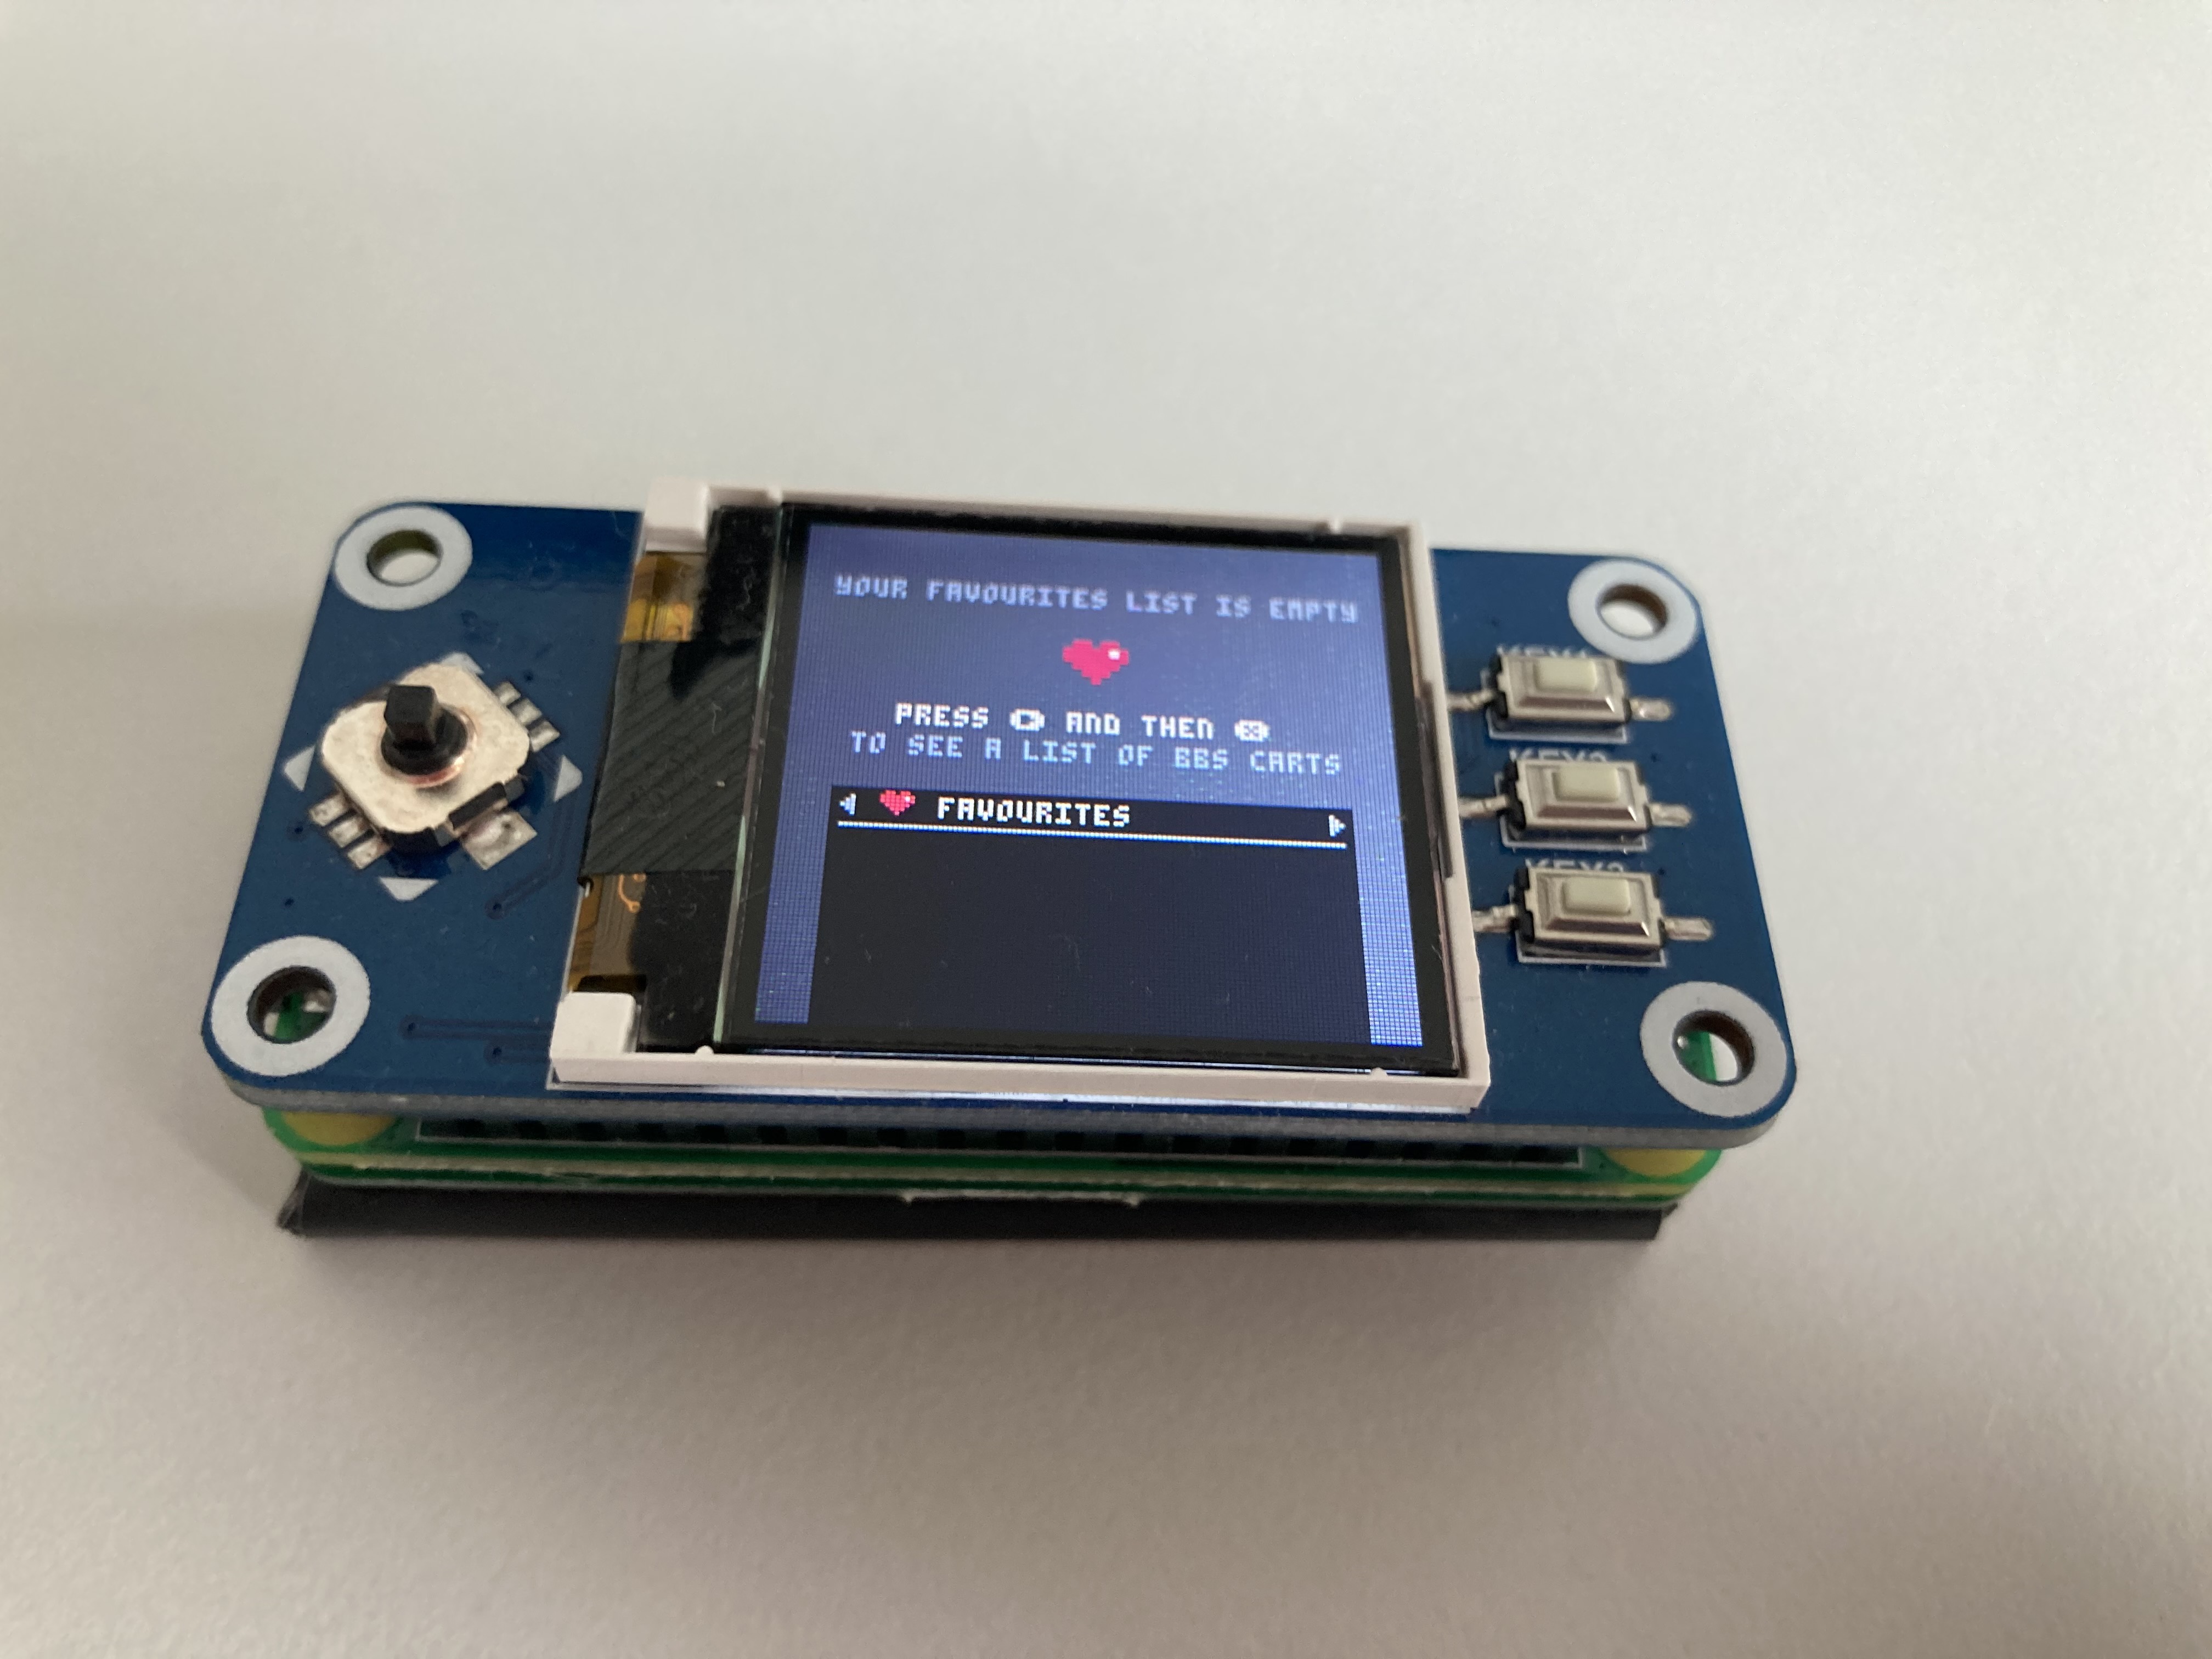
Plug-in, power-up and enjoy all colourful 128x128 pixels of Pico-8 glory on a tiny, square display and in complete silence!
Connect the Pi to the Internet via Wi-Fi (ZeroW), then use the joystick and KEY2 to update and download Pico-8 programs directly to the Pi.
KEY1 functions as Escape
KEY2 functions as X
KEY3 functions as Z

Thanks, this looks great and the tutorial is really easy to undestand, thank you! I would guess that the whole build get's a bit more pricey and bulky when you want to add a battery pack, how does it play in the current state?
It plays just fine.
There's no sound, but the majority of games I've tried work using the joystick for directional control, along with Z and X.
Adding a battery is also going to bulk-up the experience in terms of portability but I did this as I saw a 128 x 128 pixel, square hat and wondered how Pico-8 would look on a screen that used the same pixel count.
As it turned out; quite well.
I don't believe it scales so that each pixel on the screen contains a single pixel of Pico-8's display but it must be close because there's no blurring and everything is clean and bright.
It's just a pity all of the above is in silence!

The following command need to be on separate lines:
git clone https://github.com/tasanakorn/rpi-fbcp
cd rpi-fbcp/
I have acquired the same board and I am testing that on a non W Pi Zero.
Except for the typo above, things work for me.
However, it is not perfect.
I see two areas where things can be improved.
1) The screen copy:
fbcp[642]: Primary display is 480 x 640
fbcp[642]: Second display is 128 x 128 16bps
Because of the primary display size, the aspect ratio is not respected and the result is not pixel. The solution is to ask pico8 to draw on a 128x128 area and find a version of fbcp that does pixel perfect copy.
I have seen or done that in the past, so I'll try to recover some documentation on that topic and propose a solution. I'll have a look at the eyesbonet from adafruit, mlx90640 example from pimoroni and other.
2) I don't really like retrogame from adafruit as it is a loop that scan the GPIO. I have seen better solution on ANAVI play pHAT. It should be possible to use overlay with the same result. This is less of an issue, but I also plan to have a look.
Thank you very much for making us discover this board and making it work for us. Everything else is just fine tuning.
My fault, I may have not followed perfectly your hdmi configuration.
Now the aspect ratio is OK and it seems to be pixel accurate.
pi@pico8:~ $ /opt/vc/bin/tvservice -s
state 0xa [HDMI DMT (87) RGB full 4:3 x4], 128x128 @ 55.00Hz, progressive
Aug 11 23:10:48 pico8 fbcp[402]: Primary display is 128 x 128
Aug 11 23:10:48 pico8 fbcp[402]: Second display is 128 x 128 16bps
Aug 11 23:10:48 pico8 kernel: [ 36.109526] input: retrogame as /devices/virtual/input/input0
The only issue is that this resolution cannot be displayed on a physical HDMI screen.
I would have love to be able to see it both on HDMI and on the LCD like I did here: https://twitter.com/DavidGlaude/status/1018535835904479232
I have found my modified version of fbx2 from Adafruit.
After changing to display_rotation=3 I have a version of fbx2 that work on that board and replace both rpi-fbcp and fbtft.
I reach 42fps so that seems OK for 30fps games, but I believe that some game run at 60fps.
Thank you for your positive feedback.
I admit I did test this thoroughly while writing the tutorial; formatting new cards, writing Raspbian Lite images and copy/pasting my instructions back into SSH sessions before plugging in the hat and powering up.
I thought I'd caught all of my layout errors before posting but found a couple after publishing and corrected those before you found (what I hope is) the last one. These came from pasting from my original text notes and the inevitable re-formatting of mass-pasting.
I wondered where your errors in aspect ratio came from. As shown in my photo at the head of the tutorial, on all of my builds the screen looks pretty much pixel for pixel, though I had doubts myself as to whether each of Pico 8's pixels fell into an LCD cell.
Even then it was close enough for me, as it was only an experiment using a comparatively cheap add-on, just to see how well it would work and I was pleasantly surprised by the results. Enough to feel it worth sharing.
Pity there's no sound.
How are you obtaining updates from the splore menu? Are you using a dongle Wi-Fi adaptor?
I used the official, White RPI dongle before Wi-Fi became the norm but on my zeroes recently, I've been using a MicroUSB Ethernet adaptor, which Raspbian has built-in driver support for.
I would like to improve the instructions, such as reducing the number of file edition and increase the number of command that can blindly be cut and pasted. While this is not possible for config.txt, it could be possible with the module list.
My aspect ratio issue was either a typo or a shortcut I took in the content of config.txt.
At one point I did believe the behaviour was different depending if the HDMI was connected or not.
I did not find any unused soldered PiZeroW at home. My last one is in my TinyPi Pro (with a 240*240 screen). So I used an older one and I have my connectivity with a Ethernet over USB and a USB OTG cable. I also attempted to log with a serial console adapter. With your curent setup, HDMI is unusable on my screen. If I could fix that, it would greatly help.
For the sound, I may have a pHAT DAC or best a Speaker pHAT from Pimoroni. So, the first thing to verify is if I can get the sound in I2S... Anyway it will be uggly from a physical integration point of view. But if it work in I2S, then an Adafruit breadboard might do the trick to add a jack to the board.
However it seems like the recreation of the TinyPi: https://pi0cket.com/tinypi/ So I better try building mine and solder what there is to solder. ;-)


Hello. I just want to thank you in advance for this tutorial and I hope it'll work out for me at least.
I do have a couple questions:
1) how may I safely shut it down?
2) do you think a microUSB audio adapter would help with the sound conundrum?
Best wishes.
Cheez
On my Pi Zero with Waveshare hat, I modified the line which reads:
sudo /home/pi/pico-8/pico8 -splore & |
I removed the & from the end and added an additional line below this:
sudo /home/pi/pico-8/pico8 -splore sudo shutdown now |
By removing the & from the "pico8 -splore" line, the script starts pico8 and then waits for the application to exit before continuing. As the next line tells the Pi to immediately shutdown, simply exiting Pico8 safely shuts down the Pi.
As all three buttons on the Waveshare hat are used by Pico8, there is no option to use one as a safe-shutdown button. Using the method above, I can fire up the Pi, mess around in Pico8 and then safely shutdown.
Of course, you COULD simply SSH into the Pi, if near a computer running a terminal with SSH capabilities and safely shutdown from there, but YMMV.
Re: the MicroUSB sound adaptor, I guess it would work, assuming it can be recognised by Raspbian,
Which audio adaptor were you thinking of using?
I see. So basically, with those slight modifications, I'll be play a game and then when I exit the game, it'll immediately shut down. Nice.
As for the microUSB audio adapter, I was thinking a generic headphone adapter. What do you think?

I didn’t know that Escape brings the pause menu like Enter does! Three buttons are enough, this is great news :D

Great guide ! Thanks a lot It was easy to do.
I'll be trying to add a sound buzzer, I'll post any updates here. Too bad we need a keyboard to save a game locally, but it's great.

Awesome, I also made one of these, but I never finished my tutorial...
(http://reinvanderwoerd.nl/thoughts/2019/02/25/pico-8-mini-console-with-raspberry-pi-zero)

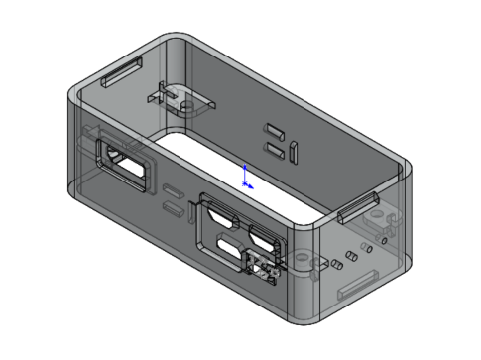
I find an open source case about waveshare 1.3inch LCD display (Same look like 1.44 inch)
https://github.com/PiSugar/pisugar-case-pihat-cap/tree/master/1.3inch_lcd_cap
Could someone change it to fit 1.44(128*128 pixel) display?
Basic case can use directly.
https://github.com/PiSugar/PiSugar/tree/master/model
@Dounx I reached out to their support. I accidentally printed the 1.3" LCD display cap and the 1.44" unit fits perfectly into the cap but the screen is slightly misaligned. I'll update here when I hear more.
The source for sndio has changed. They now recommend the following:
git clone http://caoua.org/git/sndio cd sndio ./configure make sudo make install |
Also what tripped me up for 5 minutes: As you instructed us to move the pico8 zipfile to the pi's homefolder it's good to know that one should unzip it via ssh on the Pi itself, not on Windows. Otherwise the permissions will be messed up and pico8 won't start.
Many thanks for giving us these instructions. 😊

Hey guys, hear me out... it´s not ideal but it could work, like @dglaude stated, the problem is that the screen is recieving 640x480 and it is outputing 128x128, but basically if we could "crop" the image with the correct values, we could make it work with something like this:
disable_overscan=0 overscan_left=24 overscan_right=24 overscan_top=24 overscan_bottom=24 |
on /boot/config.txt
these are not correct values, I just copied it from here
I will work on this tonight, will let you guys know if it worked
EDIT: I just realized that the aspect ratio won´t change, it would just stretch the width...
EDIT2: overscan is not working for me, it just ignores whatever value I put there...
I did it boys
I have a shell script but it is downloading a fork of fbcp-ili9341, for now it will sit on my user, but I´ll see with the author of this repo how can we add it officially to his repository, with some kind of -square-screen flag or something for the build
Here´s the shell script:
https://gist.github.com/badjano/ceff763811093112c53d61347ce52bb3
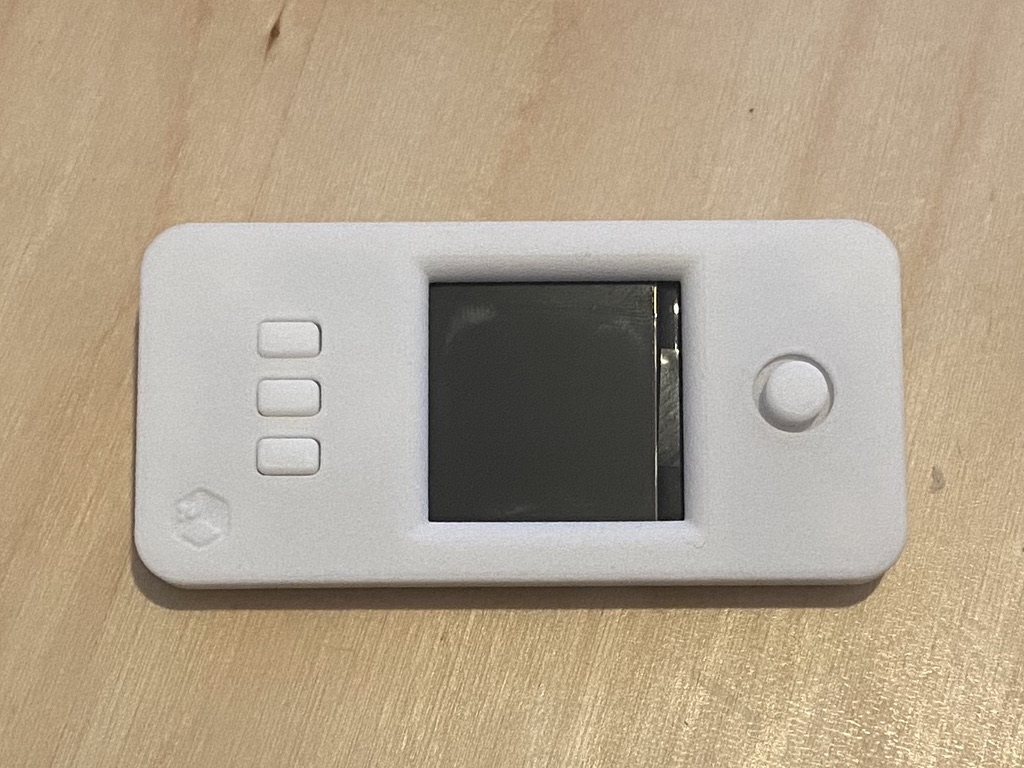
You can pretty easily create a mobile handheld by adding the Pisugar 900mA battery module as you can see here, no cables:
The battery module also includes the needed standoffs. Now all we need is a case. Pisugar provides ready-to-use case designs for the Waveshare:
3D-printing these should cost no more than 10 bucks.
I'm thinking of a nice Gameboy Color Scheme, like grey for the buttons and yellow for the case. If you go down that route please post photos of your finished handheld here.
The buttons of the Waveshare display will be probably a lot more usable as well.
As for audio you could connect Bluetooth headphones to the device.
Hey, I have a question on how to mount the screen together(I don't wanna blow a fuse ;)), do I just put them together, one on top of each other and connect every pin that's above it? THANKS!!

Did this stop working? I get the following when starting pico8
SDL Error: The video driver did not add any displays
** FATAL ERROR: Unable to initialize SDL

I had all the pieces for this around my office so I tried to get the software running on an original Pi Zero and Waveshare 1.44" HAT. I followed the instructions closely, with the exception that I installed the newest versions of bcm2835 (1.75) and sndio (1.9.0).
I also get the same SDL error as cybernesto. I think the issue is with fbtft. I tried installing libsdl2 separately but that didn't work. I might try building the newest version from source. I read somewhere that libsdl2 did not have to be installed separately, but who knows. I'm running out of ideas.
Any suggestions welcome!

Having a similar SDL error. Tried compiling libsdl2 from source with directfb enabled but didn't work. Any ideas?
The path /dev/dri/ cannot be opened or is not available The path /dev/dri/ cannot be opened or is not available SDL Error: No available video device ** FATAL ERROR: Unable to initialize SDL |
tried once again on my RPI Zero WH with both Bullseye & Brookworm but still get the same SDL error for ./pico8_dyn and the following for ./pico8:
SDL Error: Could not initialize OpenGL / GLES library ** FATAL ERROR: Unable to create window Segmentation fault |
Leaving the updated instructions for-the-record:
sudo apt-get install libasound2-dev
WiringPI (ws ref) https://github.com/WiringPi/WiringPi
[https://github.com/WiringPi/WiringPi/releases/download/3.14/wiringpi_3.14_bullseye_armhf.deb]
sndio latest -> https://sndio.org/sndio-1.10.0.tar.gz
rpi-fbcp (won’t work) used fbcp-ili9341 instead. Both of these work:
- https://github.com/juj/fbcp-ili9341
- https://github.com/waveshareteam/waveshare_fbcp/ (also tried disabling TFT & SPI related configs as indicated)
/boot/retrogame.cfg: Added Joystick click ENTER (KEY 13)
/boot{/firmware,}/config.txt: disabled vc4-kms-v3d
# Enable DRM VC4 V3D driver #dtoverlay=vc4-kms-v3d #max_framebuffers=2 |
After updating/re-installing libsdl2 with sudo apt-get install libsdl2-2.0-0 libsdl2-dev I got a sligthly different SDL error message:
$ ./pico8 SDL Error: Could not initialize EGL ** FATAL ERROR: Unable to create window Segmentation fault |
Tried other versions as explained here from similar errors: https://www.lexaloffle.com/bbs/?tid=50708
Specifically 8_0.2.5e & 8_0.2.5e2
No luck either =(
[Please log in to post a comment]