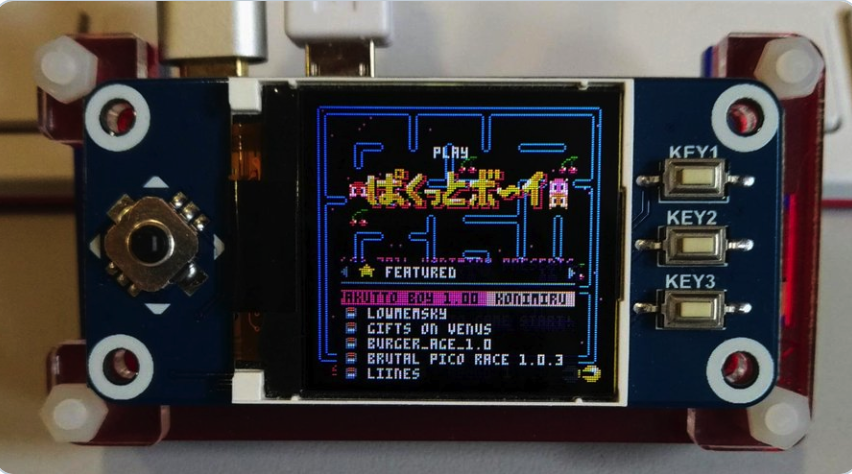
At 128 x 128 pixels, the Waveshare 1.44 inch display with controller is a perfect fit for Pico-8.
The screen Driver being installed, requires a Waveshare 1.44" 128x128 pixel colour LCD display, with joystick & 3 buttons which utilises an ST7735S controller.
Amazon UK link: https://www.amazon.co.uk/gp/product/B077YK8161
Amazon US link: https://www.amazon.com/waveshare-1-44inch-LCD-HAT-Interface/dp/B0781BNC9L/
Built, tested and confirmed working with both Raspbian Stretch lite and Buster lite-based images.
Begin by writing a fresh Raspbian Stretch or Buster Lite image to a 4GB or larger MicroSD card using your favoured image writing tool.
Caution:
Raspbian Buster appears to generate more heat after short periods on a Pi ZeroWH than Stretch does.
Whichever image you begin your build with, please monitor CPU temperature during use. I won't be held responsible for a baked Pi!
A Pi ZeroW can be set-up headless if a properly configured "wpa_supplicant.conf" and a blank file named "ssh" are copied to the root of the MicroSD card, after writing the image but before unplugging and inserting into the Pi.
ON FIRST BOOT
SSH into the Pi or plug-in a keyboard and monitor. Login with username "pi" and password "raspberry"
sudo raspi-config |
Expand the filesystem
Set boot to CLI with auto-login
enable SPI
disable VNC
disable serial
I recommend changing the default password from "raspberry" to something more secure while you're still in raspi-config.
You may also wish to change the hostname while you're in here. I named mine pico8, so I can ssh to pico8.local from other machines for maintenance.
Exit raspi-config and reboot with
sudo reboot |
Once rebooted, login as pi, then update and upgrade the OS and programs:
sudo apt-get update sudo apt-get upgrade |
Reboot once again and re-login if recommended by the upgrade process
Let's begin by getting Pico8 running on the Pi
sudo apt-get install libasound2-dev wiringpi wget https://t.co/jZy96cDeCC?amp=1 -O sndio-1.2.0.tar.gz tar -xf sndio-1.2.0.tar.gz cd sndio-1.2.0 ./configure make sudo make install cd ~ |
Use SFTP (or USB) to transfer your personal Pico download zip file into /home/pi folder
Unzip your Pico8 Raspberry Pi zip file into /home/pi.
This should create a /home/pi/pico-8 folder, which will contain all of the files required to run Pico8.
Now we’ll get the Waveshare 1.44" 128x128 pixel LCD display hat working on the Pi
cd ~ sudo apt-get install git cmake git clone https://github.com/tasanakorn/rpi-fbcp cd rpi-fbcp/ mkdir build cd build/ cmake .. make sudo install fbcp /usr/local/bin/fbcp cd ~ wget http://www.airspayce.com/mikem/bcm2835/bcm2835-1.59.tar.gz tar zxvf bcm2835-1.59.tar.gz cd bcm2835-1.59/ ./configure make sudo make check sudo make install |
Open and edit the modules file to enable the additional modules required to make the LCD function.
sudo nano /etc/modules |
Append the two lines below to the end of the file, save and exit.
spi-bcm2835 fbtft_device |
We need to create a new file for the fbtft configuration
sudo nano /etc/modprobe.d/fbtft.conf |
Add the following lines to the empty file and save it.
# /etc/modprobe.d/fbtft.conf options fbtft_device name=adafruit18_green gpios=reset:27,dc:25,cs:8,led:24 speed=40000000 bgr=1 fps=60 custom=1 height=128 width=128 rotate=180 |
Fortunately for us, Adafruit created a GPIO controller driver, so let's use this to make the Waveshare hat's controller and buttons work in pico-8.
cd ~ curl https://raw.githubusercontent.com/adafruit/Raspberry-Pi-Installer-Scripts/master/retrogame.sh >retrogame.sh sudo bash retrogame.sh |
On the option screen, Select “6 buttons + joystick”. We’ll edit the resulting config file a little later to fit the 3 button and joystick layout of our hat.
Once installed; at the reboot prompt, type “N” so as NOT to reboot your Pi.
Now we’ll edit the configuration file installed and used by Adafruit’s retrogamer driver, to configure the correct number of buttons for the Waveshare hat.
sudo nano /boot/retrogame.cfg |
Use CTRL-K to remove all lines from the file and paste the following lines into the now empty file before saving it and exiting nano.
LEFT 5 # Joypad left RIGHT 26 # Joypad right UP 6 # Joypad up DOWN 19 # Joypad down Z 20 # Button 3 X 16 # Button 2 ESC 21 # Button 1 |
Please ensure each entry is on a separate line as displayed above.
At this stage, we can set the correct display settings for the Waveshare 128x128 LCD within the file config.txt
sudo nano /boot/config.txt |
Add to the end of the file and beginning on a new/empty line, the following lines:
display_rotate=1 hdmi_group=2 hdmi_mode=87 hdmi_cvt=128 128 60 1 0 0 0 hdmi_force_hotplug=1 |
Save the file and exit nano.
Now let's put this all together and have Pico-8 run in "splore" mode at boot.
sudo nano /etc/rc.local |
This file should should be as below. (All we're adding to the file are three lines near the end, each beginning with sudo):
#!/bin/sh -e # # rc.local # # This script is executed at the end of each multiuser runlevel. # Make sure that the script will "exit 0" on success or any other # value on error. # # In order to enable or disable this script just change the execution # bits. # # By default this script does nothing. # Print the IP address _IP=$(hostname -I) || true if [ [size=16][color=#ffaabb] [ Continue Reading.. ] [/color][/size] ](/bbs/?pid=66331#p) |
 29 comments