


[edit: updated to reflect fixes in 0.2.8]
This tutorial will show you how to make a zoib from scratch -- a simple monster that chases the player and occasionally shoots out some bullet patterns.
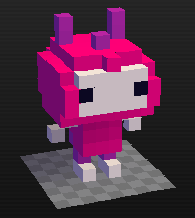
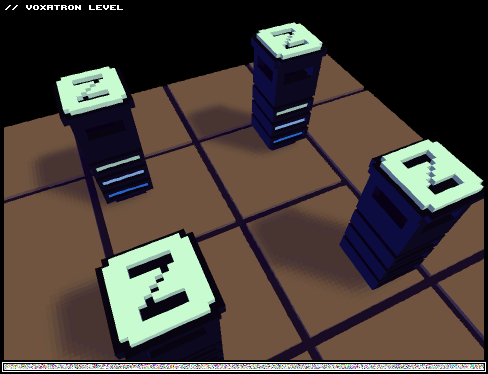
You can see some slightly more complex versions in action here:


Introduction
Monsters in Voxatron are represented as special folders that contain the monster's parts, along with a set of attributes given to the monster. Other objects are represented in a similar way -- for example, an animation is essentially a folder of frames. The monster's folder can include any combination of animations, modifiers, emitters, and anything the monster might emit: bullets, pickups, and even other monsters.
The components we need to make a zoib are:
- The monster's basic structure
- Monster properties
- Some animations to display the monster
- Some modifiers for the behaviours
- A bullet definition
- An emitter that sends out bullets during the attack
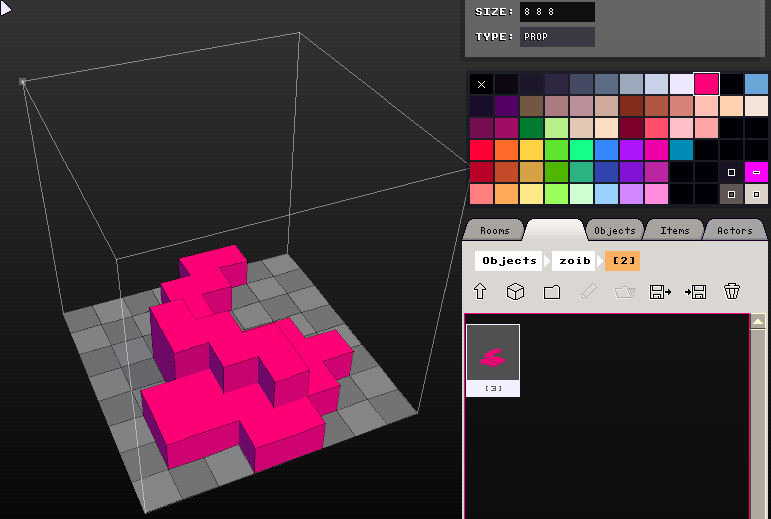
1. Create a minimal monster
Start by creating a monster item and putting an animation inside it.
- Create a new item somewhere in the Objects tab and set the type to monster.
- Double click on the monster folder to look inside (it will be empty to start with)
- Create an animation: new item, set type to animation
- Double click on the animation to look inside (again, empty to start with)
- Add one or more props as frames and draw a test squiggle to get started.
Congratulations! You have a working monster! You can now click the back to room button (bottom left) and place the monster and hit P to play. It will sit there motionless (because the default movement is 'none'), but will hurt if you touch it.
The structure of the monster now looks like this:
Monster Animation Prop frame0 Prop frame1 .. |
If you've made monsters with earlier version, you might have noticed that the 'set marker' button is missing. The marker -- the model shown in the editor when place an instance of an object -- is now automatically taken to be the first prop found in that object's folder.
2. Give the Monster some Properties
Go back to the monster definition using the item navigator. Note that you can click the breadcrumbs at the top of the navigator once to open that folder, or twice to also jump to that item's definition.
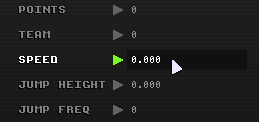
Monsters currently have the following properties:
Width, length and height are in voxels. This defines the collision box and can be completely different from the animation size. Make sure the size of the monster roughly matches its appearance. It also helps to give the width of the animation and the width of the monster the same parity (i.e. both odd or both even).
Gravity: 1.0 is roughly the same as the robot.
Life: Number of hitpoints.
Mortality: Any damage inflicted on the monster is multiplied by this value. i.e. 1.0 means normal damage, 0.5 means 50% damage, and 0.0 means the monster is immortal.
Density: Determines the monster's weight / floating level in water. * not yet implemented! Just leave at 1.0
Points: Points scored when the monster is killed. * fixed in 0.2.8!
Team: Which team the monster is on. Any bullets emitted from the monster will inherit this team value, determining which other actors it can hurt. 0 means no team and will hurt any other actor.
Lock X, Y, Z: Lock the position (X,Y) or elevation (Z) of the monster.
Speed, Jump Height: 1.0 is roughly the same as the robot. You probably want to turn speed down for most monsters.
Jump Freq: How many frames on average between jumps. The world is calculated at 120 frames per second, so a value of 240 means jump about once every 2 seconds. 0 means never, 1 means constantly bouncing.
Turn Speed: How fast the monster can turn in rps; i.e. 1.0 means one full rotation in one second.
Move Style: How the monster turns and moves:
> None: Do nothing.
> Wander: Randomly wander around without reacting to the player's location.
> Chase Player: Turn towards the target (player) and accelerate towards them. The stop to turn parameter means that the monster will only accelerate when facing roughly in the desired direction. Leaving it unchecked results in a more loopy movement path. If X-Ray Vision is not checked, the monster will revert to a wandering behaviour after losing sight of the player for several seconds.
> Patrol: Walk straight until hitting something, and then turn by the specified angle. Angles are in full rotations, so 0.5 means turn 180 degrees.
Interaction: Usually you want to check the first 3, so that the object has collidable sides and can be stood on. Check hoistable & throwable if you want to be able to pick up an object (by pressing shoot infront of it) and throw it (by pressing shoot while carrying).
Eat Walls: If the monster hits wall, bite a chunk out of it about once per second.
Atomize, Leave Debris: Explode into separate voxels on death, that optionally settle on the ground.
Spread out: Avoid walking too close to other monsters. If this is unchecked, monsters tend to bunch up into tight packs (like the demo pig)
Count as Monster: Used in conjunction with the NOMON trigger. e.g. if you're making a crate that doesn't need to be killed in order to trigger a door, you would leave this unchecked.
Hurt Player on Contact: Choose if the player is hurt when standing on top of and/or touches the side of a monster.
Facing Control: The direction in which the monster is accelerating (heading) and the direction that the monster is visibly rotated (facing) are two separate values. This means that you can have for example, a monster that patrols left and right, but is always facing the player.
> None: Remain facing the direction that the actor was placed
> Face player: Always turn to face the player
> Face dir: Turn to match the heading
> Turn: Turn a given amount each frame
Facing Control's turn speed is also given in rotations per second.
3. Give the Monster some Animations
Navigate back to the monster's animation and add some more frames. It's possible to add as many separate animations as desired, but for this tutorial we'll use a single walking animation.
By default, animations will just loop, which is not what we want for a walk cycle; if the monster is stationary, the frame number should not advance. To fix this, navigate to the animation properties and set Play Style to Actor Movement. Also, you'll need to check 'Rotate with Actor'.
I've also given the animation a name: body. You can call any object anything you like, but only one animation with the same name can play at any given time. (** this will change -- see notes on this below in the modifiers section).

The other properties are as follows:
Duration: controls how many world ticks the animation is dislayed for in world ticks. 120 == 1 second. Only relevant for looped / play once and hold animations.
Frame Length: controls how many world ticks each frame is shown for in world ticks. Again in world ticks, so using 8 means that the animation is displayed at 15 frames per second (120 / 8).
Anchor: The anchor controls where the animation is drawn with respect to its xyz coordinates in the world. Monsters' coordinates are taken to be bottom center, and so you normally want to also use this for monsters' animations. Bullets are taken to be at the center of the collision box, in which case animations should also be centered (center center).
Offset: Further positioning with respect to the anchor. These values are in the same coordinate space as the editor -- so if you draw a character facing the camera, then using X = 5 will shift the animation 5 voxels to the right (the character's left), and Y = 5 will shift it infront (towards the camera). Checking 'Rotate With Actor' will cause X & Y to be rotated according to the host actor's current facing angle.
Play Style: Controls how to advance through the frames. The only tricky one is 'Actor Movement' -- this causes the frame to advance when the actor moves one voxel in any direction. So if you draw a walk cycle with feet that move one voxel at a time, they should roughly line up with the ground (avoiding a moonwalking effect).
Paint Mode: Paint Solid only draws voxels on existing world voxels; Paint Empty only draws voxels in empty space (never clobbering existing voxels).
Draw in Screen Space: Ignores the camera position (useful for titles, scrolly tricks), and Random Starting Frame
The rest of the properties: Hitbox size, Gravity, Locking and Interaction are ignored for animations that are part of a monster. They are used for animations indpendently spawned into the world and have the same meaning as the corresponding monster properties. (i.e. they become physical objects similar to monsters).
4. Modifiers
Modifiers are alternative monster definitions that are triggered given some condition. For example, when the monster is shooting, you might like to change the animation and speed of the monster. Modifiers can replace part or all of the monster's definition.
Let's make a modifier for the zoib that causes him to shoot. This is a bit complicated, because we also need a bullet definition, an emitter to throw out the bullet, and a new attacking animation. These 3 things will be contained in the modifier's folder. For now we can test out the modifier without these 3 components:
In the monster's main folder, create a new item and give it the type 'Monster'. This time, check the modifier option.
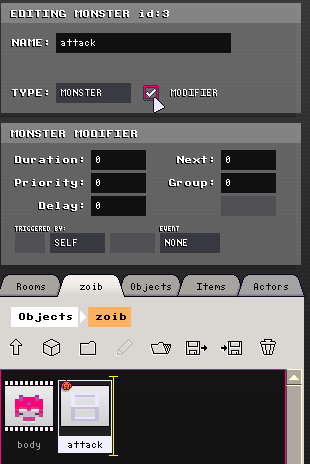
You'll notice that the definition turns grey, and contains the values that we set for the parent definition earlier. By clicking the little triangles, it is possible to specify which values should be modified when the modifier is active, and which values should be taken as-is from the parent.
There are two things we can set now:
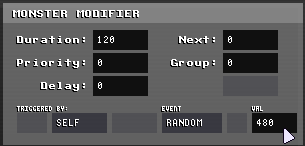
- The monster's speed should be zero while attacking, so click on Speed and change it to zero.
- To control when the modifer is active, set the event to Event:Random(480) and Duration to 120. This will cause the zoib to randomly attack every 4 seconds on average, and remain in attacking stance for 1 second (these values are in world ticks at 120fps).
Test out the monster by placing the monster in the room (if you haven't already) and hit P to play. The monster should chase the player, but then stop moving for a second every now and then.
The modifier activation settings are as follows:
Duration: How long the modifier remains active for in world ticks. 0 means forever.
Next: Which modifier to activate when this one expires (0 for none)
Priority and Group: If group number is set, then only one modifier in each group can be active, selected by highest priority.
Delay: How long to wait before the modifier can be activated again (taken from time of expirey, not activation).
Trigger: Alloes the modifier to activate itself given a specified condition.
Triggers:
Collide: collide with another object (you need to set the which_side parameter pull-down)
Hurt: when host actor is hit
Position: when the host actor is in the air, on the ground, or swimming
Speed: when the host actor has a speed in xy of some value
Life: of host actor
Time: host actor's world ticks ( 120 == 1 second old)
Random: every n world ticks on average
Periodic: every n world ticks
Changing animation when a modifier is active:
Animations follow the same activation rules as modifiers -- only one animation of the same group can be active at a given time. To create an attacking animation that is shown while the modifier is active, create an animation inside the modifier folder and give it the same group number as your walking animation.
I've made a 3 frame looping attack animation for the zoib:
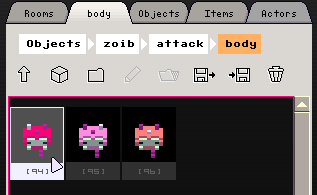
After you've added the animation, hit P to play again, and check that the animation changes when the monster stops moving. If you get overlapping animations (i.e. both the walking and attack animations are drawn over each other), make sure they have exactly the same name.
5. Bullets
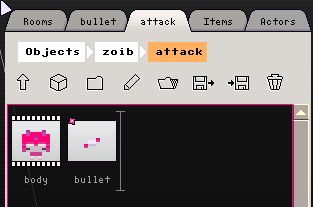
Next up, we need to create a bullet for the monster to shoot out. This will be an entirely self-contained object that could be spawned by other monsters or emitters, and could be stored anywhere in the navigator. But for convenience, it's nice to store it inside the monster's attack modifier.
The steps for creating a bullet are very similar to creating the initial monster. Navigate to the attack modifier's folder and create a new object (next to the attacking animation). Set type to bullet, open the bullet's folder, make an animation, and draw some frames. The result looks like this:
Note: leave the bullet's animation's anchor to the default of 'center center'. This means that you need to draw the bullet hovering in the center of each frame, rather than on the ground as with monsters. You can test that bullets animations line up with their collision hitboxes by checking to see where they leave holes in the walls. If the hole seems to be too high or too low, either the animation is not centered, or the anchor is wrong.
The properties of the animation are similar to before, except that I've used 'Loop' in stead of 'Actor Movement'. Because the animation is hosted by the bullet, the physical properties of the animation (size, gravity, interaction, locking) are ignored. [In future versions the interface will let you know about this automatically.]
Now to the bullet's definition:
Width, Length and Height define the size of the bullet's hitbox. For small bullets I usually just leave this to 0,0,0 -- which means the point at the center of the bullet needs to be inside another actor's hitbox for it to collide.
Gravity: 1.0 means the same as the robot. 0.0 means travel flat.
Duration: How long the bullet should stay alive, or zero for forever. Try 480 (4 seconds) for a fast bullet. You should set some value less than 1200 for this to avoid slow bullets accumulating to a very large number, unless you're very certain the bullet will die at some point. If you're using a positive gravity value and no duration, make sure Collide With Ground is set.
Collide With/ Hurt Same Team: The team index is taken from the host actor that emitted it. A team value of 0 means no team, and never counts as the same team.
Lock: lock position on each axis.
6. Emitters
Emitters are used to spawn any kind of object (including other emitters) into the world. They can be stand-alone independent world objects (in the way that animations can be), but can also be contained in monsters/modifiers to implement attacks.
There's no way to test out the bullet without an emitter, so let's make one quickly just to see the bullet working:
- Inside the attack modifier's folder, make a new item (the 3rd, next to the bullet and animation), and set type to Emitter.
- Before editing the emitter, find out the id number of the bullet by clicking to edit it, and look for 'Editing Bullet id:x' at the top right.
- Now edit the emitter, and set 'Source ID' to that number.
- Set Bursts to 1, Z to -4, and Delay to 0
Run that, and you should see the monster dropping a stationary hovering bullet each time he goes into the attack modifier.
Let's try a triple shot:
- Change Pattern to Spread.
- Num: 3, Magntitue: 0.5, Angle: 0, Rotate with Actor: On, Spread: 0.25
The properties of an emitter are follows:
Source ID: The thing you want to emit. Find out the id by editing it in a different tab (will add an easier way in the future).
Bursts: How many bursts to emit. 0 for continuous.
Burst Frequency: How many world ticks inbetween each burst (by time), or how many voxels the host actor need to travel for one burst (by movement). The first burst is emitted at the moment the modifier is activated (* fixed in 0.2.8)
Spawn Position: Where to spawn relative to the emitter (or host actor's) position. Same meanings as animation offsets; Y = 10 will position the spawned object 10 voxels infront of the emitter/actor.
Velocity: Same again, but for velocity of the burst. This is added to any other velocities generated by the pattern (e.g. so you can have a ring that is expanding, but the whole ring is also moving)
Pattern Single: Emit a single item.
Ring: Emit a circle of items moving apart at speed of 'Magnitude', offset by Angle, and increasing the offset by DAngle each burst (to create spirals).
Spread: Emit an arc of items. Similar to ring, except spread controls how much of the ring to cover. 0.25 means a quarter-circle.
It is currently possible to emit monsters, animations, bullets and other emitters. Don't try to emit the emitting emitter, because you will make Voxatron cry.
Notes
Emitters currently follow the same activation rules as animations; they are active when their parent folder (e.g. modifier) is active. This will probably also change in the future along with animations to allow emitters to activate themselves without the need to be contained inside an additional modifier.
If you can't figure out why something is not emitting or visible, try running the level in debug mode: press left_shift-P to play and you'll be able to see how many objects of each type are active. Also check that you're not emitting staight into the ground (try a large negative Z offset value like -10) and that the object has an animation, and that the modifier is actually triggering (try trigger self.t == 120).
If you want to try modifying the zoib to make multiple attacks, just duplicate the modifier folder (click to select, Control-C (copy), ENTER to deselect, Control-P (paste)), and then change the parameters of the emitter (and possibly the animation and bullet definition).
The zoibs in 'Zoib Arena' are slightly more complex -- they contain an extra modifier leading up to an attack, so that the player has a chance to get out of the way. They use the 'Next' parameter in the modifier activation settings to daisy chain the two modifiers together. This is why the attack modifier has no trigger itself.
That's all for now! Let me know if you have any trouble, or if there are points that need clarifying.
Here's the resulting test zoib file that results from following this tutorial. Feel free to use it as a template for your own monsters:


Thanks for the tutorial! I would like to know how to make a player with the new window too, with the sword as a default
My pleasure. I was hoping to get this done sooner, as I'm sure it's painful trying to deduce how a lot of this stuff works!
The player editor is really half-finished in 0.2.7 -- I wouldn't recommend using it yet except to play with animations. There isn't a way yet to trigger modifiers from player actions, but I'll be adding that in an update soon(ish).

ha ha ha @ Don't try to emit the emitting emitter, because you will make Voxatron cry.

Wow! I just bought the game today and read about the community being temporarily dead/sleeping. It's great to see a tutorial and level exercising the new alpha features from the developer himself.
Just glad to see activity on my first day :D I'll look through the tutorial now then...
@EatenAlive3 We hope you have great time here, people are developing levels right now (I suppose) so it might take a while to things start moving...

Thanks zep this really helps, I spent a lot of time looking at the demo and zoib arena trying to figure out what did what.
Zep is there any way to get a monster to shoot a random attack out of a collection of 2-3 attacks? I could do it if there was an AND operator in the conditionals. Is there a feature I'm overlooking?
It will be possible to make more complex conditional statements like that later, but for now the easiest way is just to make several separate attack modifiers, each one triggering themselves with a random probability. To prevent one attack from overlapping / interrupting the other one, give the modifiers the same group number (non-zero), and both a priority of zero.
Here's another example that has 2 attacks (kind of). Note that the monster never flies and shoots at the same time, or jumps white shooting. You could set all the group numbers back to zero to see the difference.
(EDIT: fixed)
hi i played an old demo of yours zep
https://www.lexaloffle.com/bbs/?tid=1336
and the side moving platform wasnt working anymore in the 3rd or 4th room.
Also im having a problem with a minigame i made which was all very slim long side-on rooms (platform styles). The little mice i made run out of the sides of the screen into the "walls" (front and back edge of screen) which is a problem when the activation for the next room is nomon. and they are still there just off the sides. I can send you a version of the game to see what i mean.
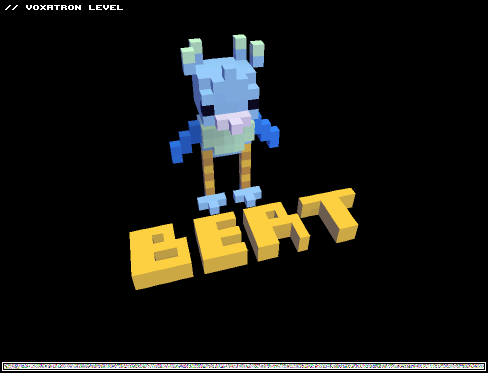
oh, and the bert and other tutorial level above that havent been posted they are blank.
Zep: I tried to load the level, but it gives me the error:
Please update Voxatron to load this level!
failed
I'm assuming you're on your own custom dev version? I get the idea though, thanks!
Oops, yes -- I was using a dev version saving to a newer file format. I uploaded a 0.2.7-loadable version now.
Quick reply, nice :P
Also I looked at what ladybug mentioned in the level editor. Apparently you locked the X axis and left the Y axis unlocked, but patrolling apparently doesn't switch to starting on the Y axis when the one it normally goes on is locked.
It can currently be fixed by switching the locks and rotating the object by 90 degrees, but it seems more like a bug you should fix.
@ladybug
Yes, please send me send me the .png. The loading code does a lot of converting properties from older formats, and it's quite likely I missed a few things. So even if you get it working in 0.2.7, it would be useful to check what went wrong with the legacy loader.
Wow, Bert is awesome! Does exactly what I want, too. It didn't occur to me that modifiers from the same group couldn't override each-other. Now I can finally make proper boss fights, thanks!
Alright, 0.2.7 is loading pre-0.2.6 starting directions wrong, which is causing the patrolling platforms to be stationary (attempting to go down with locked Y)
@ladybug
It seems that very tiny monsters (e.g. 2x4x2) are not colliding with the sides of the room, which is almost certainly what's happening with your mice. Until I release a fix in 0.2.8, you could try making the hitbox a little bit larger.


See if those tutorials will help you to get started :)
[Please log in to post a comment]