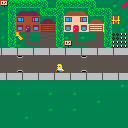
I just finished creating a tutorial for making a top-down adventure game in PICO-8. It's 10 relatively short videos (45 minutes for all 10 videos). You don't need any prior experience with PICO-8 to do the tutorial. I have done this tutorial with many, many kids and the games they create with it are always inspiring.
UPDATE 8/25: I've added a bonus step that allows you to add text to your game! :D
UPDATE 8/27: I added another bonus step that allows you have as many types of tiles as you want. You could use them for treasure, special keys to specific doors, teleporters, quest items, anything you want! 🗝️📜
You can find it on itch.io and on YouTube:
https://www.youtube.com/playlist?list=PLdLmU93eWisKpyk1WZywUSYAq5dkCPFIv
https://mboffin.itch.io/pico-8-top-down-adventure-game-tutorial
If you have any questions or need any help, feel free to let me know. I hope you enjoy it! :)
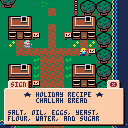
My Happy Challah Days entry for the 2018 PICO-8 Advent Calendar was created using this tutorial as the base code. (I added extra features for the jam, like dialog boxes, quests, and a larger inventory, but its foundation is this tutorial.)

Thanks for posting this, it's gonna be my weekend entertainment! Your game development zine got me started when I bought pico8, thanks again!

@Orgmir You're welcome! Please let me know if you run into any problems or have any questions. I'll be happy to help! 😊

Really great work - good pace, nice code, well explained!
I learned so many new things (the most embarrassing is that you can do "fget(tile, type)"... I only knew about "fget(tile)" and had been doing a bunch of bit twiddling to test the flags!)

@mrspeaker Thanks! Glad it was helpful! :) If you have a game you made with the tutorial, I'm showcasing the tutorial at an event tonight in Portland, Oregon and would love to show off games made using the tutorial. Totally up to you, though! :)

I only saw this tutorial series this morning (and only discovered pico8 a few days ago!)... I have a "game" but it's not in a (very) playable state, sorry!

I've now added a bonus step that allows you to add text to your game! :D

I added another bonus step that allows you have as many types of tiles as you want. You could use them for treasure, special keys to specific doors, teleporters, quest items, anything you want! 🗝️📜

I'd like to chime in. Excellent work. Pacing is perfect. Well rehearsed and tight edits makes this a pleasure to work with. Cheers.

By the way, would love to see your take on platform game creation with pico-8...

@alexr Thank you! I'm glad you liked it. :)
Yeah, I might do a couple other game types first. Unfortunately, platformers are one of the hardest types of games to make. They seem so simple, but to do it right (or do it well), it takes an unbelievable amount of very specific code and knowledge. But who knows! Maybe I can figure a way to distill it down into something simple that isn't too awful to play. 😆

That is exactly why I was asking. :)
With gravity, accel, friction, wall bouncing/sliding, it’s a challenge.

Thank you, this is brilliant! Marking it down for future reference.

I'm watching step 6. Learning stuff if you can believe that. :)
I noticed when you said you wanted to create the panel to show the inventory, wouldn't it be easier instead of calculating where the camera is to just use CAMERA() as it will automatically get repositioned before showing the map and player again ?
function show_inventory()
  camera()
  invx=40
  invy=8
  rectfill(invx,invy,invx+48,invy+24,0)
  print("inventory",invx+7,invy+4,7)
  print("keys "..p.keys,invx+12,invy+14,9)
end
|
Step 8 you are toggling tiles by constricting the range based upon the map the player is on. Wouldn't it be easier just to scan all the tiles 128x64 ? Pico is really fast and should be able to handle it.
Final step 10, you can use RUN() instead of EXTCMD("RESET"). Does the same but no screen twitch.
Gave you a star too cause I did learn new stuff.

Finishing up:
PICO-8 Top-Down Adventure Game Tutorial - Bonus Step - More Tile Types
Ah, this was a problem in S2 - to define multiple objects.
What I did there was give a 3-character attribute to each graphic tile. In some cases the first character denoted a possible 99 definitions, "#00-#99" for signs and messages.
As you have walls, keys, and doors, in your code in the sprite editor you would click on a sprite and enter a 3-character code such as.
"WAL," "KEY," "DOR."
I made this suggestion for Pico-8 just yesterday I believe.
https://www.lexaloffle.com/bbs/?tid=35330
Failing that I could write a function for it to assist others I suppose.
... and ... is that all there is ? No further tutorials ? Hungry for more.

@dw817 Thanks for doing the tutorial! I'm glad it was helpful! :)
With regard to not using camera() in drawing the inventory, I didn't want to introduce the (admittedly minor) complexity of resetting the camera after having already set it. I also really wanted to cement in the idea that if you move the camera, and want things to draw on the screen, you have to draw in the new camera space. It's not a huge deal, but something I wanted to keep.
The fact that you had the idea to reset the camera for that step is actually great, because it means you clearly understood how it works enough to modify and extend the tutorial to your liking, which is exactly my goal with the tutorial! I want people to make changes to what they make with the tutorial! :D
With regard to swapping tiles, unfortunately, going through the whole map is relatively CPU intensive. If you check CPU usage, doing the 256 tiles on screen takes about 20% CPU. Doing all 8192 tiles takes 541% CPU. So even though it's happening only once a second, that's quite a spike. I'm sure going through the whole map could be optimized, but as you probably noticed, I wasn't going for super-optimized dense code with this tutorial, but rather simplicity for people brand new to making games.
You're right, I could definitely have used run() to reset, but I kind of liked the glitchy reset artifacts. ;)
The way I extended the number of tiles you can use is really only one way of doing it, but it's the way I found that required the least amount of explanation of new ideas and the least amount of code changes.
Another way to to have up to 256 different tile types is to still use the sprite flags, but use fget() in a different way. (You may know this, so I'll just explain for anyone else reading.) The way I used fget() for the tutorial, you give fget() a sprite number and a sprite flag to check and it gives you back true/false on whether that specific flag is on or off. But, if you give fget() just a sprite number, and not a specific sprite flag to check, then instead of returning a simple true/false, it uses all the sprite flags together to create an 8-bit binary number (also called a bitfield). So if sprite #5 has its sprite flags set to 01001100, then fget(5) will return 76. This method allows you to have 256 different tile type variables to compare against, not just the maximum of 8 with the simple method used in the initial 10-step tutorial.
But again, I just chose the method I did for the bonus step because it required the least amount of explanation and changes and it was, I felt, the easier method to mentally grasp. (Bitfields are a bit of a mental leap for someone brand new to programming games.) But again, it's just one way of doing it, and I'm always happy to see people extend and change the tutorial to fit their own personal style! :)
And I do hope to make more tutorials! I'm in the middle of another one right now. Thanks again, and I appreciate the feedback. :)

Glad to help. I found your tutorial very professional. I could never do something like that with the speed and grace you did. :)
However as I was completely unaware of the flag system for Sprites in Pico (and their limitations) I'm building a new type of sprite-flagging system and onboard editor now. It will let you add an optional 36 single-character flag types to a sprite (0-9 and A-Z) as well as have any length text name for that same sprite too (completely optional).
Basically you import your sprites and run the code. Then copy 2-lines. One your sprite definition (single string), the other, the function to handle it. Sounds complex but I'll try to keep it simple when done.
. . .
Wait ... Hmm ...
Ah ! You are correct. I had the CPU check in the wrong position. Corrected. Dang it really does take 76% CPU to check all that ! Code follows:
function _update()
  cls()
  map()
  for i=0,63 do
    for j=0,127 do
      if mget(j,i)==0 then
        mset(j,i,1)
      else
        mset(j,i,0)
      end
    end
  end
  cpu=flr(stat(1)*100)
  print(cpu,0,0,8)
end
|
Guess we could use two new global commands that would be super-fast. MSETCHANGE(Orig,Dest) and MSETSWAP(Orig,Swap)

Could you make a tutorial for sound only?
I know you cover it slightly in your tutorial series, but I don't know what to click to do what, what buttons to use - I don't understand the controls at all in the sound editor.
The best you could do is make a sound file, and every time you click or press something, saying "I just pressed X keyboard key or X mouse button over Y icon to do Z action"
I'm not able to follow along when you create audio because I don't know the controls. I tried looking for other tutorials, I looked on Reddit, I looked through this forum (which is how I found this post), I looked through the official manual. It's not clear at all what the controls are
Could you make a tutorial specifically for sound, where you teach all the controls please?
EDIT: video number 10 from this post explains it pretty well https://www.lexaloffle.com/bbs/?tid=35115
Direct link to video: https://youtu.be/gMrJo88xi2M
It's in Polish but it has English subtitles, if anyone struggles with the sound editor like I do. It's explained pretty well.

@SamSibbens I might do one at some point, but in the meantime, check out this playlist by Matt Tuttle:
https://www.youtube.com/playlist?list=PLjZAika8vyZkyOjoCp0EbHeIFZ8MLlhvg
Even thought it's a few years old, almost all the information is still correct today. I hope that helps! :)

@MBoffin Hey there! I love your tutorial! As a beginner, you made it super easy to follow and understand what was happening in the code, so that I could experiment and have things work for my game.
I'm finishing up work on the game I built with your tutorial, and I'm just curious if you could briefly explain how to do conditional dialogue based on the current code?
I'm doing a scavenger hunt type game, and I really want characters to have different dialogue before and after you complete their tasks or get their objects from them.
I thought that if in the Text_setup function I could add an if/then statement before the add_text() it might do the trick, like how the inventory works, but I keep running into syntax errors. What am I doing wrong, or rather what should I be doing to achieve this? Should I be editing the Interact function instead?
(For example (and note that p.cheese changes successfully with the interact function):
function text_setup()
texts={}
if (p.cheese=0 then add_text (56,49,"gee. i sure am\nhungry"))
elseif (p.cheese=3 then add_text (56,49,"that looks tasty\thanks"))
elseif (p.cheese=1 then add_text (56,49,"wow! that hit the spot!"))
end
end
I noticed that you did some conditional stuff like what I want in Happy Challah Days, but the code was a bit difficult for me to follow.
Thank you again for your awesome tutorial! You're a great teacher!

@Foppy_Deluxe Thanks for the kind words! I'm glad it was helpful. :)
Doing conditional text definitely adds a bit more complexity. Basically, for each sign location, you would store not only all the texts that location might show, but store which of those texts are currently the active one. Then, when things happen in the game, you have to update that location to tell it which text is now currently active at that location.
One reason you were running into problems is because text_setup() only runs one time at the beginning of the game. So any logic based on, say, how much cheese the player has, would always be based on how much cheese the player has at the beginning of the game.
I'll make a modified cart that shows one way you can do conditional text and post it here for you.

@MBoffin Oh!! That makes a lot more sense! Thank you!
And thank you so much in advance for the cart, too! It's very much appreciated and helps a ton because I'm a visual learner!

@Foppy_Deluxe Here you go! I heavily commented all the new bits of code (or changed bits of code). Let me know if you have any questions on how it works. I'm happy to help explain.

Hmm ... I'm thinking an advanced map editor might be in the works to help in this instance since I finished that sprite flag engine. One that lets you store scripting data - great for signposts and NPCs.

@dw817 Sounds good! But if you do, would you mind putting it in its own thread? I'm trying to keep code in this thread limited to simple, basic code that gently extends what's in the tutorial. Feel free to link it in a reply, but if the code and explanation and so forth could be in its own thread, that would be awesome. Thanks! :)

I will. Don't worry. I'll always do that from now on.
BTW, just finished a fader. Fades one picture to another by 16-color palette. Yes that was as hard to code as it sounds. Will post it on the morrow.
Hope to see you there ! Bedtime for now ...

Wow! This is amazing! (I also appreciate the addition of cheese!! :D) Your comments are super clear, and I think I'm almost there!
I've currently got it so that 2 of the 3 messages are working. What I'm trying to do is give the NPC 1 "cheese" object; a message before we give the NPC the cheese, a message when we give it to them, and one after we give it to them. However, when my player touches the NPC tile with the item, it displays the first message, and then after plays the third message, but never the second.
Here's how I tried to (unsuccessfully) achieve that:
elseif (is_tile(man,x,y) and (p.cheese>0)) then feed_man(x,y)
if (p.cheese>1) then
go_to_text(35,55,2)
elseif (p.cheese==1) then
go_to_text(35,55,3)
end
function get_cheese(x,y)
p.cheese+=2
swap_tile(x,y)
sfx(1)
end
function feed_man(x,y)
p.cheese-=1
p.gold+=1
swap_tile(x,y)
sfx(5)
end
Where am I going wrong?
My thought process is that if active_text=1 when p.cheese=0 (or at least unless specified?), then by adding two to p.cheese in the get_cheese function (instead of +=1) we can toggle a middle message when p.cheese>1 , and subtracting 1 should allow for the followup the next time we touch the tile because p.cheese==1. But, I only seem to get the first message for the first two interactions, and the third for the third.
Thank you again! I'm looking forward to your next tutorial series! This one was a blast!

@Foppy_Deluxe I think what's happening is that when the player goes to the man, they get MSG 1, so then they pick up cheese, so now they have 2 cheese. Now, when they go to the man, they have more than 0 cheese, so they feed_man(), which brings them down to 1 cheese. Since they don't have >1 cheese, it checks the elseif, which is true, because they have 1 cheese after feeding the man, so you get MSG 3, and it just skips MSG 2.
You may have to move feed_man() after you check if they have >1 cheese, so it will first switch to MSG 2 and THEN feed_man(), bringing them to 1 cheese. That way, the next time they go up to the man, it will see 1 cheese and switch to MSG 3.
Based on your description, I think that's what is happening. Let me know if that helps or not.

@Foppy_Deluxe The other thing you might consider doing is putting the text changing code in the get_cheese() function. So after they get cheese, it checks to see if they have more than one cheese at that point, right after their cheese went to 2, and then changes the man's text accordingly (to MSG 2). Then, when they interact with the man, it will first show them MSG 2, and THEN it will see they have >1 cheese and feed_man() and switch to MSG 3. Then, the next time they go to the man, it'll show MSG 3.
Basically, it's just a matter of almost diagramming out what you want to happen when and under what conditions. This kind of thing is definitely worth some pen-and-paper diagramming, as it can be kind of hard to hold it all in your head when reading through the code.

@MBoffin Awesome!
Adding the go_to_text(35,55,2) to the get_cheese() function did the trick!
Again, thank you so much! I really appreciate your help and the fact that you took the time to tell me why and how the code is functioning so that I can learn and understand. As I said before, you're a great teacher, and I look forward to your next tutorial!!

This looks really interesting. What age children have you used it with?

@extar I've usually used this particular tutorial with students 11-12 and up. Some students younger than that have done it, but for them it's more of a "rote copying of exactly what's being written to see if it works" than actually digesting and understanding what's happening. And that's okay too! (It's how I learned a lot of programming when I was a kid.) Each child is different, though, and some as young as 10 totally get it, far better than older kids who have done it.
And thanks for the comment you left on the videos. It's very much appreciated. :)

Thanks for the detailed reply, I teach coding to 5-11 year olds, so this would probably be very close to the limit for what I could try. I've been wanting to use Pico-8 for some time, so this tutorial is something I might try in future. Thanks again!

I have just started with pico-8.
Im trying to add a main menu to the game from your tutorials
But it just doesnt draw it. When I run the game it just starts the game,no main menu. Do you know why is this?
I also added a variable called active_menu=true that is set in the draw_menu() function
I told the timer function to only start if not active_menu
Then in the init function I wrote
Function _Init()
Draw_Menu()
if btnp c then
Map_setup
Make_player()
music(0)
end
game_win=false
game_over=false
end
For some reason it doesn`t run the draw_menu function and only does the rest
Thank you!

PICO-8 doesn't send stuff to the screen until after it runs _draw(). So even if you put, say, 100 circle functions in _init(), it'll all get erased when the cls() line runs in _draw().
So it's basically doing this...
1) Run _init()
2) Inside _init(), now run draw_menu()
3) Draw a bunch of menu stuff to the screen
4) Do all the _update() stuff
5) Run _draw()
6) Inside _draw(), run cls() and erase everything on the screen
7) Do the rest of the _draw() stuff
8) NOW show the screen to the user (after it's erased everything at the start of the _draw() function)
I hope that makes sense.
In my PICO-8 zine (which is free to download on itch.io), on pages 55 and 54, I give an example of a way of doing multiple game states (like a menu screen before the main game). Hopefully that's of some help to you. If not, let me know. I'm happy to answer any questions.

That makes sense
I should have thought about it
Thanks a lot!

In tha game for the advent calendar you managed to make the text fluid, one letter after another a fraction of a second between them.
How?
In my game the text appears all together not like in the game for tha advent calendar.
Wich is pretty cool by the way

@ExtrovertPlatypus Here you go!
https://www.lexaloffle.com/bbs/?tid=35381
That post I made has a heavily commented cart that shows exactly how you can do the kind of flowing text I did in the advent calendar game. Or, if you want to see it in PICO-8 directly, in the PICO-8 console, type: load #mb_textflow

Thanks a lot for your quick answer!
Your posts, tutorials and your zine have been super helpful

I should mention that the cart is easier to understand if you understand coroutines. Pages 56 and 57 of the zine I linked above has an explanation that might help. If not, let me know, and I'd be happy to explain further.

The zine is pretty clear
This is the first programing thing I have ever done and I thought learning would be almost impossible.
You proved me wrong
Thanks

Hearing that makes me happier than you can possibly imagine. 😊 I'm glad to hear it's going well.
Don't get discouraged, though, if you do run into something that just seems impossible to figure out. That happens even to those of us who have been programming for literally decades. Just ask here on the BBS and lots of people here are happy to help.

Could you add the flowing text to the original code of the tutorial, just to how it goes because I have been trying to compliment them but its kind of difficult, and in the kallah days one there is a lot of code for each character
EDIT: Never mind I figured it out on my own

love it, just followed the tutorials, made a Simpsons themed version based on your tutorial
Great tutorial, broken down into easy to learn sections... thank you :-)
(it's only a basic version I made)


@MBoffin, I noticed you had code tabs in the editor. I didn't have that in my version of PICO-8 so I updated to the newest version. I still don't have that feature, is there anything I need to do to enable that?

@puchodr When you first start PICO-8, what version does it say you have? There's nothing to enable if the version is right. They will just be there. (You will start with just a tab 0, with a little + next to it to add more tabs.)

@MBoffin, That was weird, I reinstalled it and now it works. I was using 0.10.0c. Thanks for the help.

I just found this post, I must say this is a great resource, thanks @MBoffin.
I have not used sprite flags yet, but now I can see how much value they can add to a project. The clever use of coroutines to display dialog text incrementally (Happy Challah Days) is also very neat, and not something I would have thought of doing, yet it is so simple and compact.
So I have learned a couple of things from your game already, and hope to learn a lot more.

I want to thank you for this tutorial. It has helped me start an actual major project, though I'm still ironing out the bugs before I actually work on it some more and release it. Thanks again for the boost. <3
[Please log in to post a comment]







 (1).gif)

