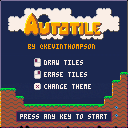
Controls
- Left Click: Draw Tiles
- Right Click: Erase Tiles
- Z/X: Switch Tileset Theme
Description
Lately I've been playing around with procedurally generated platformer levels and as part of that I started exploring an autotiling function. The goal was to be able to generate a level layout using one algorithm, then apply autotiling to theme the level.
How It Works
The autotile function has a signature similar to map. It accepts six arguments, an x and y coordinate of the map, the width and height in map tiles to apply the autotiling to, the sprite to use as a rule tile for tiling, and a table containing bitmask data for each rule.
The bitmask rules look like this, {0b00000000, 2}, where the first value is the mask and the second value is the sprite id to replace the rule tile with. The second argument can also be a table of tiles to randomly choose from if you want to have a variety of tiles for a give position.
Bitmasks
Each bit of the bitmask corresponds to a possible surrounding tile starting from the top left, down to the bottom right. Here's an example of how a bitmask translates to the relative tiles:
-- Given A Bitmask 0b01011010 -- Where X is the tile being evaluated ------- |0|1|0| ------- |1|X|1| ------- |0|1|0| ------- -- The current tile has tiles above, below, and on either side. |
Project Status
I'm not sure yet what else I want to do with this but I figured I'd post it and see if anyone had any questions or ideas. The entire cartridge is more verbose than it needs to be to help with understanding, but I'd be happy to hear how you all would change it.
Thanks for taking a look!

holy smokes. i think i am reading this correctly and that is awesome.

cool demo! more info about autotiling in this article: https://8bit-caaz.tumblr.com/post/170314485678/binary-and-tilesheets
[Please log in to post a comment]


