


Corewar is played between two programs written in Redcode, a low-level language similar to assembly.
Players write a program to eliminate all opponents in the memory (core) of the virtual computer.
The "sandbox" goal of Corewar is to write code that will cause your opponent code to terminate.
A set of challenges with incremental difficulty (like in all Zachlikes) is yet to be created.
This game is part of the Zachlike Jam and currently work in progress.
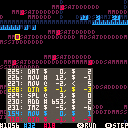
The above screen with the dancing letters shows a 800 cell memory (core), with 1 instruction per memory
location. The letters represent the first character of the opcode stored in that memory location
(so D=DAT, M=MOV, J=JMP, etc). The blue/red color shows who "owns" (has written) that memory cell and
the highlights show the instructions pointers for all the processes of that color.
Example warrior code
This program will overwrite every 4th memory position with a DAT instruction, potentially corrupting
& killing the other process:
0000: ADD # 4, $ 3 0001: MOV $ 2, @ 2 0002: JMP $ -2, # 0 0003: DAT # 0, # 0 |
Learning Redcode
Read the beginners' guide to Redcode for a thorough
introduction to the Corewar language. Further below you will find an overview of the supported
opcodes and address modes in this version of Corewar.
User Interface
main menu screenshot
When running the cartridge, you enter in the main menu with the following options:
- Missions - Complete a list of challenges (work in progress)
- Simulator - run a fight between two warriors
- Editor - write the code for a warrior
- Manual - In-game details on the instructions.
Missions
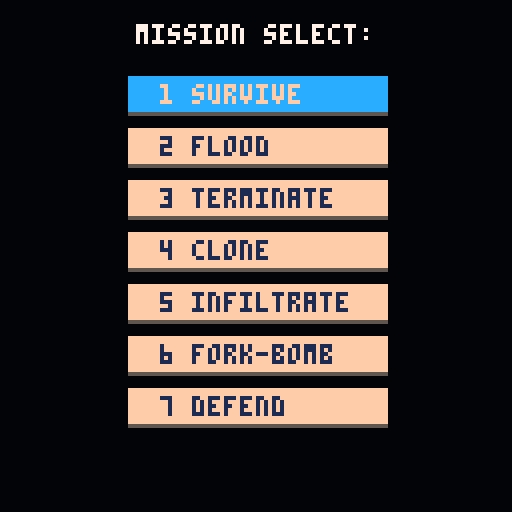
mission select screenshot
Select one of the available missions, they are in more-or-less increasing difficulty and challenge you to explore the Corewar system.
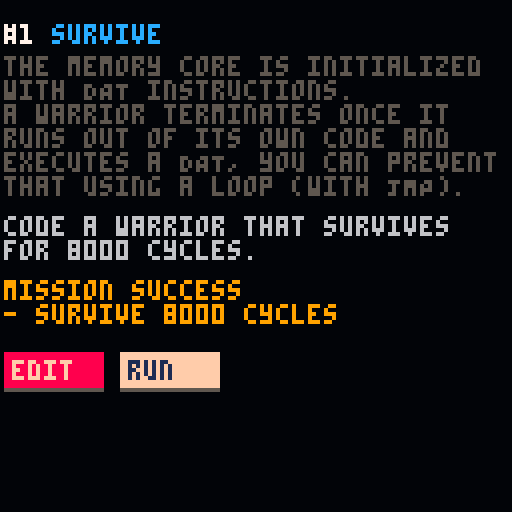
mission details screenshot
For each mission a short introduction is given, followed by the core objective and a list of goals that need to be completed in order for the mission to succeed. From here you can create/edit the warrior solution
using the in-game editor (see below for details on the editor). Once you have created your solution,
you can run it in the Simulator and test it against the mission objectives (see the next section for more
on the Simulator).
Simulator
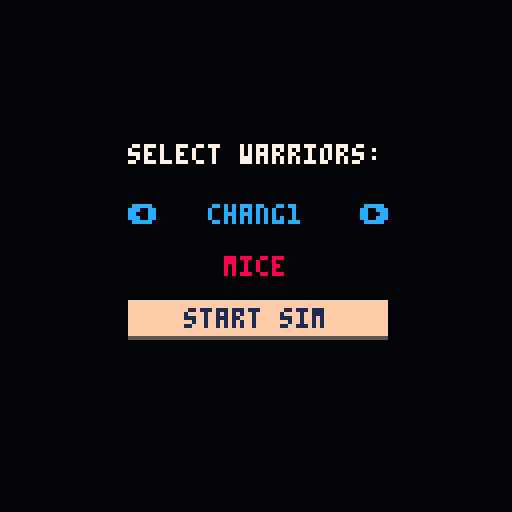
warrior selector screenshot
Select which two warriors (blue and red) will fight against each other. You can also have a warrior
fight a copy of itself.

simulator intro screenshot
The warriors are loaded into the core at equal distance (but with a random offset).
The default coresize is 800 cells and will run for 8000 cycles. On the bottom row you can see the
current cycle (white #0), the number of blue processes (#1) and the number of red processes (#1).
When a warrior doesn't have any processes anymore (#0) it loses, if both warriors are still running
after 8000 cycles the game is a tie.
The characters M,J,D,S,A, etc are the first characters of the opcode in the memory, giving you an
idea for the "fingerprint" of the each warrior. The highlighted character is the current active
instruction from the process queue.
Press ❎ to run / pause the simulation. Press 🅾️ to step through it one cycle at a time. When
the simulation is paused, you can inspect the memory by moving the debug cursor (yellow square)
with the arrow keys.
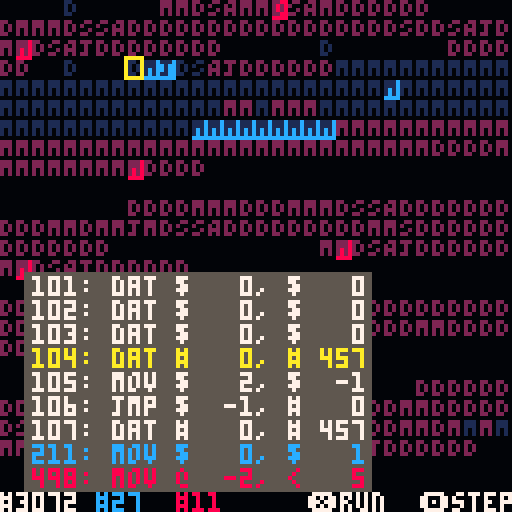
simulator pause screenshot
When paused, you can see the memory around the debug cursor (yellow highlighted). The blue and
red active instructions are also shown.
simulator pause screenshot
After running for a while, you can see that both warriors have spawned multiple processes and
filled the core with their data / instructions.
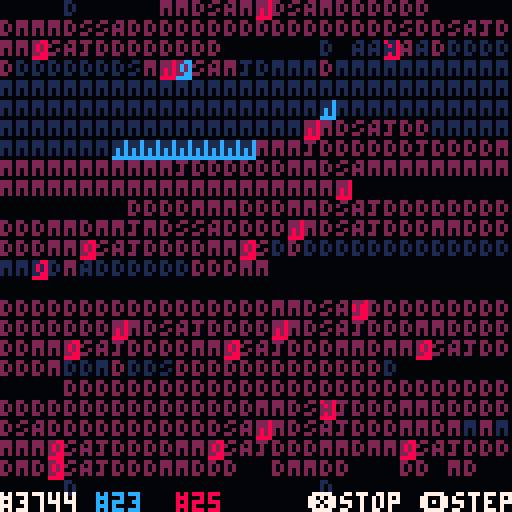
simulator run screenshot
Running ❎ the simulation at full speed.
simulator end screenshot
The simulation has ended at 8000 cycles, both warriors are still alive (blue with 7 processes and red
with 26), resulting in a draw. You can restart ❎ the simulation of go back 🅾️ to the main menu.
If you want to exit the simulation before it has ended, press both the ❎ and 🅾️ buttons at the
same time while paused.

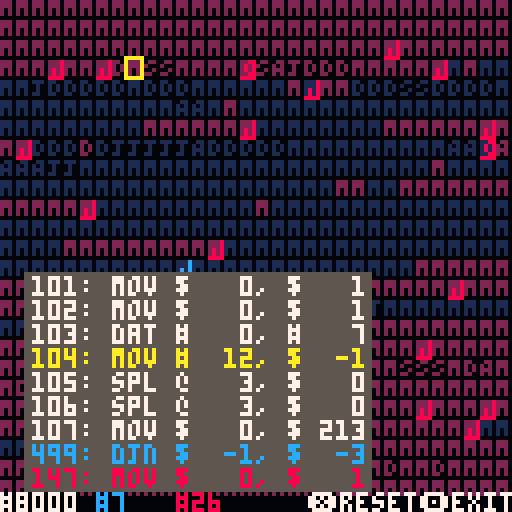
simulator mission result screenshot
If you are running the simulator for a mission solution, you will see if you succeeded to complete the objective of the mission. Any completed or failed goals are listed, allowing you to understand what went wrong.
Editor
editor screenshot
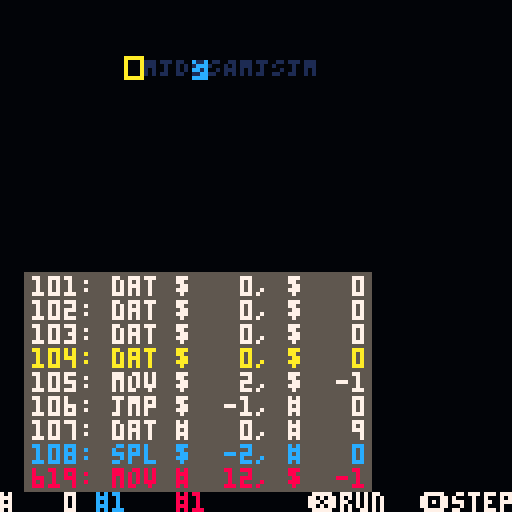
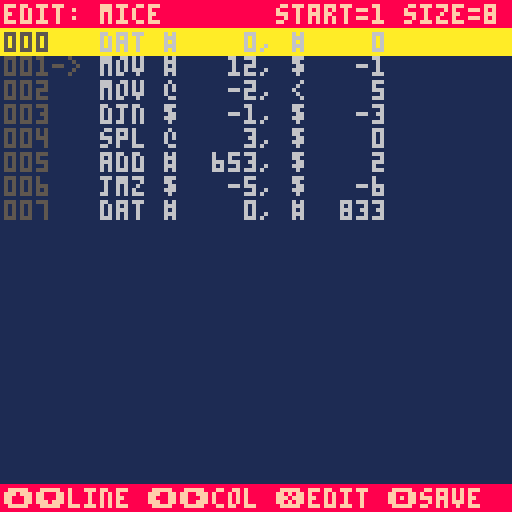
After starting the editor, you can see and change the instructions for the current warrior. Editing
is done with the 6 PICO-8 buttons; the 4 arrow keys and the ❎ and 🅾️ buttons. Within the scope of
the editor, the ❎ button is commonly used to edit / confirm and the 🅾️ button for undo / save &
back to the main menu.
At the top of the screen you can see the name of the current warrior (MICE), the starting position
(also indicated by the -> arrow at line 001) and the size (8) of the code.
The first column are the line numbers (000), followed by the instruction / opcode (DAT), the
A-address modifier (#), the A number (0), the B-address modifier (#) and the B address (0).
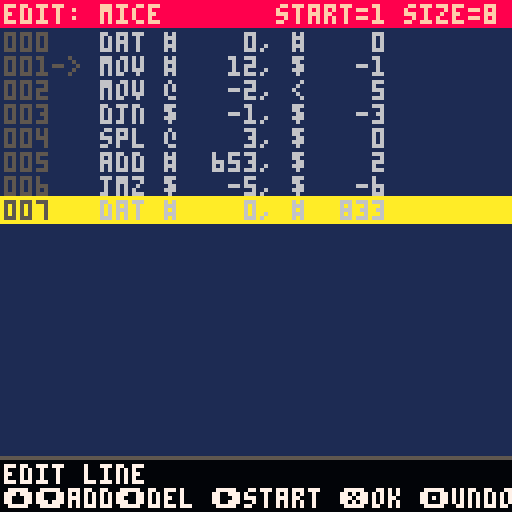
edit line screenshot
Use the up/down buttons to change the current line, you can enter the line edit mode by pressing
the ❎ button, which lets you add a new line above/below (up/down) the current line, delete the
current line (left) and set the start position (right) to the current line. You can make multiple
changes while you are in the edit line mode. Press ❎ to confirm the changes or press 🅾️ to undo.
Use the left/right buttons to select a column on the current line, you can then edit the column
value by pressing the ❎ button.
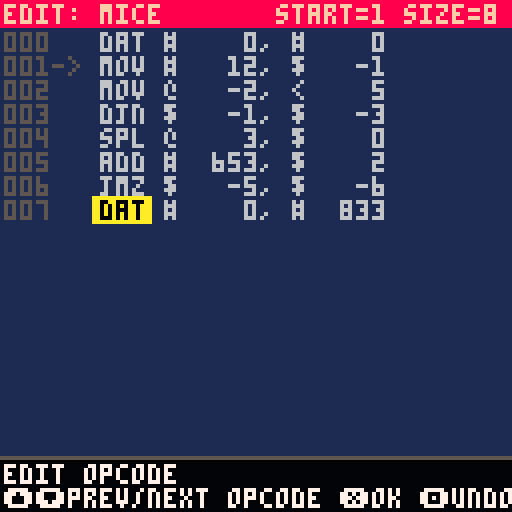
edit opcode screenshot
When editing the opcode, you can cycle through the opcodes with the up/down button.
Press ❎ to confirm the change or press 🅾️ to undo.
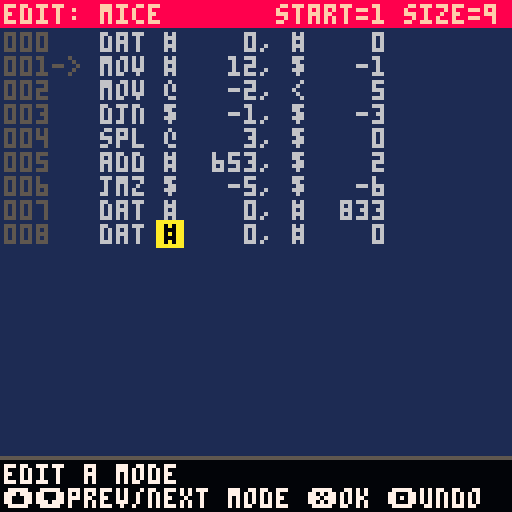
edit address mode screenshot
When editing the opcode, you can cycle through the opcodes with the up/down button.
Press ❎ to confirm the change or press 🅾️ to undo.
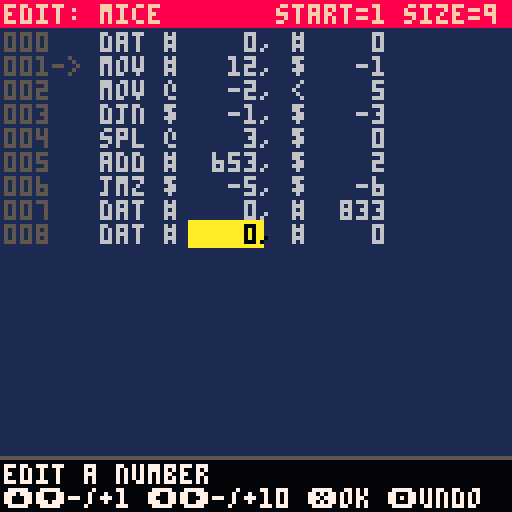
edit number screenshot
When editing the A or B number, you can change the number in steps of 1 with the up/down buttons
and in steps of 10 with the left/right buttons. Press ❎ to confirm the change or press 🅾️ to undo.
Redcode
This version of Corewar attempts to follow the Redcode ICWS '94 standard,
with the following limitations for the sake of simplicity and PICO-8 limitations:
- only modes #$@<
- no opcode modifiers (using ICWS'88 defaults)
- no expressions
- no macros
- no ORG, EQU or END pseudo-instructions
- no comments
Redcode instruction set
Each location in memory contains an instruction and two values A and B. A and B are used as address
pointers when the instruction is executed. A and B may also be used as data when referenced by
another instruction.
Opcodes can be divided into six groups:
Data:
DAT - stores data, the process executing DAT is terminated
Copying:
MOV - copy the contents of A to B
Simple Maths:
ADD - add the contents of A to the contents of B
SUB - subtract the contents of A from the contents of B
MUL - multiply the contents of A by the contents of B
DIV - divide the contents of B by the contents of A
MOD - divide the contents of B by the contents of A, taking the remainder
Flow Control:
JMP - transfer control to A (the contents of B is ignored)
JMZ - transfer control to A if the contents of B are zero
JMN - transfer control to A if the contents of B are non-zero
DJN - decrement the contents of B then transfer control to A if non-zero
SEQ - skip the next instruction if the contents of A and B are equal
SNE - skip the next instruction if the contents of A and B are not equal
SLT - skip the next instruction if the contents of A is less than B
Process Control:
SPL - create a new process at A (the contents of B is ignored)
Miscellaneous:
NOP - do nothing (for debugging purposes)
Addresses
Each address has an addressing mode and a pointer. All pointers are relative to where the address
is stored. 0 refers to the current location. 1 refers to the next location and -1 to the previous.
There are 4 addressing modes:
$ - direct - address is the location at pointer
# - immediate - address is the current instruction
@ - B indirect - the B value of the location at pointer points to the address
< - pre decrement B indirect - decrement the B value of the location at pointer then use B indirect
addressing
All values are taken modulo the size of memory (CORESIZE). Values range from 0 to CORESIZE-1. For
example if the CORESIZE is 800, -3 is stored as 797 (CORESIZE-3).


O
M
F
G
I love that you ported this to PICO-8. Holy crap, this brings back so many memories.

Now that is a blast from the past! This will be the first Cartridge I play.
@mischa_u. Sorry I downloaded but didn't get any missions running so I assumed it was a place holder i.e. work in progress. Seeing as I just got the pico-8 i then went on to start some coding and trying other things out. But I will give it a go and post some feedback. I have a python game project on the go and now I can see this pico-8 taking up much of my time...
@mischa_u Ok tried with the classic imp. Took me a while to figure out the addressing modes (it's a good 30 odd years since I messed with this!).
- I think when you enter the run you should default the cursor to the start address of the executing code!
- I am not sure about the input method. It's a bit cumbersome. But not sure what you could replace it with.
- The code you entered should still be available for the next scenario.
- How are you going to get player vs player?
- Beat the first two scenarios then imp vs imp draw on the third.
@ZeroTheHero Hey, thanks for giving it a try and passing along your comments... getting good play testing feedback is so very valuable!
- Not sure which version you have downloaded, the missions have only been recently added (v0.9).
- The addressing modes are tricky, I'll look into adding them to the mission intro text, but I haven't figured out how they can be properly explained in such limited space.
[Please log in to post a comment]