


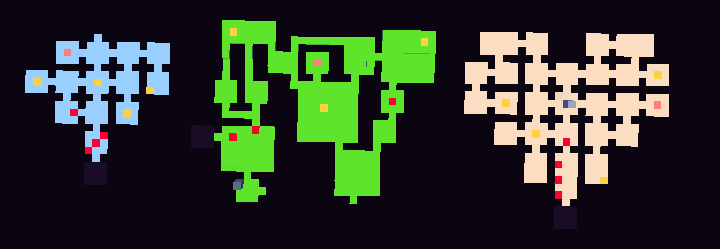
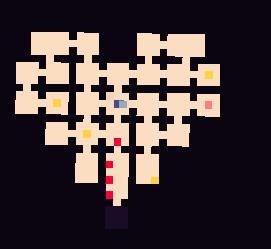
here you have the 3 maps for the temple, the forest and the sky, from left to right
basic information about this tutorial
There are more than one way of beating this cartridge,
the one shown here will be the easiest one (by the order of maps)
also showing how to get the secret sword: the divine happier.
reading the maps:
red: locks
yellow: keys
black: boss room
pink: bonus room (optional)
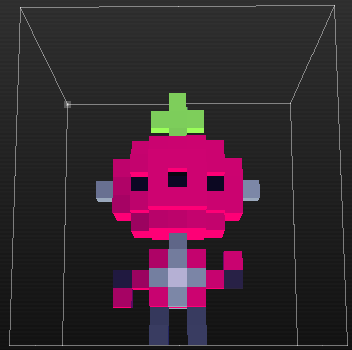
cartridge basics:
this cartridge is mean to be played with the arrow keys and the X and Z buttons,
the character is locked on four directions,
so using a mouse or controler won't really help here.
you swipe to kill enemies, if a bullet touches you, you take damage, simple as that
don't let an enemy jump on your head,
it will make your character hard to control possibly leading to death
(throw the enemy or panic, your choice)
your hearts are increased by going into the statue in the center of the hub
and collecting a container adquired by beating a boss and collecting it's key
(one of them is given right after it opens it's mouth, however)
there are a few health pickups in the game that you can pick up indefinetly,
3 of them are in the area you spawn in, 3 of them are in the middle of the tower.
When you are at a complicated position, you may always backtrack there to replenish your health.
you may get trapped in trees, don't go too close to them
adquiring the sword: a beggining
when you start the cartridge (at the hub),
go right into the portal for the royal happier area, there, you'll fight
a few enemies after picking up the sword in the pedestal, be careful because
there is not a wall on the back of it, so you may fall
on the second area you ought to advance carefuly,
as enemies will spawn as you progress, here you have a box that you can trow into the abyss,
as tempting as it sounds, if you would like to adquire the divine happier, do not do it,
simply destroy the enemies and get out of there.
there will be a heart container waiting for you inside the statue now.
First area: the mushroom temple
The first area you'll want to go is the mushroom temple, to the right of the hub,
going to it's entrance you'll see trees that can be choped down in order to replenish health,
use it wisely.
the first room inside the temple will lock all doors as long as there's a monster in it,
an they respawn every time so remember to go there only when necessary,
also DO NOT go left, there's a mini bullet hell boss that that will take you 2 hearts per hit
(I call her baddie), instead, go left, foward the first dot.
on that room you'll only need to aproach the board and on one of the corners
a platform will go up, allowing you the first key.
the key in the middle of the map is adquired by defeating all enemies once,
teleporting you to another key which wil now open the door to the bridge
the key to the far left is a necessary mini boss fight,
the prince will charge before attacking, stay away from it when it warns you,
as he will aim at you while shooting,
besides that the normal aproach to hold X while going backward works fine,
in this room a bridge is formed on the upper and lower part by aproaching them.
the last key is a similar mini boss fight
(if you're lucky you can make the prince fall into the pit of lava)
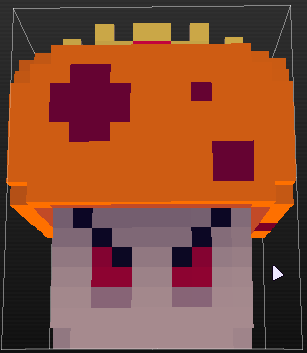
BOSS:King Mush
on the boss room you'll want to have all four hearts full and take a few tries to figure out it's pattern.
initially you'll have to defeat its minions
(there are five and they will always spawn at the same places)
after it, you can use the same strategy of hit and run used on the princes and if things get nasty,
go up the bushes for safety, this boss shoulc be no problem once it's pattern is learnt
there will be a heart container waiting for you inside the statue now.
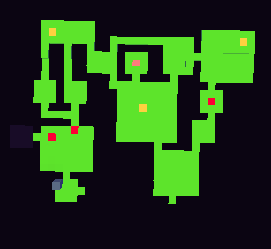
Secon area: The forest
the forest is the upper area of the hub.
This area is actually much more complex than what is shown on the map,
this area is about opening doors and shortcuts, it is also where you'll find the imperial happier,
giving you an extra reach to your sword.
in the first room you'll find yourself stuck because the only obvious door leads to a shut gate,
in this first room you have to actually jump from a tree to reach the door without a stair and once on the other room,
kill all monsters in there in order to unlock the key to the next area (and opening the initially locked gate).
on the following room you have two options: run for it and go to the left door or defeat the optional mini boss.
choosing to go left you may go on a straight line (completely igonring the conveniently placed portal)
to a long room full of water where you'll find the imperial happier on a rock
(from there you can still go back to the mini boss)
choosing to fight the mini boss will afect how the room behaves aftewards,
when you revisit it
(by killing the mini boss the left door will only be open after defeating all enemies in the room)
the mini boss (big slime) can be easily defeated by hiding under a tree and swording it to death,
killing it, however, will lead to an arena event where not only you'll have to
fight a bunch of sheeps that appeared out of nowhere
but also the monsters the big slime spawned with it's death
(and the little slimes spawned by the death of those monsters),
once done, there will appear another portal on the upper right corner allowing you to open another gate.
now, back to the ignored portal to the left:
it will lead you to the area before the boss,
allowing you to reach a key that will open the boss room
(if you get stuck here you can just restart the checkpoint)
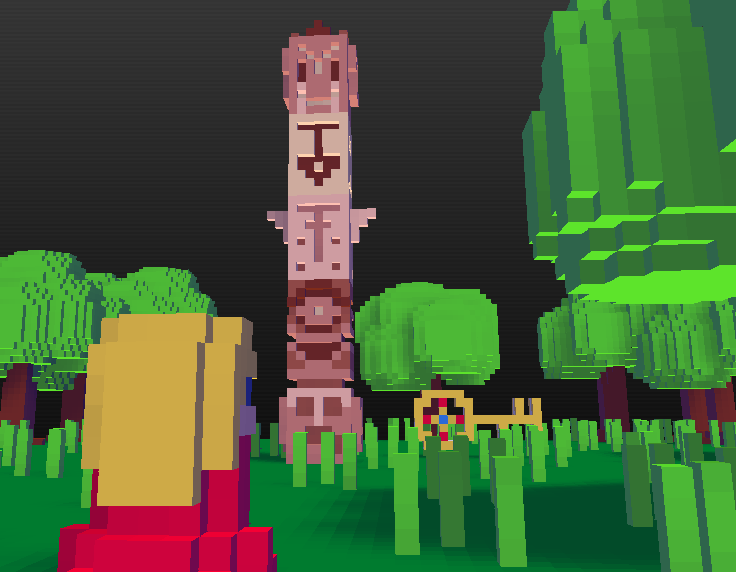
BOSS: Totem
this is a 5 part boss,
each piece has it's own behavior and it's behavior when it reaches the ground,
this boss is a bullet hell boss.
always there:
this top totem wil from time to time shoot a black layer on top of the area, it doesn't hurt you but it will block your
visibility, here you can use O and P to move your camera, but either way, your vision will be patially blocked.
the same head will also shoot a number of health pickups from time to time, remember where they fall.
the totem with wings will spawn little slimes fin regular intervals,
be careful not to be too close to it when it emits them
the totem with an arrow will also spawn a rain of bullets in four directions
on a regular interval always in the same directions
totems by order
the base is an easy one to go for, besides it's 8 directions,
it has many blind spots and a cooling down moment,
the problem here is to remember when the little slimes spawn and focus and priorize them over the totem,
besides that, the easiest way is to hit while it is cooling down and the fastest way is to hit it on it's blind spot.
the eye is only active on ground, it will become pink once there and will open and an infinite bullet wing on it's back
forbidding you to pass there, it will also shoot a bullet changing it's direction betwen left and right,
here you can atack left when it's aming right and vice versa, again, be careful with the little slimes.
the wing totem once on the ground will spawn many, many little slimes,
allowing for a monster wave constantly coming at you, after it, it will return to it's normal spawning,
right here you may wait before killing it in order to get many health pickups before the arrow totem reaches ground.
the arrow totem will open it's half to shoot a wave of bulllets
similar to the ones used by the eye that will cicle trough itself,
the idea here is to stay inside the safe zone (always in movement)
and attack it when it's about to change direction (slowing down the spin)
the last totem can't hurt you, you can just hit it to death.
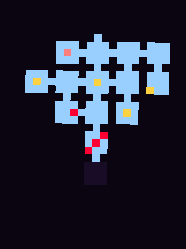
Third area: The tower
The tower is divided in two parts, the first part,
where the enemies you defeat will not be respawned and the second area,
where you have to defeat many enemies in order to advance to the next floor.
the areas are divided by a room with 3 health pickups that are always there,
simply make your way up and you'll adquire the shield which gives you double the armor
(you take half the damage) and passage to the sky area
in here you'll find 2 new important enemy types,
the tiny brat which will run at you fast and the normal brat which will
randomly duplicate itself once and once it's defeated it'll leave a health pickup.
once you get the shield you can try to get the divine happier
(you'll have to go down the tower, however)
DIVINE HAPPIER: optional quest
read before going down the tower
The divine happier need the following conditions in order to be adquired:
1:Must not have thrown the box on the initial room into the abyss
2:Must have defeated 2 baddies (pink bullet hell mini boss)
3:Must have defeated the big slime
the 2 baddies can be found on the extra rooms of the temple and the sky area and the big slime on the forest,
by choosing the path to the right.
once theese conditions are met you can go back to the hub area and look for a secret portal,
that portal can only be entered once so be certain that you have met all conditions before going in!
once here if all conditions are met you'll have a set of four open curtains leading to the divine happier,
a sword that grants you 3 times the damage of the other 2 together with
4000 worth of points on the extra points pickups.
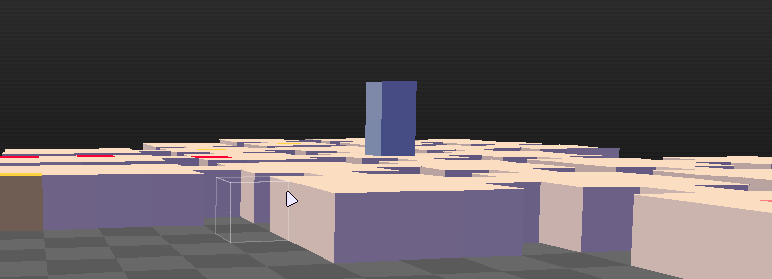
Last area: the sky
wait for it


I like what you did here! Voxatron is a game maker with some restrictions so all these games aren't like real console games. Yet we treat them like they are seeing people create walkthroughs for this game is just so... Lovely. (I should speak for myself making a video trailer for a game i made :3) I like it though i never noticed that the sky area is shaped like a heart <3
actually voxatron isn't even a game maker right now, a game maker would allow you to export your game so people on other places so people can play it or even download it.
voxatron only allows cartridges to be played exclusively on its foruns and on it's console, but I really would be happy with an exporting module
anyway thanks for the feedback, but I'll finish the sky area later
[Please log in to post a comment]