


Building a PICO-8 Beatemup part 1
Introduction and Aknowledgements
Hello and thanks for reading. This post will be an explanation of the basics of my Ninja Turtles beatemup engine. I'm going to try and explain every single step along the way so this will be a fairly long post. You should probably have some familiarity with basic development but I'll make this as understandable as possible across skill levels.
This blog post obviously owes a lot to a lot of people but much of this specific workflow was derived from these two posts:
and
Using _𝘦𝘯𝘷 in PICO-8 by slainte.
Please read both if you have not. Neither is a prerequisite, but you'll be glad you did.
Help Wanted
I’m not a programmer by trade so I’m looking forward to learning from the community by explaining what I’ve created to people who are smarter than me, and receiving feedback on improvements. I hope this helps anyone along their own path. Please feel free to use this code or anything you find in any of my stuff, really. I'd love to play your game some day.
Blog Purpose:
What I’m going to do is rebuild the core of my engine step by step to a basic working state. I won’t go all the way through the ninja turtle specific stuff, odds are that you're making something different enough that you don't need those steps. So, we're going to focus on things that can or must go into action games of this type regardless of IP.
Ideally, you will follow along, making little changes and coming up with ideas I never could have. But most of these games have biped characters who can walk around, so we're going to start with that.
In This Post:
In this post we’ll set up our code and get a little guy walking around.
Basic loop and character sprite
function _init()

	o={} --object table

end

function _update60()

end

function _draw()

end |
I’m going to start with the basic _init, _update60, _draw, and then we’ll do some sprites.
We’re going to be creating an object setup and "o" is going to be the table variable that every object falls under. We’ll have many types of objects, including the players, enemies, and any kind of powerup or effect or game feature you can think of adding.
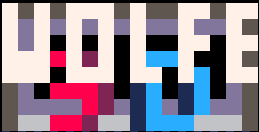
Now we need a few sprites to work with and so I will show you the default skeleton rig I came up with.
|
|
[8x16] |
I’ve drawn a circle filling the first sprite tile and this will be my character’s head. I’ve drawn a stick figure body in a neutral pose. I then copied and pasted those two in two rows of 8, filling half of the first page of the sprite sheet.
|
[64x32] |
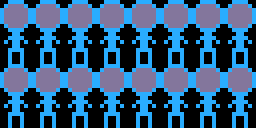
My template uses 8x8 heads and 8x8 bodies. I have 8 different poses, and I have one row for forward/backward and one for right/left.
Arcade beatemups usually don’t have the forward/backward versions of the poses, so you could certainly cut that out of your plans to save some sprite space.
You could do this with fewer poses, but this is going to let me have a character that can move and animate in a variety of different directions.
|
|
[8x32] |
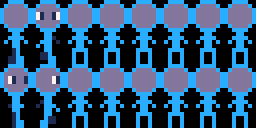
I gave the character some eyes. You can see I’ve made the left/right version directly below it by shifting one eye over. The head will switch between these two rows depending on the player movement so I want the aligned ones to match.
|
|
[8x32] |
I’m keeping two special head poses in the first column. The top one is for facing directly up and the bottom is for diagonal walking down.

|
[16x16] |
Now I’m making two body poses. The first one is a resting pose with both feet together. I’m using a darker shade for one foot already to help delineate them. Then on the right I’m making a walking pose. You can flip this sprite horizontally with the F key to see the animation. I have posed the arms a bit and made the back arm the darker shade.

|
[16x16] |
Here are the sideways versions. I made the feet 2x2 blocks instead of L blocks because the flip animation looks better. One downside of this character method is that using the Xflip to animate can be limiting.
So at this point, the first half of the first page of my sprite editor looks like this:
|
[64x32] |
This is all I need for now. I'll start filling in those empty poses when I start adding more actions, like jumps and attacks.
Object and player setup
I'm going to be writing some functions and like the sprites, I'm pasting them into this doc at various stages. If you're putting this into your code, be sure to read carefully before copy/pasting because some of these will be bad examples or halfway steps and that kind of thing.
Now we’re going to make the function that we use to create new objects.
function new_o(f) --creates a new object with function f

	local obj={} --local table created

	add(o,obj) --obj is added to table called o

	return obj --send obj back

end
|
This function is going to be called whenever we create a new object and “f” will be our first argument. It stands for “function” and is designed to run any given function just once at "birth" so that objects can have different inherent properties. I haven’t actually implemented it yet, though. We’ll get there in a sec.
So the first thing we do is create a local table called “obj”. The reason is that we can accidentally overwrite our objects if we create these tables globally instead of locally. Making a local, empty table will ensure that this is an entirely new object and won't overwrite or be an instance of some previously created thing.
Then we add the local obj to the “o” table. Keeping everything we create under this one variable means later we can just update every single object with one command instead of running through a bunch of lists of different things.
We can add this new obj to other tables, but we’ll decide to do that as we work. So we’re going to return the obj and grab it later if we want.
Now we're going to add one line to that function.
function new_o(f) --creates a new object with function f

	local obj={} --local table created

	setmetatable(obj,{__index=_𝘦𝘯𝘷}) --creates env setup for objects

	add(o,obj) --obj is added to table called o

	return obj --send obj back

end |
IMPORTANT:
The _𝘦𝘯𝘷 may or may not copy paste correctly so enable puny font with ctrl-p and type _env and ctrl-p back out if you need to.
Essentially, what we're doing is changing the nature of these "o" objects at creation and before they are added to the big "o" table, so that when they execute little functions that we write for them, we don't have to waste a lot of token space differentiating between local and global variables.
If that didn't make sense, don't worry. I'll explain where it comes in as we start writing some specific objects like the player. Before we do, we just need to bring in that "f" argument and call an init for all objects.
function new_o(f) --creates a new object with function f

	local obj={} --local table created

	setmetatable(obj,{__index=_𝘦𝘯𝘷}) --creates env setup for objects

	o_i(obj) --runs init on all objects

	if(f)f(obj) --runs a given init if called

	add(o,obj) --obj is added to table called o

	return obj --send obj back

end
|
First, we call a new function that we are about to create called o_i. It stands for object_init and it will declare all the basic attributes of any object we create.
Next, we run the "f" function, if any has been sent. Now whenever we run "new_o(foo)", an object will be created that will execute a function called "foo".
And because we are returning the obj in the function, we can set variable names as we create the objects like so:
function _init()

	o={} --object table

	p1=new_o() --creates player 1

end |
Now, at the bottom of our _init, we're creating an object and we're calling it p1 for player 1. I'm not passing any arguments yet, so we'll just start by creating a basic object that goes through our function called "o_i".
function o_i(_𝘦𝘯𝘷) --all object init x=64 --sets x to 64 y=64 --sets y to 64 end |
Note the _𝘦𝘯𝘷 in the argument line. You will need that in most of your argument functions. But it's what makes the next step so cool. We declare x and y variables and put them in the middle of the screen. But because of all the business with the metatable and the _𝘦𝘯𝘷, that variable is now local to the object rather than a global variable. That means that the object can run functions that change those values while other objects are unaffected.
Without the metatable line, you would have to do something like this:
function o_i(obj) --all object init obj.x=64 --sets x to 64 obj.y=64 --sets y to 64 end |
And that period between the "obj" and the x or y is an added token every time. So this is way has a bit of overhead but saves a lot of space.
If you are planning a small demo, feel free to declare all your attributes in this manner. But if you're trying to jam a lot of content into your game, you'll want to start thinking about token optimization over readability. I'm going to be writing this with that kind of person in mind, and show you some of the things I've learned that will help.
We can, for instance, optimize our use of "=" tokens buy declaring like this:
function o_i(_𝘦𝘯𝘷) --all object init x,y = 64,64 --x and y coords end |
A little less readable, but the token savings are important if you want to jam in more content later.
Now we need to create default update and draw functions for the object.
function o_i(_𝘦𝘯𝘷) --all object init u=o_u --object update d=o_d --object draw x,y = 64,64 --x and y coords end |
And then if we put those new variables within the existing x and y setup, we get this:
function o_i(_𝘦𝘯𝘷) --all object init x,y,u,d = 64,64, --x and y coords o_u,o_d --update and draw functions end |
So we're using the letters "u" and "d" to represent update and draw. We're going to tell every object to run their "u" function during _update, and their "d" during _draw. And we're going to make those o_u and o_d functions next.
function o_u(_𝘦𝘯𝘷) --all object update end function o_d(_𝘦𝘯𝘷) --all object draw pset(x,y,14) --draws object pivot end |
I'm leaving the object update, o_u, empty for now. We'll be coming back soon.
I've added one command to the object draw, o_d. We're using pset to draw one pink pixel at the object's x and y coord. Later we are going to be drawing sprites relative to this point, so I'm referring to it in the comments as a "pivot". Making it pink will hopefully make it easier to see. We'll probably want to remove this line of code later in the process, but this will be a good visual indicator for the beginning of creating this character.
Now we need to actually add the object update and draw to the main loop. Here's the 3 main functions written out:
function _init()

 o={} --object table

 p1=new_o() --creates player 1

end

function _update60()

	foreach(o, function(o) --runs the following code on each object

		o:u() --runs the object's update

	end) --ends the foreach

end

function _draw()

	cls()

	foreach(o, function(o) --runs the following code on each object

		o:d() --runs the object's draw

	end) --ends the foreach

end |
Update and draw have been updated to include a foreach command. We're going to run through every object (we currently just have 1) and run whatever function has been assigned to their "u" and "d" attribute. I've also added a command to clear the screen to the top of draw. If you run this code, you should get the pink pivot point drawn to the middle of the screen.
Bringing it all Together
Let's put our sprite work in by modifying the o_d function.
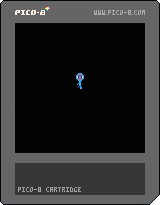
function o_d(_𝘦𝘯𝘷) --all object draw spr(16,x-4,y-7) --draws character body spr(1,x-4,y-15) --draws character head pset(x,y,14) --draws object pivot end |
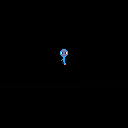
When you run this code, the blue guy should be standing with the pivot at the base of his foot. Easy enough, let's add some temporary movement controls to o_u.
function o_u(_𝘦𝘯𝘷) --all object update if(btn(⬅️))x-=1 --temp movement if(btn(➡️))x+=1 if(btn(⬆️))y-=1 if(btn(⬇️))y+=1 end |
So now we're going to add some animation, and animation requires some kind of escalating frame count. I like to use ⧗ as a variable for an object's "clock", so I'm going to add a couple lines to my object's init and update to get that going.
```
function o_i(_𝘦𝘯𝘷) --all object init
⧗,
x,y,u,d
=
0, --clock
64,64, --x and y coords
o_u,o_d --update and draw functions
end
function o_u(_𝘦𝘯𝘷) --all object update
if(btn(⬅️))x-=1 --temp movement
if(btn(➡️))x+=1
if(btn(⬆️))y-=1
if(btn(⬇️))y+=1
⧗+=1
end
I've added ⧗ as a variable equal to 0 at the top of the variable list, and I'm incrementing that variable by 1 at the end of the object's update. Now every object I create will have their own clock that we can time our animations off of. Now let's get some code in to control and switch between sprites. Here's a new version of our object loop. |
function o_i(_𝘦𝘯𝘷) --all object init
⧗,
x,y,u,d
=
0, --clock
64,64, --x and y coords
o_u,o_d --update and draw functions
body=17 head=1
end
function o_u(_𝘦𝘯𝘷) --all object update
if(btn(⬅️))x-=1 body=49 head=33 --temp movement and animation
if(btn(➡️))x+=1 body=49 head=33
if(btn(⬆️))y-=1 body=17 head=0
if(btn(⬇️))y+=1 body=17 head=1
⧗+=1
end
function o_d(_𝘦𝘯𝘷) --all object draw
spr(body,x-4,y-7) --draws character body
spr(head,x-4,y-15) --draws character head
pset(x,y,14) --draws object pivot
end
Pretty self explanatory here, but what's great is how easy it is to create, implement, and modify new attributes. We'll make this all a little more elegant in the next episode but let's cap this off with the walk cycle. One advantage to splitting the head from the body is that we can move and flip them independantly. |
function o_u(_𝘦𝘯𝘷) --all object update
bodyflip=false --reset flip
walkcycle=⧗%16<8 and true or false --modify clock into walk frames
if(btn(⬅️))x-=1 bodyflip=walkcycle headflip=true body=49 head=33 --temp movement and animation
if(btn(➡️))x+=1 bodyflip=walkcycle headflip=false body=49 head=33
if(btn(⬆️))y-=1 bodyflip=walkcycle body=17 head=0
if(btn(⬇️))y+=1 bodyflip=walkcycle body=17 head=1
⧗+=1
end
function o_d(_𝘦𝘯𝘷) --all object draw
spr(body,x-4,y-7,1,1,bodyflip) --draws character body
spr(head,x-4,y-15,1,1,headflip) --draws character head
pset(x,y,14) --draws object pivot
end
So I'm now flipping the head and body sprites in the object draw with boolean variables called bodyflip and headflip. If you run this cart, you'll have a little guy who can walk around. I'm going to export out the work I've done so far and paste it at the bottom of this post. If you're having trouble getting your version to work, check against that code first. If you are looking for a challenge to complete, see if you can introduce sprite 32, aka diagonal head, to the walk animation. In the next entry of this blog, we're going to add some non player characters on to the screen and introduce a state machine to our objects that will let them switch between actions and animations. Thanks for reading! |


Here is a small example of the engine I am building. I am posting a new demo of the full level tomorrow night. Happy Solstice!

[Please log in to post a comment]