


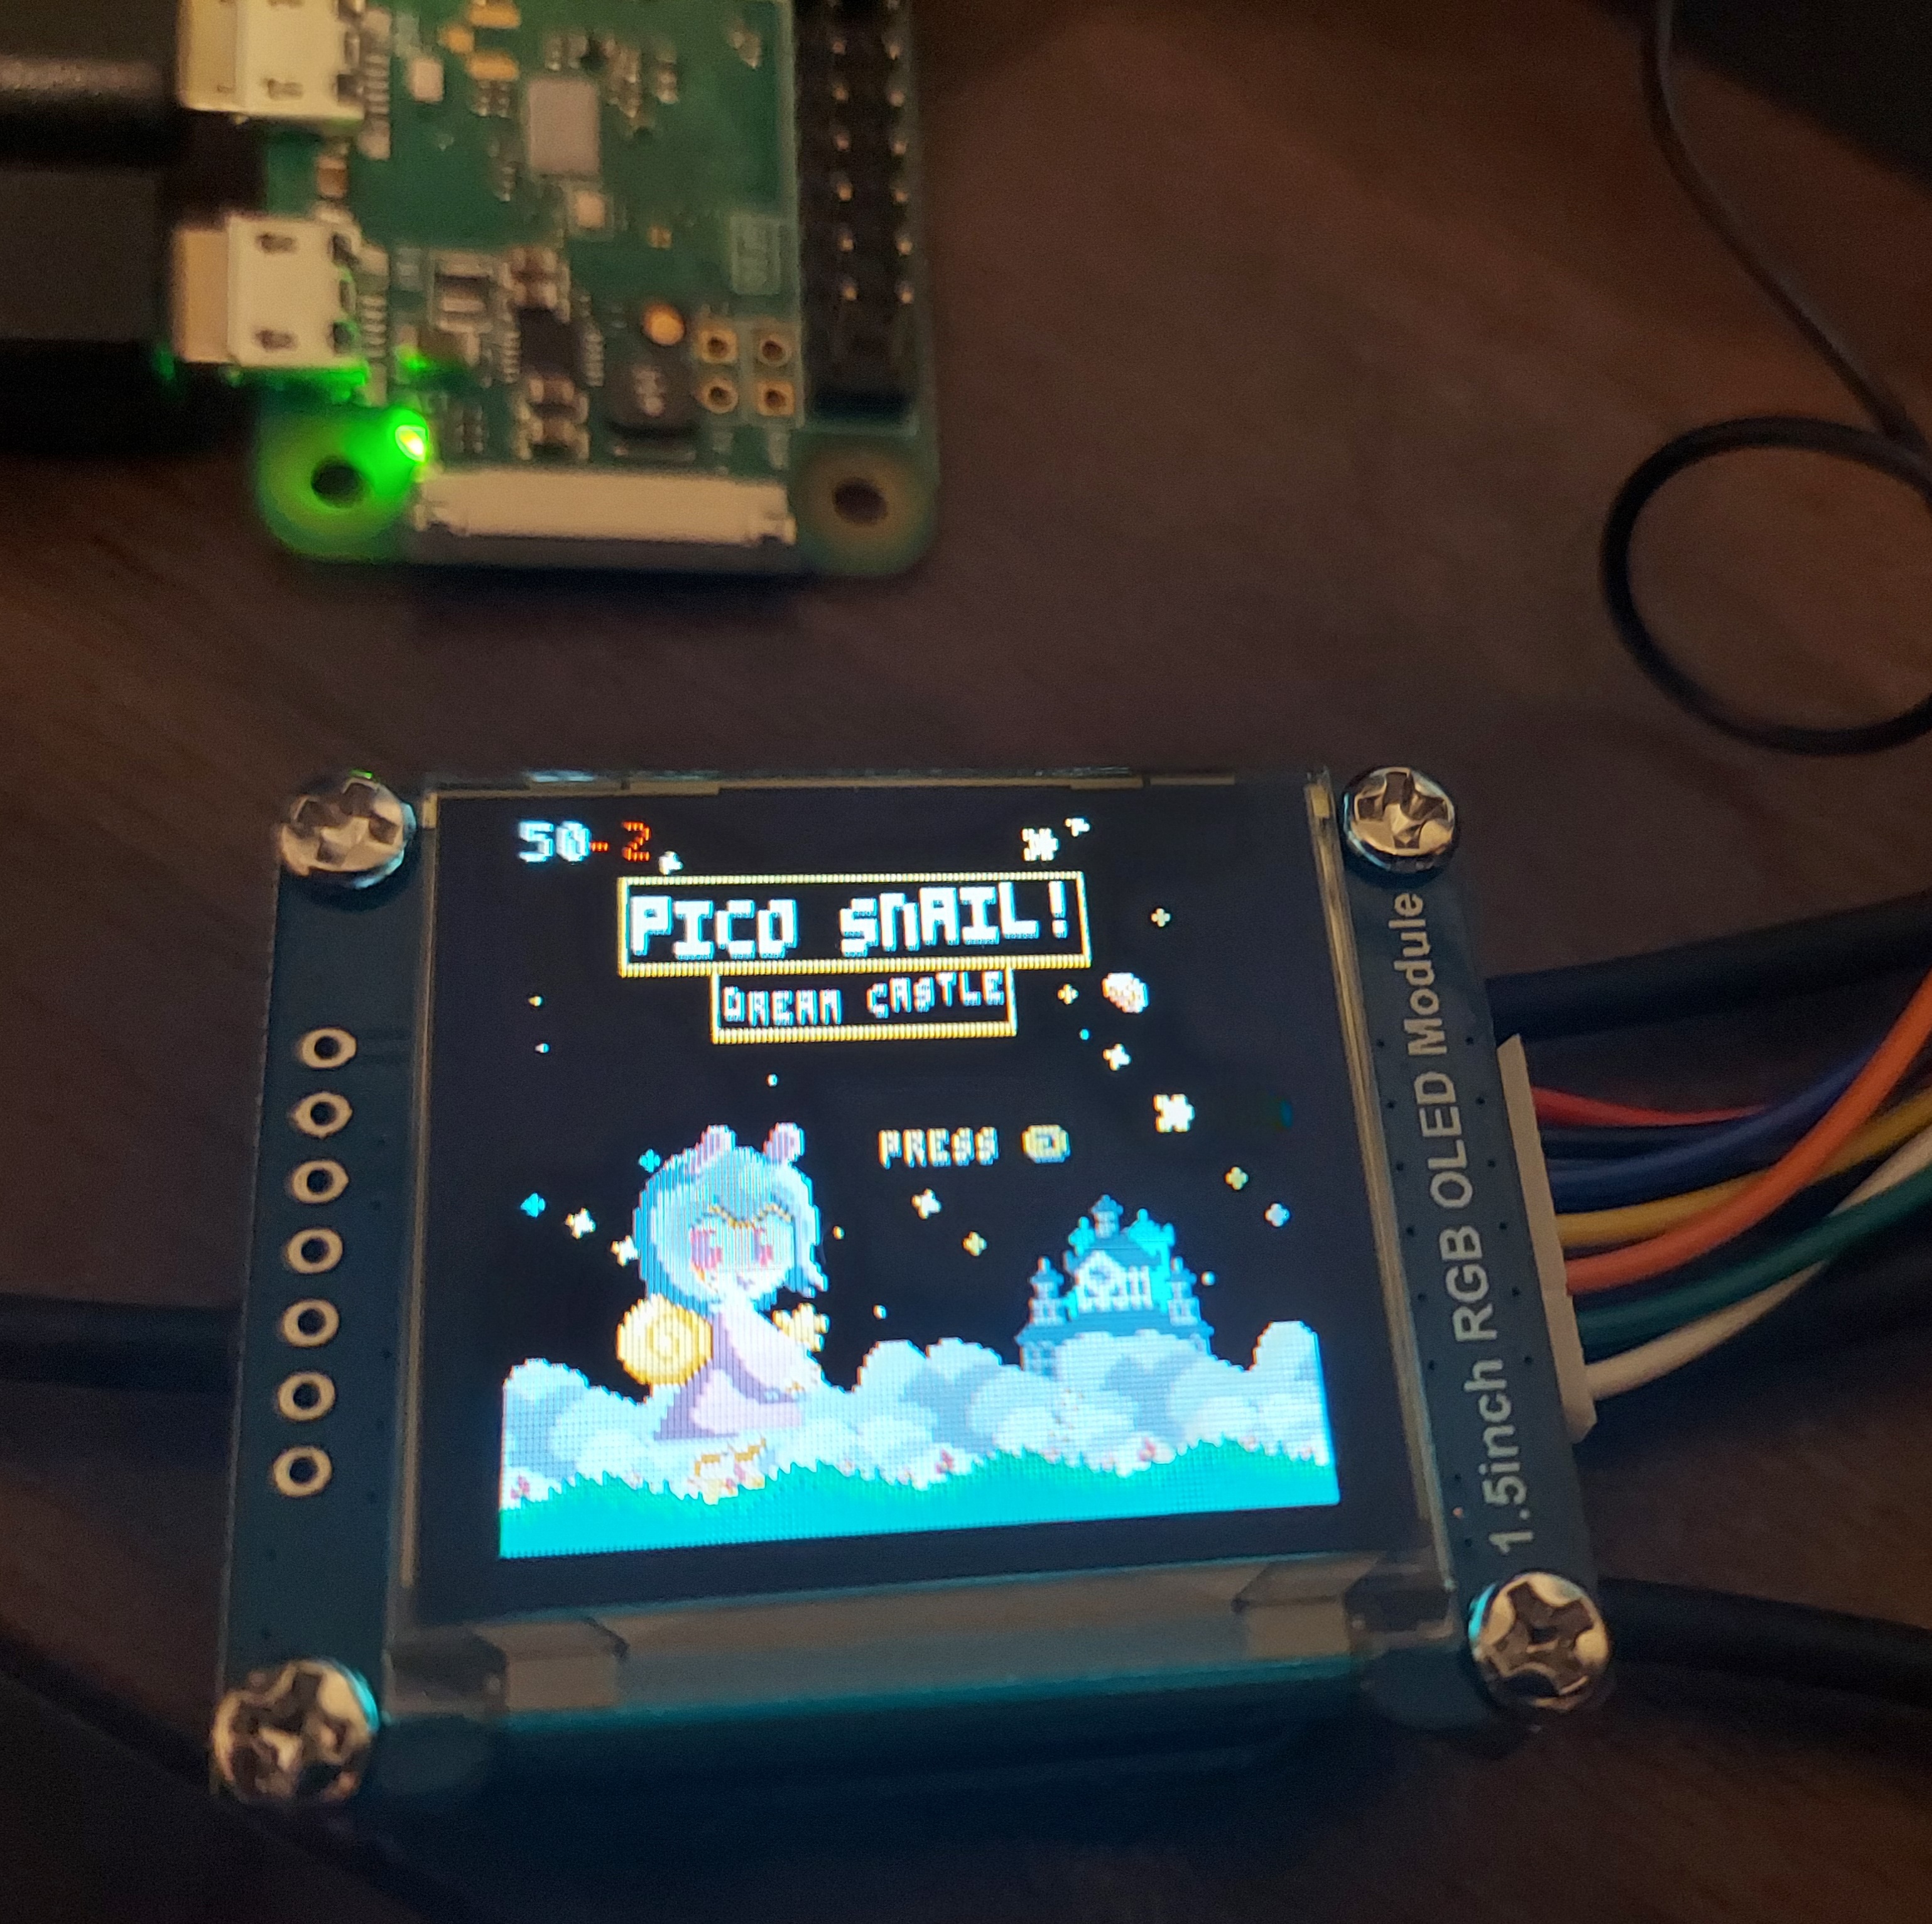
Hello there. My name is Grhmhome and I've been working on a fan handheld for Pico 8, using a Pi Zero W. I've been working on this project for roughly a week now. I'm proficient with Cad, 3D printing, and I've been learning soldering. I wanted to make a handheld for the Pico 8 with the correct aspect ratio screen and I finally found the perfect screen for my project. This post is a quick tutorial on how to get the Waveshare 128x128 RGB OLED display module to work properly. This took me all of yesterday to get to work properly as I had to troubleshoot and do more troubleshooting.
Where to find this screen?
Amazon: https://www.amazon.com/dp/B07D9NVJPZ/
Waveshare: https://www.waveshare.com/1.5inch-rgb-oled-module.htm
I used the latest version of RetroPie for this project.
Step 1. Wiring the screen. The pins I used are as follows. The connector that comes with the display should be color coded.
VCC (Power +): Any 3.3V GND (Power -): Any GND DIN: GPIO 10 MOSI CLK: GPIO 11 CLK CS: GPIO 8 CE0 DC: GPIO 25 RST: GPIO 24 |
If you need help on figuring which pin are which, I used this handy site: https://pinout.xyz/
Step 2.
Type sudo raspi-config and enable SPI interfaces. You will also want to configure your system to autologin as Pi and boot into the terminal. If you are using RetroPie like me, you will also have to go into the RetroPie settings and make sure your not booting directly into Emulationstation, but into the terminal and have it autologin as Pi.
Step 3. Install wiring pi and cmake. If your OS doesn't have git, install that too.
sudo apt-get update sudo apt install cmake sudo apt install wiringpi sudo apt install git |
Step 5. Clone the git repo git clone https://github.com/juj/fbcp-ili9341.git
Step 6. Edit some of the files. You will need to edit config.h and change //#define UPDATE_FRAMES_WITHOUT_DIFFING
to #define UPDATE_FRAMES_WITHOUT_DIFFING
Also you will want to edit ssd1351.cpp and change the values on line 35 from 97 to 127.
On ssd1351.h you will want to change #define DISPLAY_NATIVE_HEIGHT 96 to 128 on line 21.
Step 7. Once you finish doing that copy the following commands into the terminal.
mkdir build cd build cmake -DSSD1351=ON -DGPIO_TFT_DATA_CONTROL=25 -DGPIO_TFT_RESET_PIN=24 -DSPI_BUS_CLOCK_DIVISOR=20 -DSTATISTICS=0 .. make -j |
Make sure the display is working by typing in sudo ./fbcp-ili9341
If the display is working correctly, continue on. If it is not working, you will have to make sure the screen is connected to the correct GPIO pins.
Step 8. Next, you will want to make sure the display driver will autostart when you turn on your Pi Zero. Edit /etc/rc.local and add the following above the line that says exit 0 sudo /home/pi/fbcp-ili9341/build/fbcp-ili9341 &
After that, you will want to edit /boot/config.txt and add the following
hdmi_group=2 hdmi_mode=87 hdmi_cvt=128 128 60 hdmi_force_hotplug=1 |
If you want to autostart Pico 8, which I'm assuming you are wanting, add another line in /etc/rc.local above exit 0. Change the path accordingly wherever you decided to put Pico 8.
sudo /home/pi/pico-8/pico8 -splore &
Now, when you reboot your system, it should boot directly to Pico 8 every time using the display. I hope this tutorial was helpful. If you have any questions, or if I'm missing anything, feel free to leave a message.

Updated the first post: When I changed one thing from 30 to 20, it doesn't lag anymore, the games don't play at 30 or less FPS. The audio isn't lagging behind. It all works now. The screen doesn't freeze either or it seems.


not with that specific way of using /etc/rc.local
there are other, more proper ways to autostart pico8 and shutdown on exit! (I can’t say what’s the current best way, I have to update my raspis and check docs)
.png)
can someone please help me out? i dont think that the commands in step 7 works can someone please send me the full commands
i seem to be getting a sudo ./fbcp-ili9341 command not found
could i be getting these problems because i am using Raspbian instead of retropie?
UPDATE! i have almost gotten this to work in the standard raspberry pi OS just remember before doing step 7 do cd fbcp-ili9341 otherwise it wont work also you might need to use sudo apt install libraspberrypi-dev instead of sudo apt install wiringpi the reason why i think this is because when trying to build it got up to 95% then i get the error
/home/myuser/fbcp-ili9341/gpu.cpp:1:10: fatal error: bcm_host.h: No such file or directory
1| #include <bcm_host.h> // bcm_host_init, bcm_host_deinit
but libraspberrypi-dev should hopefully fix this ill update the comment when i make any changes
[Please log in to post a comment]