


I have always wanted to get into programming, at least to some extent, but never really got into it. It always felt so daunting, and I didn't think I had a "programmer's mind". That is, until recently, when my brother showed me PICO-8 and I was sold. I grew up in the 80s/90s, so the aesthetics and concept of PICO-8 obviously appealed a lot to me! It kind of felt less scary to dive into this.
I've also always been fascinated by the demoscene and the amazing demos that have been made throughout the years. The tweetcarts of recent times are also incredible.
Anyways, this thread is intended to sort of be a personal PICO-diary of sorts, where i intend to post my (very) basic concepts and ideas as I learn to crawl. I am very much a newbie at this, so don't expect crazy things. It's going to be messy :D
Cheers

When I first started out back in April I went through the PICOzines, but even the most basic stuff there went above my head. I was able to grasp certain things, but I very much felt I lacked a fundamental understanding of most things in programming.
I kind of missed really basic, short pieces of code that explained things, but did find some things on the way that I was able to kind of distil into its simplest form. More on that later. I realised it was too early for me even to start with the zines, so I looked up tutorials elsewhere, and also actually found the short example snippets in the PICO API to be incredibly helpful. I really wished I was able to do more advanced stuff but it was clear that this would take some time. Once I slowed down a bit, things began to be fun, even though I did (and still do) very simple stuff.
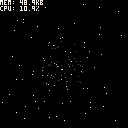
My first "project" was being able to do white noise, and so looking in my PICO folder this is the first thing I kind of did "on my own":

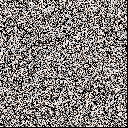
Note, this was after initially working my way through getting just one pixel to flash, and at this stage I barely understood tables and for loops.
It annoyed me that it increased in speed if I did it on a smaller area of the display, and also how it seemed to consume a lot of cpu, as scaling it up even slightly made the fps choppy. I figured there had to be a better way, something like writing directly to the screen buffer or something, but again - way more than I currently understood so I had to let it go for now :)
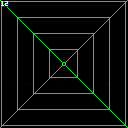
The next thing I kind of made by myself was this tunnel thing, after I went through the 3d cube code in one of the zines. I've made a bunch of these in ASEprite, by handdrawing them, so it was fun trying to tackle it in PICO-8.
Again, a lot of the stuff I did here was kind of beyond where I was technically, but I did learn some things, like having a frame counter. Yes, declaring t=0 and doing t+=1 in _update() was new to me. Where's the LOL emoji?
Cheers
Looking at different carts, I noticed a lot of sin/cos going on. I find it kind of funny that that was new/unknown to me, now that I'm starting to understand how much it is used :D
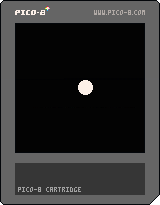
My first puny attempt at understanding how to manipulate it was this which I probably pulled from somewhere, or simplified down to just plotting a circle on screen. I was not yet able to make stuff move..

Cheers
After learning about timers, I messed around a lot with it and how to sort of convert/map the frame value to other ranges, to be able to read milliseconds, seconds etc. Again, VERY basic stuff, I know.. But I finally started learning things, instead of just "reciting" big (to me) chunks of code.
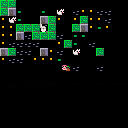
Again getting too eager, I wanted to start creating a Space Invaders replica, or at least see if I could get it started. I drew from/used code from some tutorials, like Pong etc. I started to have some idea of the concept of using tables/arrays, but the first result was a sad example of how little I knew, haha!
Z to fire, sort of.. at least one bullet :D

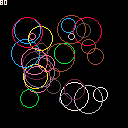
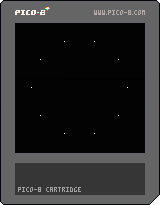
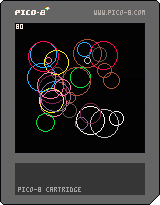
Random circles, increase/decrease spread with up/down. I'm using stuff here that I barely grasped, like moving the camera etc.. This was, again probably used from some tutorial and not something I would have been able to do on my own.
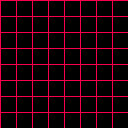
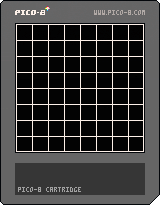
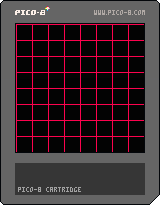
A simple grid. Now I'm starting to feel like I'm actually using stuff that I know.
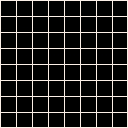
Here I was able to simplify the code a bit
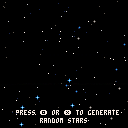
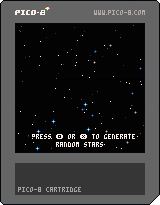
A simple star field, with a nested for loop. I think I barely understood the concept of nested loops here, where I'm dividing the number of stars with the length of the star color table so that it iterates over each of the star colors and does 25 of each... I think.

In my second attempt I included some randomly distributed sprites, as well as the ability to run the stargen function again, making a new star field..
Cheers!
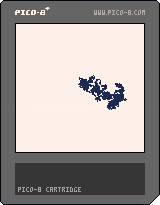
In looking for PICO-8 tutorials end programming in general I somehow stumbled across Daniel Shiffman's "The Nature of Code", and then his youtube channel The Coding Train. One of the first subjects in The Nature of Code is a random walker, and I felt like I picked up a lot from that, as simple as it is..
Some code is commented out, which is from the first part of making the walker, then following along as he optimized it. There's also a part that has the walker prefer a direction, which was interesting. I soon started thinking about how I could have multiple walkers, or make the walker do many steps before rendering to screen. While trying to speed up the walker I had issues with it "jumping" instead of printing a longer trail for each draw! I realized I might have to store n amount of steps in a table and draw all those steps at each draw..
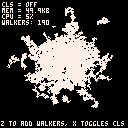
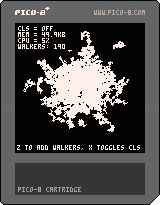
This next one I made weeks later when I had started to learn how to add stuff to a table/array, give objects update and draw functions etc.. Btn Z adds 10 walkers to the center of the screen, btn X toggles cls() on and off.. Kind of interesting to just drop a bunch of random walkers in there and watch them make art, turning cls on/off :)
I'm also starting a slight obsession over monitoring what's going on, which probably stems from analytically approaching certain aspects of mixing/producing music, which is what I usually do.
Here's a link to the Nature of Code, where he talks about this stuff:
https://natureofcode.com/book/
Once he moved on to pvectors I was kind of at a loss as to what was going on, but hopefully I will understand this soon ;)
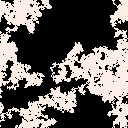
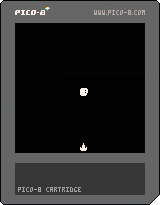
Another one, "user-walker" where you can control the walker etch-a-sketch style :D

MrGoober, I didn't find a way to tag you or reply directly so.. Here it goes as a reply to the thread! Thank you so much, and looking at Magus Aora it seems you already have quite some experience! :o Looks amazing!
This is kind of a nightmare and I'm not even gonna try to explain the code, haha.. My daughter came up to me while I was doing some PICO stuff, and she got interested. So we started making this game where an old lady collects cats, but my skills quickly fell short, when she asked for stuff that required collision detection, levels, game mechanics etc etc. I'd barely started exploring sprites, maps, etc. But we did have a lot of fun doing just this and hopefully soon we can finish our game 8)
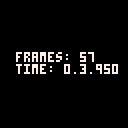
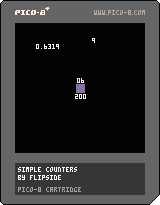
Looking back I can barely remember what I was doing here, let alone explain it. Counters again, and also some sort of fading/palette thing going on, very manually. I think I'm using a frame counter to execute a square drawing function, with different colours as the counter hits different thresholds?
Also there are various counters doing frames up/down, 1-0, 0-30, milliseconds..
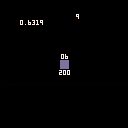
More random walker stuff, I finally semi-figured out how to do many steps per draw by making a randomwalker function, using a for i=1,200 loop to add a bunch of random values to two tables tx and ty, adding the values to an initial set of x=64 y=64 values for the walker each draw.. I think. Please correct me if I'm interpreting this wrong :) I'm also starting to handle screen/canvas edge cases, trying to have the walker loop back around to the opposite screen edge if it exceeds a screen edge
I then became vaguely aware of the concept of "state machines", and this was pretty much a follow-along result of some tutorial somewhere. Could be Nerdyteachers..
I found this starfield tutorial that I really liked, I look forward to experimenting more with dividing by a Z value to give the perception of depth! Not something I would be able to write on my own yet, but definitely learned some new things
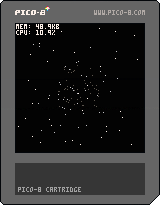
The mem and cpu stats were added later as I learned how to take stat 0 and 1 and control the number of decimal places to make nicer, more "readable" numbers
Back to more simple tests and learning stuff, I set up a table and fed it 10 randomly picked values from another table, I think I used this for the random walker that takes many steps per frame, and also had some ideas to use this for another version of the white noise effect but don't think I was successful in that
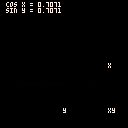
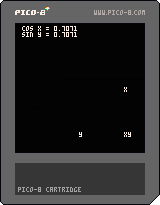
After seeing how much sin/cos was being used for some really cool effects I desperately wanted to understand the basics of it. I tried to make the simplest use of it as I could and finally understood that
-
You need a timer or some changing value to run sin/cos on, in order to get the -1 - 1 values
-
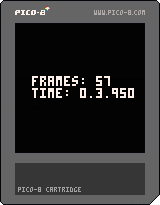
The number you divide time with determines the speed (the higher the number the slower), and with update60, dividing by 120 means sin/cos will loop in 2 seconds.
-
This number is directly related to the timer, i.e. if the "rate" is set to 60 and the fps is 60, then one "round" = 60 frames, and you can move the start phase so to speak by manipulating the initial value of the timer
-
Next you multiply to scale the movement from -1 1 to the desired range
- Finally add or subtract to move the whole motion to the desired place on screen

Simplifying it down to this really helped!
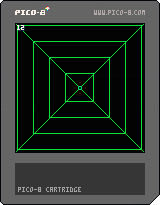
Now I was ready to tackle circular motion, and made this to further understand the concept
In the beginning I used sin for x and cos for y, until I was told they are usually used to other way around, haha
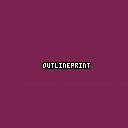
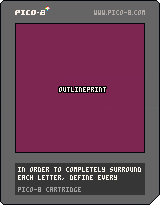
I wanted to do a function that could do outlines on text, and came up with this..
It takes four arguments: string, x, y, outlinecolor, textcolor
After defining a table with the X and Y positions around a pixel/letter, it iterates over the length of the X table (or Y, doesn't matter as they are the same length) and prints the string 8 times with the X and Y values to do the outline, then the main text is placed on top of that. Not sure if there's an easier/better way to do it. Would love to know if there is!
[Please log in to post a comment]