


Chrome 71 (December 2018) implements the new autoplay audio policy for the Web Audio API, which affects the Pico-8 web player. The BBS is OK because it implements a "curtain" that the user clicks on to start the player, which does the Web Audio enable interaction. But this breaks the exported web player as of Pico-8 0.1.11g: If I export a game to its own page then load the page, Pico-8 starts immediately and is disallowed sound. No interaction enables sound after this point.
One fix is for the exported web player to implement a curtain similar to the BBS. I don't know if that meets everyone's needs but would resolve the issue for the exported page. I assume we can work around this by implementing our own player curtain.
Interesting side note: This appears to affect stat() calls regarding sound as well. I have a cart that paused on stat(24) != 0, to wait for music to finish playing. The web export with sound disabled never gets past this point. I added a timeout for the pause to get around this, though I still don't have sound in this case.
https://developers.google.com/web/updates/2017/09/autoplay-policy-changes
 3 comments
I notice that the YouTube field of the BBS profile only accepts alphanumeric characters, and whatever is entered becomes a link of the form www.youtube.com/<alphanumericfield>. I'm mostly ignorant of how this part of YouTube works, but my understanding is that not everyone can reserve a youtube.com/<alphanumericfield> URL. You need a certain number of followers, have qualifying channel art, etc. Everyone gets a www.youtube.com/channel/<randomlyassignedalphanumeric> channel URL, but I can't enter that into my BBS profile and get a working link.
There's some history with G+ URLs that I've forgotten the details of. It looks like anyone can reserve a www.youtube.com/c/<alphanumericfield> URL. At least I have one, not sure how. But I can't enter that in either.
I think the YouTube profile field needs to accept more values and/or provide hints in the profile form on how to link a profile to a channel.
The BBS fails silently when I attempt to attach an image whose filename contains spaces. The upload appears to be successful, but it doesn't appear in the list of available images.
I remember this bug from the previous version of the BBS, so it's not new.
It appears that I have to sign in to the BBS on a daily basis. This does not appear to be intentional, and it's certainly annoying. I believe in the previous version of the BBS we had a one month sign-in expiration.
My cookies seem to be in reasonable shape for expiration dates:
www.lexaloffle.com:
PHPSESSID: when browsing session ends
pass: one month
user: one month
lexaloffle.com without the www also sets a cookie, __cfduid, but this doesn't seem related. I have tried clearing and recreating all of these cookies, with no change of behavior.
When playing a game in the web player, if I hold the z key ("o" button), I get the macOS diacritic editor. This interrupts play. I don't recall seeing this prior to the BBS/player update.


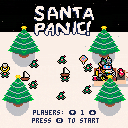
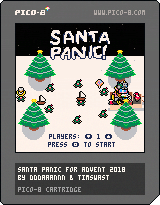
Santa Panic! A gift wrapping arcade game for 1 or 2 players, by dddaaannn and TimSwast. This is game 9 of the PICO-8 Advent calendar 2018.
Get those presents wrapped and in the right spots, and get yourself back up the chimney, before you're found out!
- Directional pad to move.
- "O" button to pick up, then "O" again while not moving to drop, or while moving to throw.
- Wrap a present by walking it to a wrapping station.
- Pick up your sack and walk into the chimney to leave.
Two player co-op available! You could use the help, but make sure both of you get to the chimney in time!
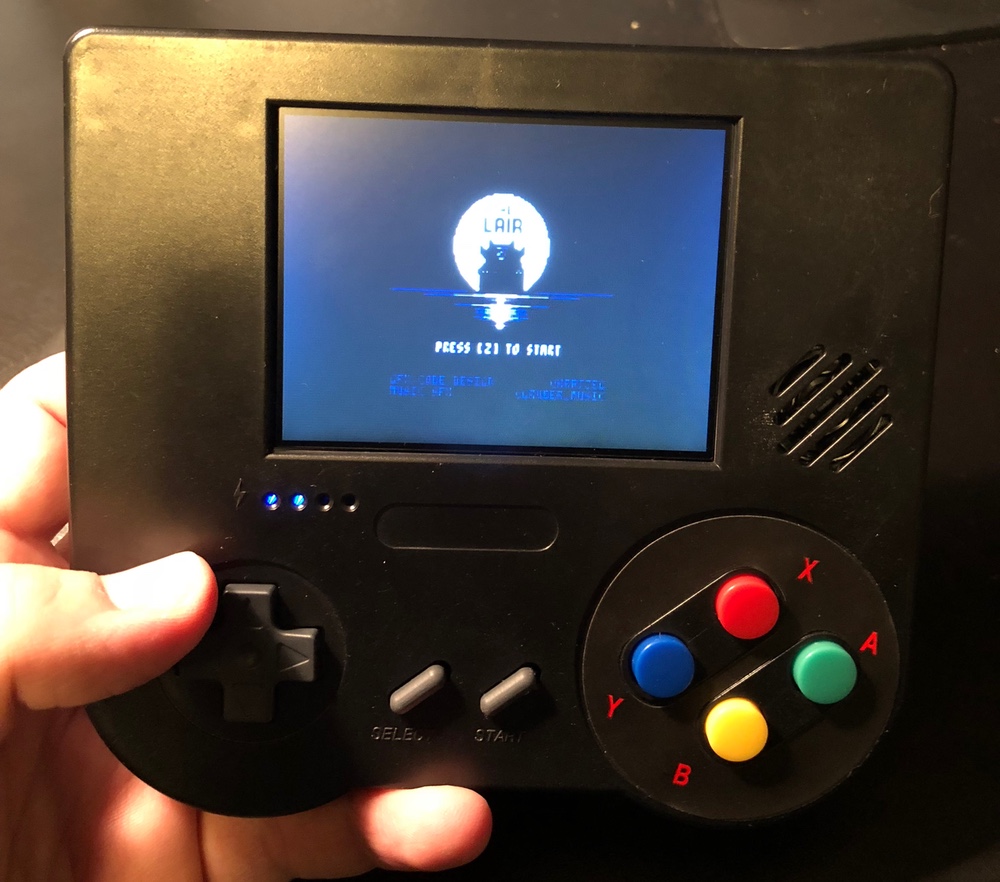
ClockworkPi is having a "Black Friday" sale on GameShells, only $119 (40% off) today only!
This is the new version of the GameShell with more memory and microHDMI out. It runs Pico-8 and is my favorite Pico-8-capable handheld to date.
I am not affiliated with ClockworkPi, I'm just passing along the info. Enjoy!
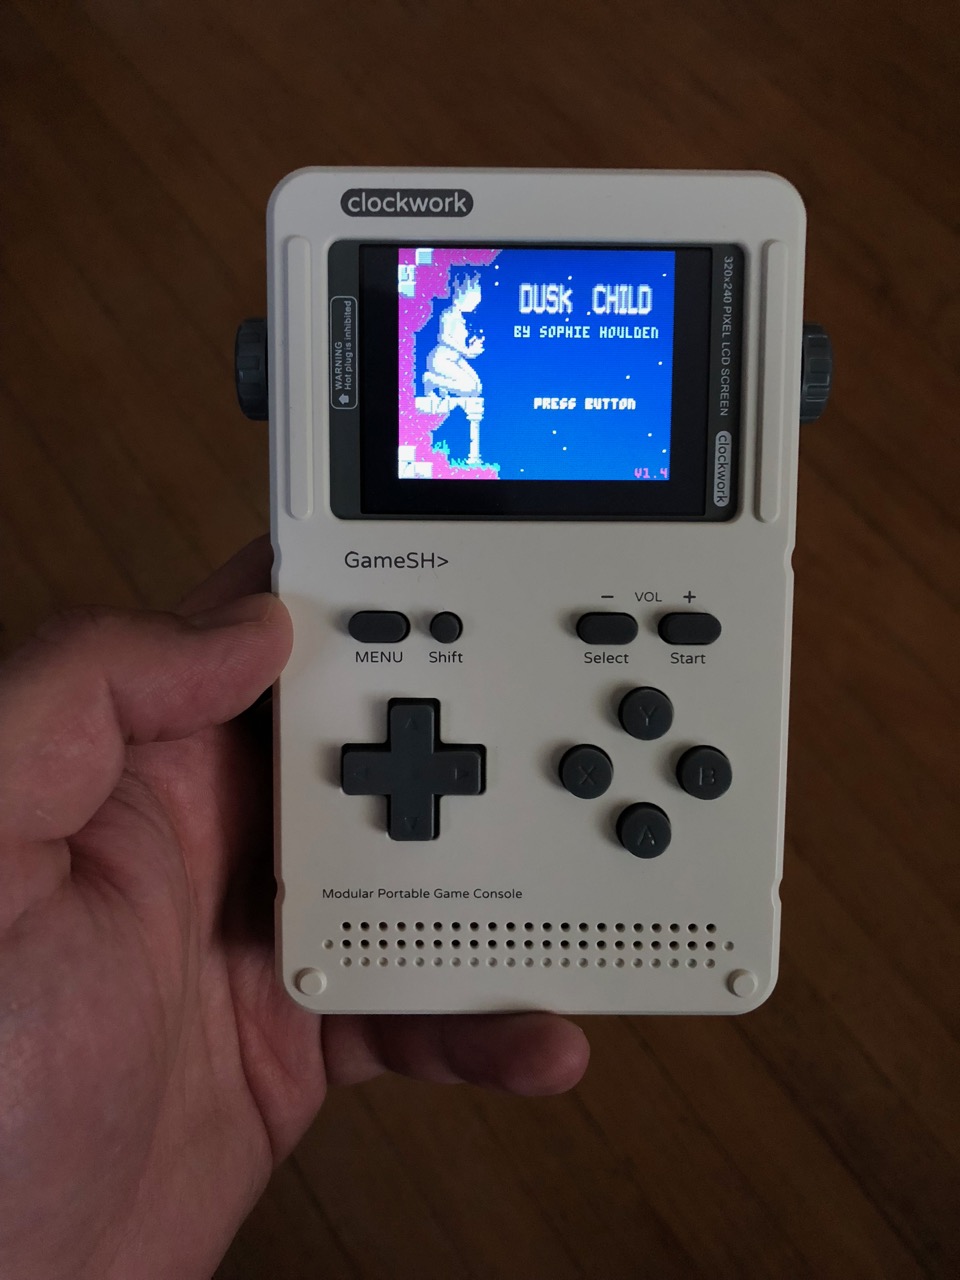
This is Pico-8 running on the Clockwork Pi GameShell, a new hackable handheld game machine. GameShell has an ARM architecture, runs Linux, and works with the Raspberry Pi version of Pico-8.
Featuring a "modular" design, GameShell comes as a easy-to-assemble kit. You need side cutters or a hobby knife to separate the plastic pieces from their sprues and clean up the ends. Beyond that, the parts go together without tools. There are five modules: the main board, the screen, the battery, the keypad, and the speakers. Each module is enclosed in a plastic case with an easy-to-open lid. The modules are connected with little cables, and they all fit snugly in a Gameboy-sized case. There's a headphone jack and a microUSB port for charging, as well as on-board Wifi. The keypad includes D-pad, ABXY buttons, select, start, menu, and shift. You can also get a separate expansion module for shoulder buttons on the back.
I posted some unboxing photos to Twitter: https://twitter.com/dan_sanderson/status/1022265067142696961
The build quality is excellent, and the kit is designed to be foolproof. Unlike the RaspiBoy, everything fits together easily, with no fiddly bits to get wrong. Everything is injection molded and has a comfortable, traditional Gameboy feel in a thinner lighter form factor. Game play with the membrane-style buttons is fast and fluid. The 320x240 color screen is sharp, and while a little small for games expecting a desktop display, GBA and Pico-8 games are just the right size.
The microSD card comes preloaded with a Debian Linux derivative, known as "clockwork OS." It's just Debian with kernel patches applied for the hardware. The OS boots to a simple Launcher interface that you can use from the gamepad. The Launcher has big icons, and it's easy to add more simply by adding new files in certain places. All OS customizations are open source and on Github, and the Launcher is just a Python app based on Pygame that runs in user space.
GameShell also comes with RetroArch preinstalled, along with full versions of Cave Story and freeDM (a Doom clone) to get started. These aren't actually the best examples because they expect a bigger screen, but they'll get you playing right away. Though it's a little under-documented for beginners (and the user community is starting to fill the gaps), it's easy enough to copy over MAME, GBA, and NES ROMs, install new RetroArch cores, and even load up music files for the built-in music player.
The wifi reception is surprisingly weak. I have to be a few feet from the wireless router to stay connected, and character throughput over an ssh connection is too laggy for anything more than simple administrative commands or light edits. (I recommend a clever network-aware text editor running on another computer, such as Emacs Tramp, for extensive on-device file editing.) You can replace the kernel to get ethernet over USB, and you can disable wifi power-save mode to get better wifi throughput. I haven't tried these yet, nor have I tried connecting a keyboard to the microUSB port (not sure if that'd even work).
Setting up Pico-8
Update, June 2019: ClockworkPi has recently added a built-in PICO-8 installer for the GameShell! A while ago, I wrote a tutorial for adding it manually. They have since automated the tutorial and made it a default menu option! See the updated tutorial for the new installation procedure:
https://github.com/clockworkpi/GameShellDocs/wiki/Running-PICO-8-on-the-GameShell
The best so far
Like many, I've wanted a hackable homebrew game machine for so long that I've backed pretty much every Kickstarter on the subject, and have built a few of my own with 3D printed cases and soldering kits. RaspiBoy came really close to the ideal feature set with injection molded plastic, membrane buttons, and a stock RaspPi with all ports exposed, but fell down on a few design details in the keypad. I'm looking forward to 8b Craft's RetroStone, with a larger screen, HDMI out, all the USB and ethernet ports, and full pre-assembly. Shipping soon.
Until then, the Clockwork Pi GameShell holds the crown as the best hackable handheld. I could play on this hardware for days, everything is well designed for ease of use, and underneath it's a very familiar Linux/X11 set-up. You could probably do the whole RetroPie/EmulationStation thing here, but the simple Launcher with RetroArch is so much cleaner, and feels just right on the hardware. Cave Story is already on there, and it took me mere minutes to find some GBA ROMs and start playing. While the screen is a little small for on-device hacking without a second computer, I'm tempted to wish for an upgraded mainboard with Bluetooth keyboard/mouse capability, and maybe a little kickstand.
As an aside, it's also one of the better "modular" designs I've seen. I've been skeptical about modular educational kits for a while, mostly because I was dissatisfied with choices other kits make in where to apply abstraction and proprietary interfaces. Clockwork Pi is just getting started so there's not a lot else you can do with these modules yet, but I can already tell they're making smart simple design choices for the module interfaces and hardware designs. I'm looking forward to seeing where this goes.
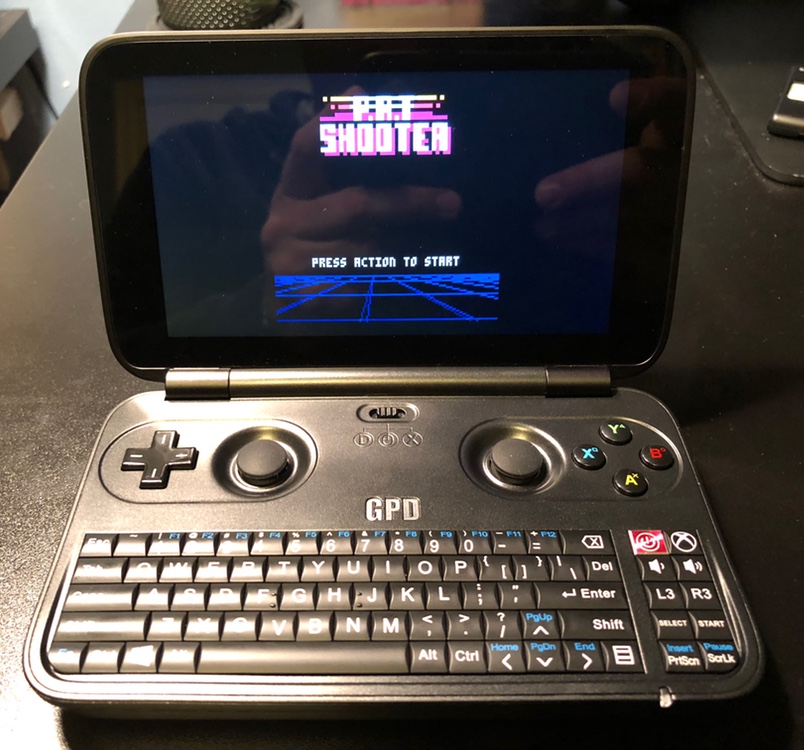
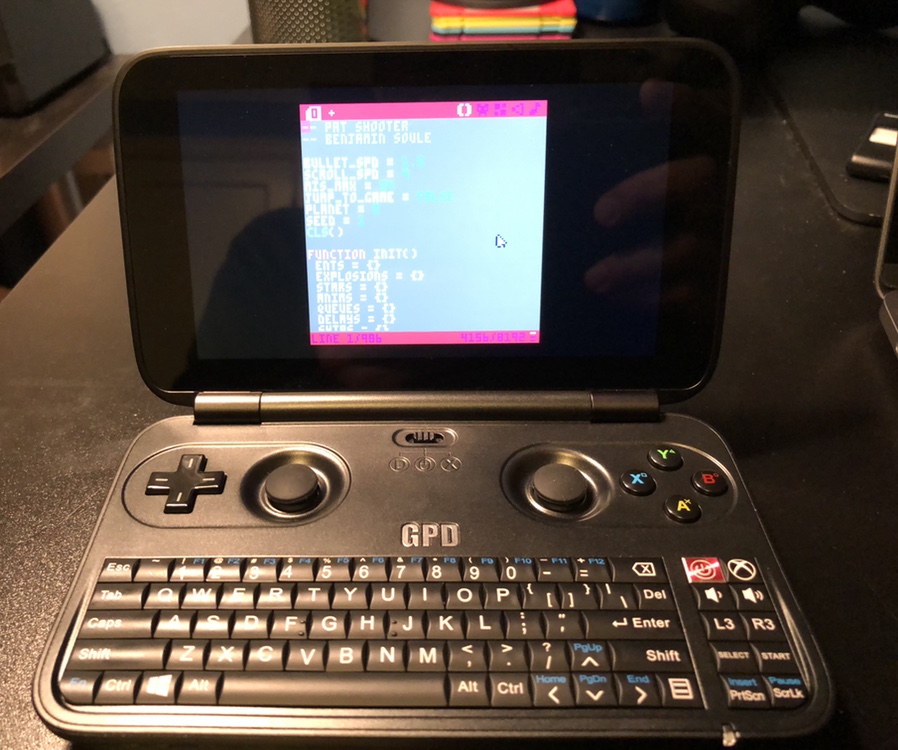
This is Pico-8 on the GamePad Digital GPD-WIN palmtop gaming computer. I won't give this a detailed review because there are better sources of info on this machine, and it's no surprise that it can run Pico-8. But since I posted pics of RaspiBoy I thought it'd be fun to show it off in comparison.
GPD-WIN is a bit famous for being surprisingly good at what it does, but if you haven't seen it before: 5.5 inch touch screen, Intel Atom processor, teeny keyboard, built-in game controls (including shoulder buttons), and it runs Windows 10. Install the Windows version of Pico-8 and not only can you play games, but you can make games as well. The keyboard is implausibly small, but it compares favorably to a PocketChip. The whole thing folds up to the size of a 3DS.
I made a half-hearted attempt at setting up the game controls with Pico-8. You can choose between three controller modes using a hardware switch, including a mouse-and-keyboard emulation mode for regular Windowing. I ended up using this mode and Pico-8's keyconfig to get a reasonable result with the D-pad and buttons. I bet another mode and proper SDL controller set-up would also work. Mouse-and-key mode is also plausible for the editors: left stick to move the mouse, left shoulder button to left-click, etc. Touchscreen mousing is surprisingly good in general, but I personally would prefer the stick for drawing. There is one (and only one) USB-A port for external peripherals. It also supports Bluetooth.
The GPD-WIN sells for ~$400 USD, so a bit pricier than a RaspPi set-up (or any handheld game machine subsidized through licensing). It's also a plausible option (only option?) for playing Steam games in a handheld-like, which appears to be its chief purpose. I don't think I'd use it for apps unless I were desperate, or could use its mini-HDMI out and peripherals.
GPD-WIN has a subreddit of devoted fans, and the subreddit has a FAQ.

This is the RaspiBoy handheld console kit running Pico-8. Inside, it's a Raspberry Pi Zero connected to a TFT display, a LiPo rechargeable battery, a small speaker, a custom controller board, and a built-in full-size SNES-style controller including shoulder buttons on the back. The custom board provides two USB-A ports for data, a microUSB port strictly for charging, mini-HDMI video out, a headphone jack, a volume wheel for the speaker, and buttons for adjusting the display. RaspiBoy ships as a solderless kit that does not include the RaspPi Zero.
The two big ideas here are the full-size SNES-like controller grip and the injection molded case. Injection molding and silicone membrane pushbuttons do more to recreate the mass-market handhelds than any 3D-printed equivalent can. The controller size is comfortable and familiar. Overall, there are a lot of good ideas in the RaspiBoy that we haven't seen yet in this increasingly populated category of small-run manufacturing of Raspberry Pi-based handheld game consoles. The general design ticks a lot of boxes in my ideal version of this concept.
Unfortunately, there are some significant failures in the details. The large grip comes at the expense of a wide frame around the TFT screen. As shown in the picture, Pico-8 by default doesn't fill the frame, and the low resolution makes even Pico-8's chunky typeface difficult to read. (I have not yet experimented with options and config to fix this. The -width and -height command-line arguments may come in handy.) A flaw common to RaspPi-based handhelds is the need to formally shut down the operating system before turning it off, or risk corrupting the filesystem. (This could be fixed with custom software and a "soft" power button, but it'd be a project that I haven't seen anyone attempt yet.)
While the silicone membrane buttons have a familiar feel, they're a pain to assemble as part of the kit. Plastic buttons sit atop the membrane, and the membrane makes contact with simple copper pads on the circuit board. Getting these to line up while you push the two sides of the case together is difficult, and it took me multiple tries to get it to fit together correctly. Even when fully assembled, the buttons are too unreliable for gaming performance. I had far better luck sticking a prefab USB controller into one of the ports than I did with the built-in controller.
RaspiBoy doesn't use any custom software: it's just RetroPie in a common RaspPi configuration, and you install it yourself. So I'm not sure how to explain that Pico-8 misbehaves and crashes after a few minutes of play. I'm tentatively inclined to blame the RaspiBoy, the RaspPi Zero, or possibly the way the controller board connects to the Zero using pogo pins pressed up against the test pads. Needless to say, it's a deal breaker if I can't actually use it to play games reliably. I doubt I'll have the time or patience to troubleshoot this properly.
The basic RaspiBoy kit sells for 75 euros (~$90 USD) from http://www.8bcraft.com/.
Picotool is a library and toolset for manipulating Pico-8 cart data, useful for build workflows, as well as cart generation and transformation experiments. Many Pico-8 devs use it for its code minification feature (p8tool luamin), which can be handy when your game's code is near the uncompressed character limit.
A more recent feature is "p8tool build", a tool to assemble carts from multiple files. This tool takes a cart and replaces a type of its data from another file. For example, you can copy the spritesheet from another cart like so, such as to collaborate with an artist working in a separate cart file:
% p8tool build mygame.p8.png --gfx sprites.p8.png |
You can pull in Lua code from a .lua file with the --lua argument:
% p8tool build mygame.p8.png --lua mygame.lua |
When you use --lua, you get an especially powerful feature: build-time support for Lua's require() statement. The main .lua file can call require() to include code from additional .lua files, such as reusable libraries. It supports several features of the official Lua require() statement, such as only including a module once, and module return values.
You can get Picotool from its Github repo, as well as file bug reports, here:
https://github.com/dansanderson/picotool
Packages and the require() function
p8tool build supports a special feature for organizing your Lua code, called packages. When loading Lua code from a file with the --lua mygame.lua argument, your program can call a function named require() to load Lua code from another file. This is similar to the require() function available in some other Lua environments, with some subtle differences due to how picotool does this at build time instead of at run time.
Consider the following simple example. Say you have a function you like to use in several games in a file called mylib.lua:
function handyfunc(x, y) return x + y end handynumber = 3.14 |
Your main game code is in a file named mygame.lua. To use the handyfunc() function within mygame.lua, call require() to load it:
require("mylib")

result = handyfunc(2, 3)
print(result)

r = 5
area = handynumber * r * r
|
All globals defined in the required file are set as globals in your program when require() is called. While this is easy enough to understand, this has the disadvantage of polluting the main program's global namespace.
A more typical way to write a Lua package is to put everything intended to be used by other programs in a table:
HandyPackage = {
  handyfunc = function(x, y)
    return x + y
  end,
  handynumber = 3.14,
}
|
Then in mygame.lua:
require("mylib")

result = HandyPackage.handyfunc(2, 3)
|
This is cleaner, but still has the disadvantage that the package must be known by the global name HandyPackage wihtin mygame.lua. To fix this, Lua packages can return a value with the return statement. This becomes the return value for the require() call. Furthermore, Lua packages can declare local variables that are not accessible to the main program. You can use these features to hide explicit names and return the table for the package:
local HandyPackage = {
  handyfunc = function(x, y)
    return x + y
  end,
  handynumber = 3.14,
}

return HandyPackage
|
The main program uses the return value of require() to access the package:
HandyPackage = require("mylib")

result = HandyPackage.handyfunc(2, 3)
|
The require() function only evaluates the package's code once. Subsequent calls to require() with the same string name do not reevaluate the code. They just return the package's return value. Packages can safely require other packages, and only the first encountered require() call evaluates the package's code.
Where packages are located
The first argument to require() is a string name. picotool finds the file that goes with the string name using a library lookup path. This is a semicolon-delimited (;) list of filesystem path patterns, where each pattern uses a question mark (?) where the string name would go.
The default lookup path is ?;?.lua. With this path, require("mylib") would check for a file named mylib, then for a file named mylib.lua, each in the same directory as the file containing the require() call. The lookup path can also use absolute filesystem paths (such as /usr/share/pico8/lib/?.lua). You can customize the lookup path either by passing the --lua-path=... argument on the command line, or by setting the PICO8_LUA_PATH environment variable.
For example, with this environment variable set:
PICO8_LUA_PATH=?;?.lua;/home/dan/p8libs/?/?.p8 |
The require("3dlib") statement would look for these files, in this order, with paths relative to the file containing the require() statement:
3dlib 3dlib.lua /home/dan/p8libs/3dlib/3dlib.p8 |
To prevent malicious code from accessing arbitrary files on your hard drive (unlikely but it's nice to prevent it), the require() string cannot refer to files in parent directories with ../. It can refer to child directories, such as require("math/linear").
As with Lua, packages are remembered by the string name used with require(). This means it is possible to have two copies of the same package, each known by a different name, if it can be reached two ways with the lookup path. For example, if the file is named foo.lua and the lookup path is ?;?.lua, require("foo") and require("foo.lua") treat the same file as two different packages.
Packages and game loop functions
When you write a library of routines for Pico-8, you probably want to write test code for those routines. picotool assumes that this test code would be executed in a Pico-8 game loop, such that the library can be in its own test cart. For this purpose, you can write your library file with _init(), _update() or _update60(), and _draw() functions that test the library. By default, require() will strip the game loop functions from the library when including it in your game code so they don't cause conflicts or consume tokens.
For example:
local HandyPackage = {
  handyfunc = function(x, y)
    return x + y
  end,
  handynumber = 3.14,
}

function _update()
  test1 = HandyPackage.handyfunc(2, 3)
end
function _draw()
  cls()
  print('test1 = '..test1)
end

return HandyPackage
|
If you want to keep the game loop functions present in a package, you can request them with a second argument to require(), like so:
require("mylib", {use_game_loop=true})
|
How require() actually works
Of course, Pico-8 does not actually load packages from disk when it runs the cartridge. Instead, picotool inserts each package into the cartridge code in a special way that replicates the behavior of the Lua require() feature.
When you run p8tool build with the --lua=... argument, picotool scans the code for calls to the require() function. If it sees any, it loads and parses the file associated with the string name, and does so again if the required file also has require() calls.
Each required library is stored once as a function object in a table inserted at the top of the final cartridge's code. A definition of the require() function is also inserted that finds and evaluates the package code in the table as needed.
To match Lua's behavior, require() maintains a table named package.loaded that maps string names to return values. As with Lua, you can reset this value to nil to force a require() to reevaluate a package.
This feature incurs a small amount of overhead in terms of tokens. Each library uses tokens for its own code, plus a few additional tokens for storing it in the table. The definition for require() is another 40 tokens or so. Naturally, the inserted code also consumes characters.
Formatting or minifying Lua in a built cart
You can tell p8tool build to format or minify the code in the built output using the --lua-format or --lua-minify command line arguments, respectively.
% ./picotool-master/p8tool build mycart.p8.png --lua=mygame.lua --lua-format |
This is equivalent to building the cart then running p8tool luafmt or p8tool luamin on the result.
Future build features
I actually implemented require() support back in March of 2017. I didn't announce it at the time because I wanted to implement "dead code elimination," a feature that would prune unused code from included libraries, thereby saving tokens and making reusable libraries more practical. It'll be a fancy feature to implement, and I need to overhaul the parser to do it right, so that project is on hold for now. I'm announcing require() support now in case anyone has a use for it.
Let me know if you have any questions. Feel free to file bug reports and feature requests in Picotool's issue tracker on Github.
-- Dan
Next Thing Co. now has an alpha test image of the next version of the PocketCHIP software (4.4 alpha) that includes Pico-8 1.9. If you don't mind installing an alpha version (which may have bugs that cause data loss), it's easy to give it a try. It's easy enough that you probably don't even need instructions but there's one bit that I found by guessing so I thought I'd write it up.
You'll need a computer running Chrome, a USB-to-micro-USB cable, and your PocketCHIP. Ideally, the computer would be plugged into power so it doesn't lose power in the middle of the update.
- In Chrome, go to http://flash.getchip.com/. If this is your first time using the CHIP flash utility in Chrome, it will prompt you to install the Chrome extension. Do so.
- Connect PocketCHIP to your computer via the USB cable.
- Turn on PocketCHIP. Allow PocketCHIP to boot up to the main menu.
- On PocketCHIP, press the "power" on-screen button. In the power menu, select "Flash Software."
- In the Chrome window, start the flasher, then follow the prompts. Ignore the instructions involving a paperclip and "FEL" mode; you accomplished this with the menu option.
- Leave everything connected until the flasher utility reports success.
- Unplug PocketCHIP and allow it to reboot.
Start Pico-8 and notice it displays the 0.1.9 version number during start-up. Enjoy!
As of 0.1.7 the GPIO feature is advertised as in development and involves the memory region 0x5f80-0x5fff (128 bytes). In the web player, this memory region can be accessed by external JavaScript by defining the window global pico8_gpio = new Array(128). Does the RaspPi build do anything with actual RaspPi GPIO pins yet? Does the bundled PocketCHIP version do anything with GPIO? (I get my PocketCHIP on Monday.)
I wrote a two-way memory mapper to watch this region and set values as I messed with stuff and didn't get very far. There are some necessary features, such as setting pin modes, that are either missing or encoded in an undocumented way in the memory region. I don't see any activity in either direction if I set pin modes outside of Pico-8 either. I verified my set-up with regular GPIO test code. I also took a quick guess based on the strings tool that Pico-8 was using a GPIO driver with C functions such as gpio_write(), and I tried setting debugger breakpoints and saw no hits, but I'm not confident I did that correctly so that's not conclusive. (Reverse engineering newb. :) )
Any official word? Has anyone had success reverse engineering in this area? Any reverse engineering tips or suggestions?
I just got a Pimoroni Picade, an arcade mini-cabinet for use with small board computers like the Raspberry Pi. It's a great match for PICO-8!
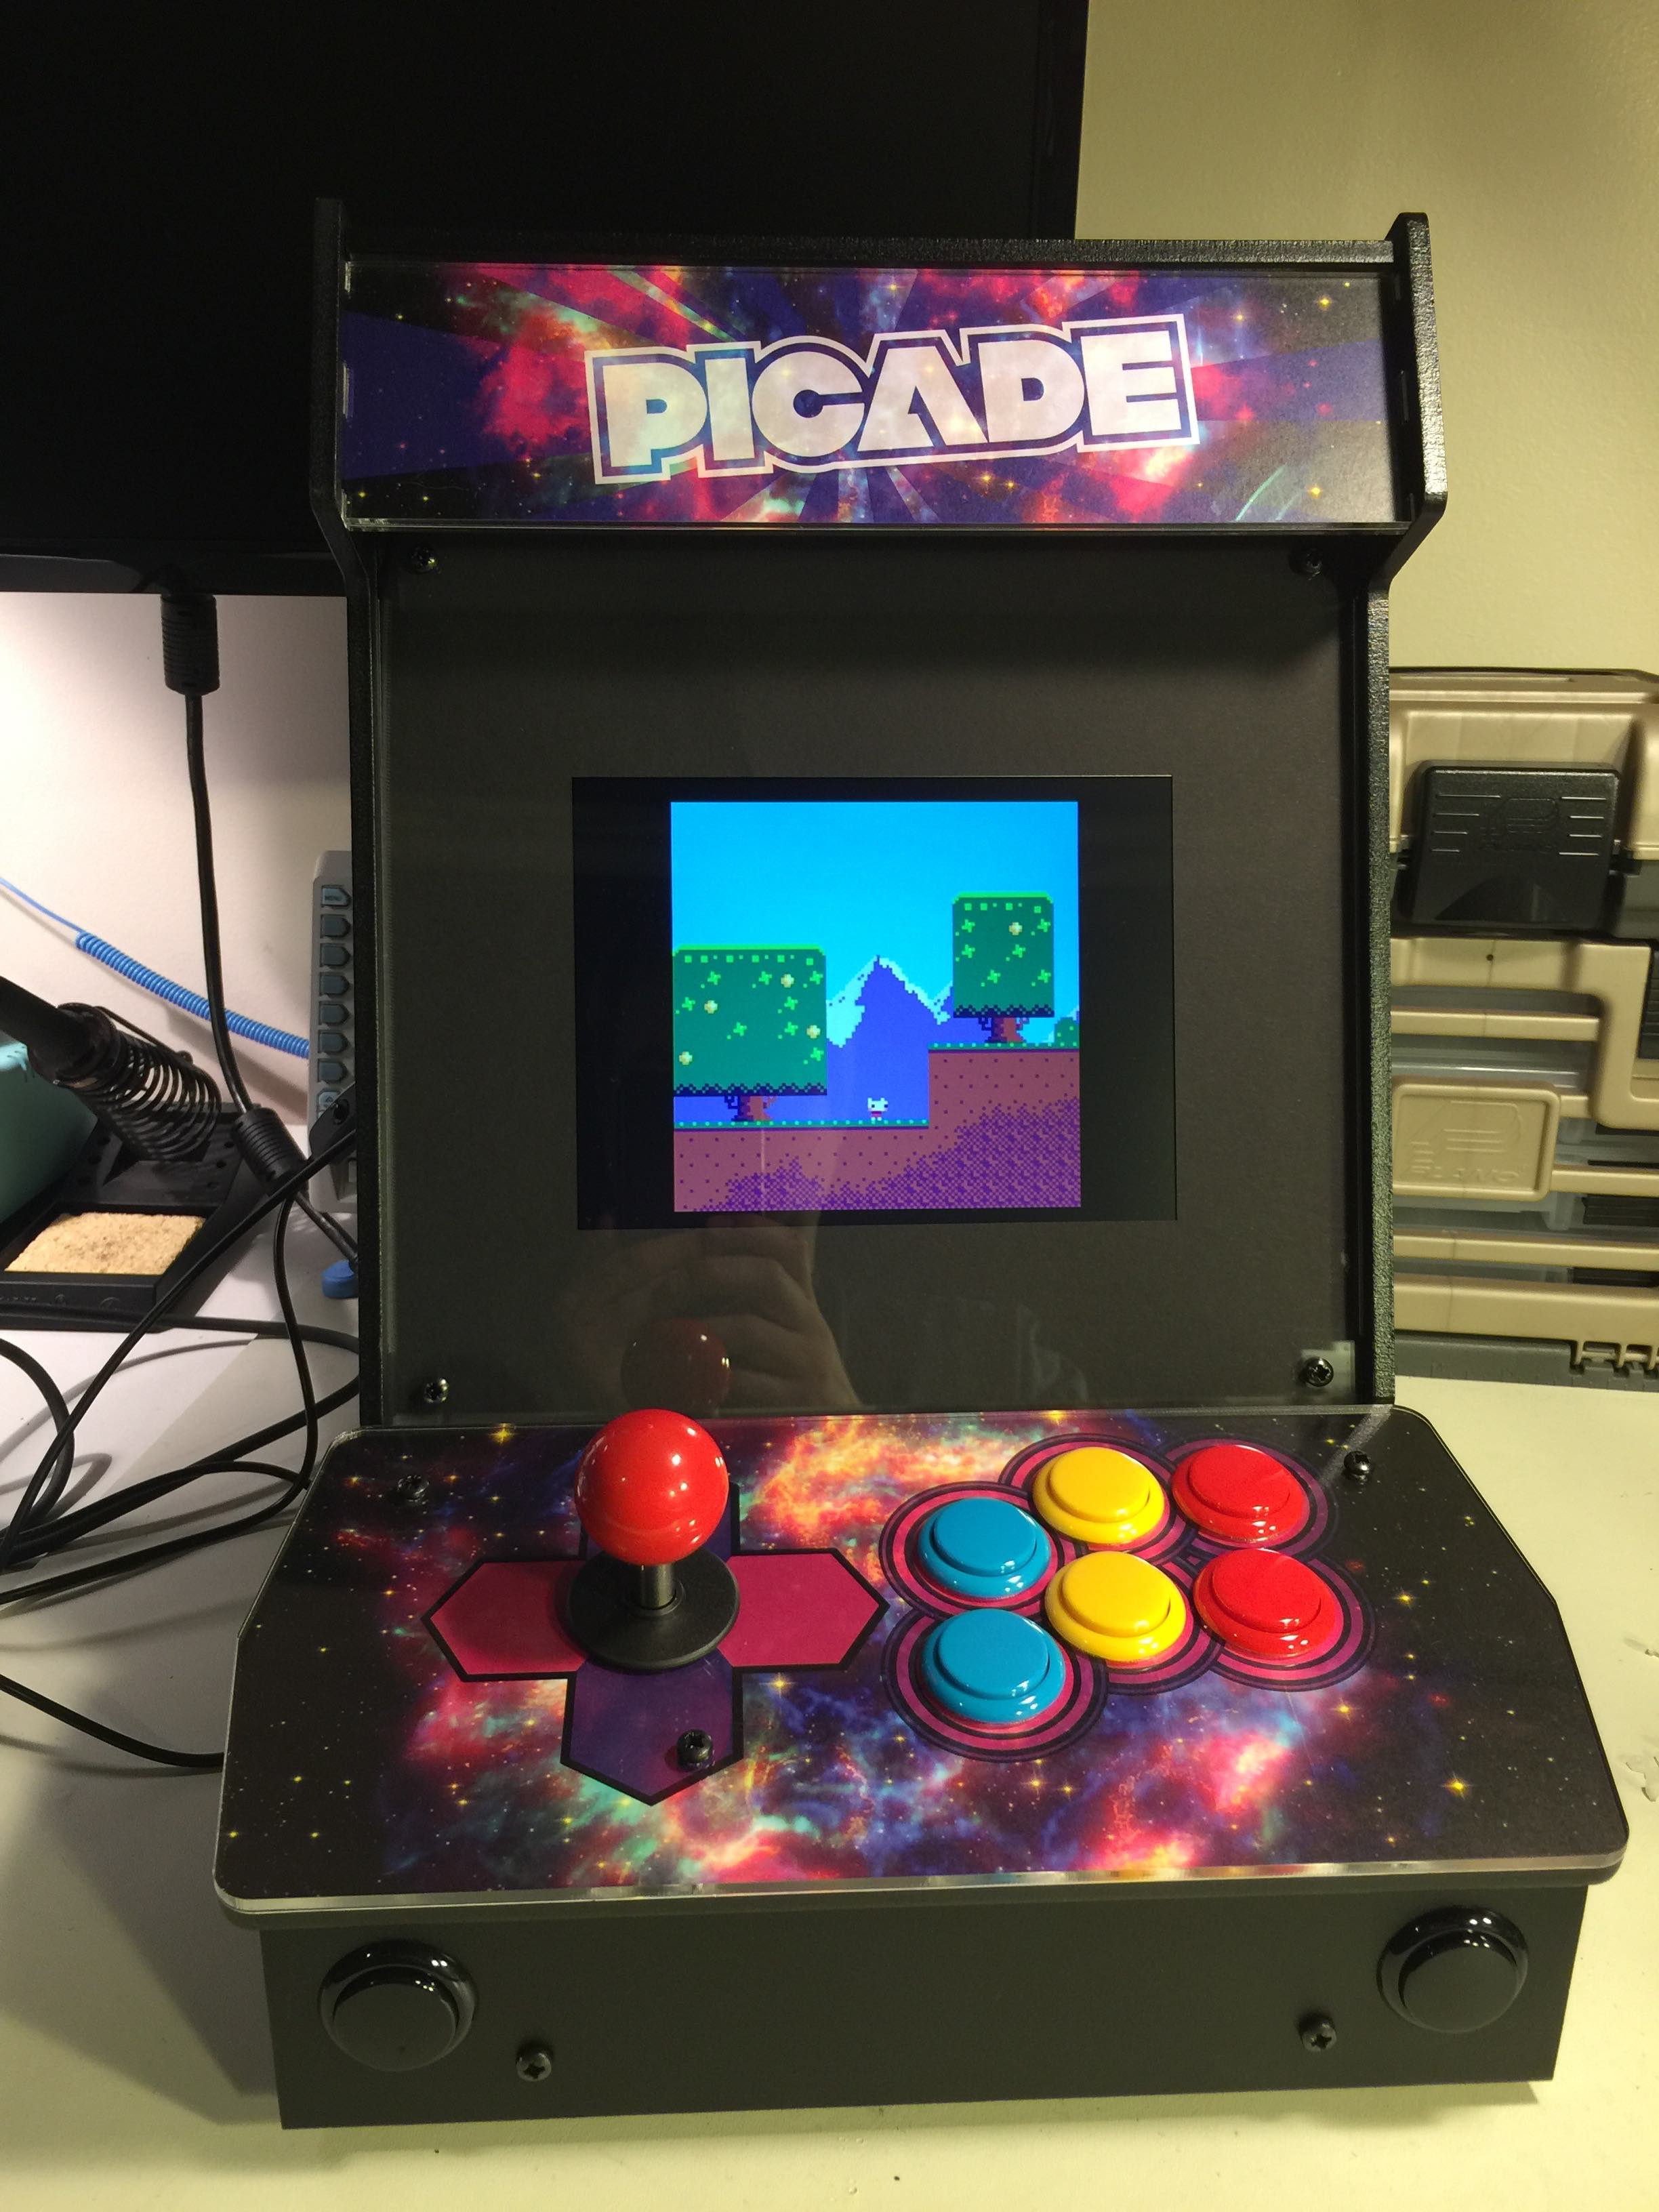
See also a short video I posted to Twitter.
The cabinet is $240 / £180, not including the Raspberry Pi and power supply. The cabinet goes together with a screwdriver (no soldering) and is fun and easy to build. (Be sure to refer to the assembly video in addition to the written instructions.) The result is solid and gorgeous.
I used a RaspPi 3 for my Picade. I strongly recommend the USB audio adapter that Adafruit sells, a major improvement in sound quality over connecting the Picade speakers directly to the RaspPi headphone jack. RaspPi 3 has built-in wireless Internet, but if you're using an older model you'll also want a RaspPi-compatible USB wifi dongle.
- Raspberry Pi 3 Model B at Adafruit
- 2.4A power supply at Adafruit
- USB audio adapter at Adafruit
- USB wifi dongle at Adafruit (for RaspPi 1/2)
RetroPie is an easy-to-use software package of the best retro-gaming projects for the Raspberry Pi. It includes emulators for many platforms (arcade and home computers) as well as media center software, and a master menu called Emulation Station that you can manipulate using just the joystick and buttons so you don't need a keyboard connected once it's all set up.
Setting up RetroPie for Picade
I won't go through the RetroPie set-up procedure in detail. There are plenty of guides on the web, including at Adafruit. What follows are a few notes from my build.
Download the RetroPie image, in my case "retropie-v3.8.1-rpi2_rpi3.img".
Format an appropriately-sized SD card, at least 8 GB. I used a 32 GB card, which takes a while to format.
Write the image to the SD card. I have a Mac laptop and I used the command line to do this, as follows:
- Determine which disk device (e.g. "disk2") is the SD card.
diskutil list |
- Unmount the SD card, substituting "disk2" with your actual device name.
diskutil unmountDisk /dev/disk2 |
- Write the image to the SD card, substituting "rdisk2" with your actual device name with a "r" in front of it ("rdisk" instead of "disk"). This command can take a while.
sudo dd bs=1m if=retropie-v3.8.1-rpi2_rpi3.img of=/dev/rdisk2 |
With the SD card still connected to the laptop, edit "/boot/config.txt" (accessible on the Mac as "/Volumes/boot/config.txt"). Uncomment this line so that Picade's screen will work correctly:
hdmi_force_hotplug=1 |
-
Unmount the SD card then remove it from your computer. Put the SD card in the Pi, hook it all up, and supply power. It should boot to Emulation Station and let you set up the button bindings. I mapped the D-pad controls to the joystick, and took a guess at the six top, two front, and two right buttons. (The two left buttons are for the speaker volume and are not seen by the Pi.) This is easy to change later.
- From Emulation Station, go into the RetroPie menu and set up wifi. You'll need a keyboard connected to the Pi to enter your wifi password.
Once wifi is set up, select "show IP" from the RetroPie menu. You can use this IP address to connect to the Pi over the wireless network, transfer files, and make config changes. To get to a remote shell from your laptop, use the "ssh" command, substituting your IP address, and enter a password of "raspberry":
To copy a file to the Pi:
scp pico-8_0.1.8_arm.zip [email protected]:~/ |
- The USB audio interface needs to be configured from the command line. Guides like Adafruit's tutorial and RetroPie's sound docs get us started. Mine came up as the CM-Headphone type.
For Pico-8, we also need to fix an issue with playback speed. The solution presented here is to configure a virtual device that converts the sampling rate, then pipes it to the actual USB audio device.
Create or edit the file "/etc/asound.conf" to contain the following:
pcm.card {
 type hw card 1
}
pcm.!default {
 type plug;
 slave {
  pcm card;
  rate 48000;
 }
}
ctl.!default {
 type hw card 1
}
|
Reboot the Pi:
sudo shutdown -r now |
The Emulation Station menu plays sounds, and RetroPie comes with Doom pre-installed (see the Ports system menu). Test the audio. Use the volume buttons on the left of the cabinet to adjust as needed; it may start out too quiet to hear.
PICO-8 on the Picade
You can run the Raspberry Pi version of PICO-8 with this set-up. Copy PICO-8 to the Pi and unpack it into the ~/pico-8 directory:
# (starting from your computer:) scp pico-8_0.1.8_arm.zip [email protected]:~/ ssh [email protected] # (now on the RaspPi:) unzip pico-8_0.1.8_arm.zip |
On the Picade with a keyboard connected, exit Emulation Station (Menu button, Quit, Quit Emulation Station) to get a shell prompt, then run the pico8 command:
~/pico-8/pico8 -splore |
Controls, fullscreen graphics, sound, and Splore over the Internet should all just work.
Launching PICO-8 from Emulation Station
Of course, it'd be better if you didn't need the command line and a keyboard to start up PICO-8, especially since Splore lets you download and play PICO-8 games using just the joystick and buttons. I wanted the ability to launch PICO-8 from Emulation Station, as in this video. It turns out this wasn't too difficult, but it involves a few steps.
I made two versions of the PICO-8 logo, one with light text and one with dark text, based on the one I made for the PICO-8 wiki (which in turn is heavily based on the official logos). You can get these here:
On the Pi, create a new pico8 theme directory for Emulation Station:
cd /etc/emulationstation sudo mkdir themes/carbon/pico8 |
Copy the logo files to the Pi and move them to this directory. (You will need to use "sudo mv ..." to move the files into place.)
You also need to create a "theme.xml" file in this directory. Copy the one from .../themes/carbon/amiga/theme.xml, then edit it (such as with the "nano" editor):
sudo cp themes/carbon/amiga/theme.xml themes/carbon/pico8/theme.xml sudo nano -w themes/carbon/pico8/theme.xml |
Make these changes:
-
Replace all instances of "./art/controller.svg" with "./../amiga/art/controller.svg".
- Change the logo for the main system screen, using the dark text version:
<view name="system">
  ...
  <image name="logo">
    <path>./p8logo_dark.png</path>
  </image>
</view>
|
- Change the logo for the system detail screen, using the light text version:
<view name="basic, detailed">
  ...
  <image name="logo">
    <path>./p8logo.png</path>
    ...
  </image>
  ...
</view>
|
Now you need to add pico8 to the list of systems. Edit the system config file:
sudo nano -w /etc/emulationstation/es_systems.cfg |
Inside <systemList>...</systemList>, add these lines:
  <system>
    <name>pico8</name>
    <fullname>PICO-8</fullname>
    <path>/home/pi/pico-8</path>
    <extension>.sh .SH</extension>
    <command>/opt/retropie/supplementary/runcommand/runcommand.sh 0 "/home/pi/pico-8/pico8 -splore"</command>
    <platform>pico8</platform>
    <theme>pico8</theme>
  </system>
|
Emulation Station expects to find a directory of game files under <path> whose names have an extension specified by <extension>, so it can list them all in its menu and launch them individually. If you really want to use this feature with PICO-8 carts (and not use Splore), you could use <extension>.p8 .p8.png</extension>, <command>/opt/retropie/supplementary/runcommand/runcommand.sh 0 "/home/pi/pico-8/pico8 %ROM%"</command>, and an appropriate <path>. Every cart you put in your cart directory will appear as a menu option in Emulation Station.
For my configuration, I just wanted Emulation Station to launch PICO-8 in Splore mode. My configuration says to look for ".sh" files in the "/home/pi/pico-8" directory and create a menu entry for each one it finds. Emulation Station will not show the system in the main menu unless there is at least one such file. I created an empty file called "/home/pi/pico-8/+Start PICO-8.sh". When I select this option from the Emulation Station menu, it runs <command>, which in this case ignores the selected menu option and just starts PICO-8 with Splore.
Another way to do this is to make "/home/pi/pico-8/+Start PICO-8.sh" a real script that starts PICO-8, like this:
#!/bin/bash pushd "/home/pi/pico-8" ./pico8 -splore popd |
Don't forget to make the script executable:
chmod a+x "+Start PICO-8.sh" |
Change the command to <command>/opt/retropie/supplementary/runcommand/runcommand.sh 0 %ROM%</command>. This runs the script itself as the command when the menu option is selected. Doing it this way lets you add more items to the PICO-8 Emulation Station menu simply by adding more scripts to /home/pi/pico-8, such as to have multiple configurations (such as a non-Splore gamedev mode) or jump straight to your favorite carts.
Reboot ("sudo shutdown -r now") and you should now have PICO-8 in your list of systems. Select the PICO-8 system, then select the "+Start PICO-8" option. PICO-8 starts in Splore mode, and you can browse the BBS, play games, and add them to your favorites all using Picade controls. You only need a keyboard connected if you want to do text searches in Splore, or if you want the ability to exit to the PICO-8 command prompt or code editor.
I'm happy to announce the relaunch of the Pico-8 wiki!
I've spent the last few weekends writing articles and reference material for Pico-8, including complete API and command references, a memory map (including format details), a summary of the Lua subset, and tutorials on several subjects. This is very much a rough draft and I still have a list of to-dos, missing articles, more thorough sample code with screenshots, and some stuff I want to reorganize.
But it's a wiki, so you can help! Corrections are welcome at this stage. If you want to discuss a change before making it, hit me up on Slack or use Wikia's messaging feature or just reply here. But don't be shy about changing things directly.
Let me know what you think!
--
Two possible points of controversy I'll mention up front:
-
I tweaked the theme colors so they're reasonably readable, matching the forum site. I'm still a bit concerned that the Pico-8 red is unsuitable for link and header text. One of my monitors apparently doesn't support sub-pixel rendering or something and blurs it all to hell, but I'm not sure how big a problem that is. I tried a bunch of options and all the others seemed to drop the Pico-8 feel of the site. Suggestions welcome.
- The cos, sin, and atan2 articles currently use a different convention to explain the y-inversion than the official docs do. A quick survey of the Slack group led me to try and explain it as inverting the angle direction and not the sign of sin(). This works until you get to atan2, which requires inverting the dy argument to fit that model. So the choices are counterclockwise with inverted sin() result, or clockwise with inverted atan2() dy argument. Inverting a result seems less problematic than inverting an argument, so I'll probably change it back. (I already have the diagram drawn.) Feedback welcome here as well.
Thanks!
-- Dan
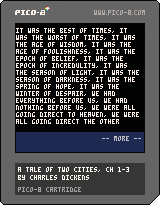
Here's a simple ebook reader with the first three chapters of A Tale of Two Cities. Press X to advance (once per paragraph / page).
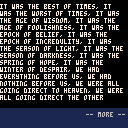
This is a tech demo of some tools I've been working on for developing text-based games. It'd be more impressive if it were an actual game, but this victory was hard won so I'm posting it. :)
Notes:
-
Text is stored in cart data, not as string literals in the code.
-
The original source file does have the text as string literals in code. I use a post-processor to extract the string literals, pack them into text data stored in the cart, then replace them with string IDs. I use a custom syntax to flag which strings ought to be extracted so I can still use regular string literals elsewhere. The processing tool lets me adjust the location of the text in memory, so I can set aside space for sprites, sfx, etc. by limiting the size of the text data region.
-
Text is compressed using LZW with variable-width codes. The processor has a compressor written in Python, and it appends a decoder written in Lua to the cart code. This Tale of Two Cites excerpt is 25,613 bytes, and compresses to 12,457 bytes for storage in the cart data, 48% of its original size.
-
My LZW implementation is designed to allow random access to strings during program execution. LZW is a dictionary-based compression algorithm, and all strings share the same dictionary for efficient packing. The entire corpus is not decompressed all at once into Lua memory. Instead, the lookup dictionary is calculated from the bit stream and retained in Lua memory so that strings can be decoded on the fly as they are accessed. In the cart data, I use a simple binary layout that gives each string a header with information that helps track the code bit width during decompression, and byte-aligns each string's first and last characters.
-
This Tale of Two Cities demo gets close to the Lua memory limit with its dictionary. I maximized the size of the dictionary (7,903 entries) to minimize the size of the compressed data. In practice, I'll probably cap the dictionary size to 4,096 entries, which for this text gains a few kilobytes in cart data. But headroom in Lua RAM will be important for real games.
-
The slow scroll of the text in this reader app is artificial, originally intended for use in a text game. Decompression is quite fast after the initial dictionary is built. I have limited interest in making a usable ebook reader cart, but you're welcome to try it. This implementation uses only 292 tokens and 5017 chars, and that could probably be tightened up a bit.
- This excerpt is 4,634 words. For comparison, Zork I is 14,214 words. Considering Zork had the luxury of paging from a 160k floppy disk and this is packed into a 16k region of cart data, that's not too shabby. :)
I don't know yet if this will actually be useful for a game project, but it was fun to make. The complete code is not ready for public consumption, but here's the Github link anyway: https://github.com/dansanderson/p8advent It's based on and requires picotool.
Happy reading!
-- Dan
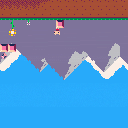
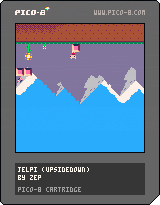
I wrote a new tool that turns carts upside down.
% ./p8upsidedown jelpi.p8.png |
The tool is built with the picotool library (discussion). This version of the tool inverts the sprites, inverts the map, and translates the code to use inverted coordinates for drawing functions.
This is meant as a hack/demo and is known not to work with every cart. It works with many carts, and some of the failures are interesting. Notably:
-
The code translation increases the token count, so large carts (Celeste, Dusk Child) can't be turned upside down.
-
This version doesn't support spr/sspr calls that draw a rectangle of tiles. This wouldn't be too difficult to support: it'd need to flip the entire spritesheet not just individual sprites, translate the sprite IDs in the map, and extend the code to rewrite sprite ID args. But I have other things to do this weekend. :)
-
The print function will always print left to right, so we compromise and merely relocate the y coordinate for print / cursor calls. There's nothing the tool can do with carts that call multiple coordinate-less prints.
- I wrote this to exercise and demonstrate the picotool libraries for mutating Lua code via the AST. The lib doesn't know how to write out an arbitrary AST and preserve other comments/spaces, so p8upsidedown generates hideous code. Unfortunately the luafmt writer isn't entirely up to snuff either so it's not much help. This is mostly not an issue to Pico-8, though I did find a bug where Pico-8's special "t += val" syntax rejects a newline between the "+=" and the "val", which p8upsidedown might accidentally introduce.
Anyway, a fun weekend hack with picotool. Enjoy!
-- Dan
I'm pleased to announce picotool, a set of tools and Python libraries for manipulating Pico-8 game files. picotool can read .p8.png and .p8 files, and can write .p8 files.
To get picotool and learn how to use it, visit the picotool Github repo.
The p8tool command is a multi-tool with multiple functions. You can run it like this:
% p8tool stats helloworld.p8.png hello world (helloworld.p8.png) by zep version: 0 lines: 48 chars: 419 tokens: 134 |
picotool currently includes the following tools:
- build: builds a cart from pieces of other carts
- stats: a statistics reporting tool
- listlua: prints the Lua region of a cart
- writep8: converts a .p8.png cart to a .p8 cart
- luafmt: writes a new .p8 cart with Lua rewritten with regular formatting, to make it easier to read
- luamin: writes a new .p8 cart with Lua rewritten to use a minimal number of characters, to make it difficult to read
- luafind: searches for lines of Lua code containing a string or matching a pattern
- listtokens: prints a visualization of Lua tokens
- printast: prints a visualization of the Lua parser abstract syntax tree (AST)
The Python library includes a hand-written Lua parser with support for Pico-8 features, with API access to the token stream and abstract syntax tree. Additional modules provide access to the graphics, map, sound, and music data. All game data can be transformed or created with Python code and written to a .p8 or .p8.png cart file.
I've included the Lua minifier (luamin) as an example tool, though I don't actually think it's a good idea to use it. Statistically, you'll run out of tokens before you run out of characters. The Pico-8 community benefits more from published carts with code that is easy to read and well commented. All luamin does is make the code difficult to read, without much benefit.
Here is a chart of the character count, minified character count, and token count of 496 carts that have been posted to the BBS, relative to the Pico-8 maximums:
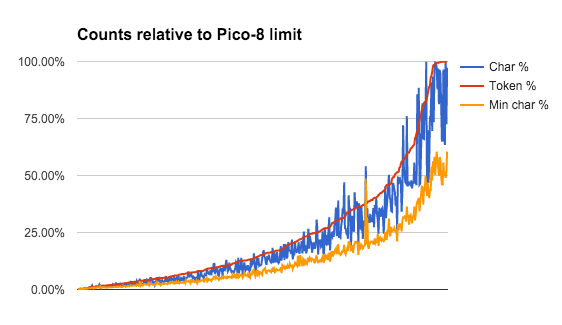
As shown, even un-minified code tends to stay below the token count, percentage-wise. Minifying reduces the (uncompressed) character count to 65% of the original size on average.
The inspirational use case for this library is actually luafmt, which re-formats the Lua code of a cart to be easier to read. The current version of this tool is simple and only adjusts indentation. There is much more luafmt can do by analyzing the AST, but this is not yet implemented.
As of today, this is very much a v0.1 early release. There are known issues regarding parsing and token counting, and the library APIs are incomplete and messy. This project has already gotten away from me a bit, so I'm not sure how far I'll take it. But if you do want to build against it, patience with non-backwards compatible changes will be appreciated. :)
Let me know what you think! Thanks!
Update 2015-10-29: Added luafind tool. Refactored AST walking code to make it easier to build tools that read or transform the parser tree.
Update 2016-10-17: Added build tool. Added support for updating and creating .p8.png cartridge files.
I don't think anything ought to change, but I thought this was interesting. Pico-8 allows this:
x = 1
if (x == 1) do
  print('a')
end
if (x == 2) do
  print('b')
end
|
Notice that this is not "if-then-end" but "if-do-end". This appears to be supported accidentally due to the "if (...) ..." shortcut, described in the manual as:
IF THEN END statements on a single line can be expressed without the THEN & END IF (NOT B) I=1 J=2 -- is equivalent to: IF (NOT B) THEN I=1 J=2 END -- note that the condition must be surrounded by brackets. |
The intent is for "if (cond) exp..." to parse expressions to the end of the line. However, if the last expression is a do-end block, the block is allowed to span multiple lines. Of course, this requires that the condition be in parentheses.
I found 7 carts posted to the BBS that use "if-do-end" across multiple lines. Pico-8 does what's intended, so it's hard to call it a mistake.
Unrelated: "if (cond) block else block" is undocumented but supported. "if (cond) block elseif (code) block else block" is not supported. The else's block is optional (though pointless to omit): "if (cond) block else" I found 13 carts using the else form of short-if.
As of version 1.2, PICO-8 includes a command useful for debugging: printh("string") This command prints a string to the host operating system's console. You can put printh() calls in your code to examine events or state without cluttering the game screen with debugging information.
So how do you see the host operating system's console?
In Linux, you probably already run the "pico8" command from a terminal window. If you don't, locate where you put the "pico-8" directory, then run the pico8 command from a terminal window using its full path. For example:
~/pico-8/pico8 |
In Mac OS X, instead of double-clicking the PICO-8 icon, open Terminal, then start PICO-8 with the following command, adjusting the path to match where you put the app. For example:
/Applications/PICO-8.app/Contents/MacOS/pico8 |
In Windows, instead of double-clicking the PICO-8 icon, open Command Prompt, then start PICO-8 with the following command:
"\Program Files (x86)\PICO-8\pico8.exe" |
Note that with the Windows version, the prompt appears immediately (the process is forked). PICO-8 output will appear in this window anyway.
Try it out! With PICO-8 running from the console, type this at the PICO-8 prompt:
printh("hello")
|
The message appears in the console window (not the PICO-8 window).
(Updated for 1.5.)
View Older Posts